How to setup brands
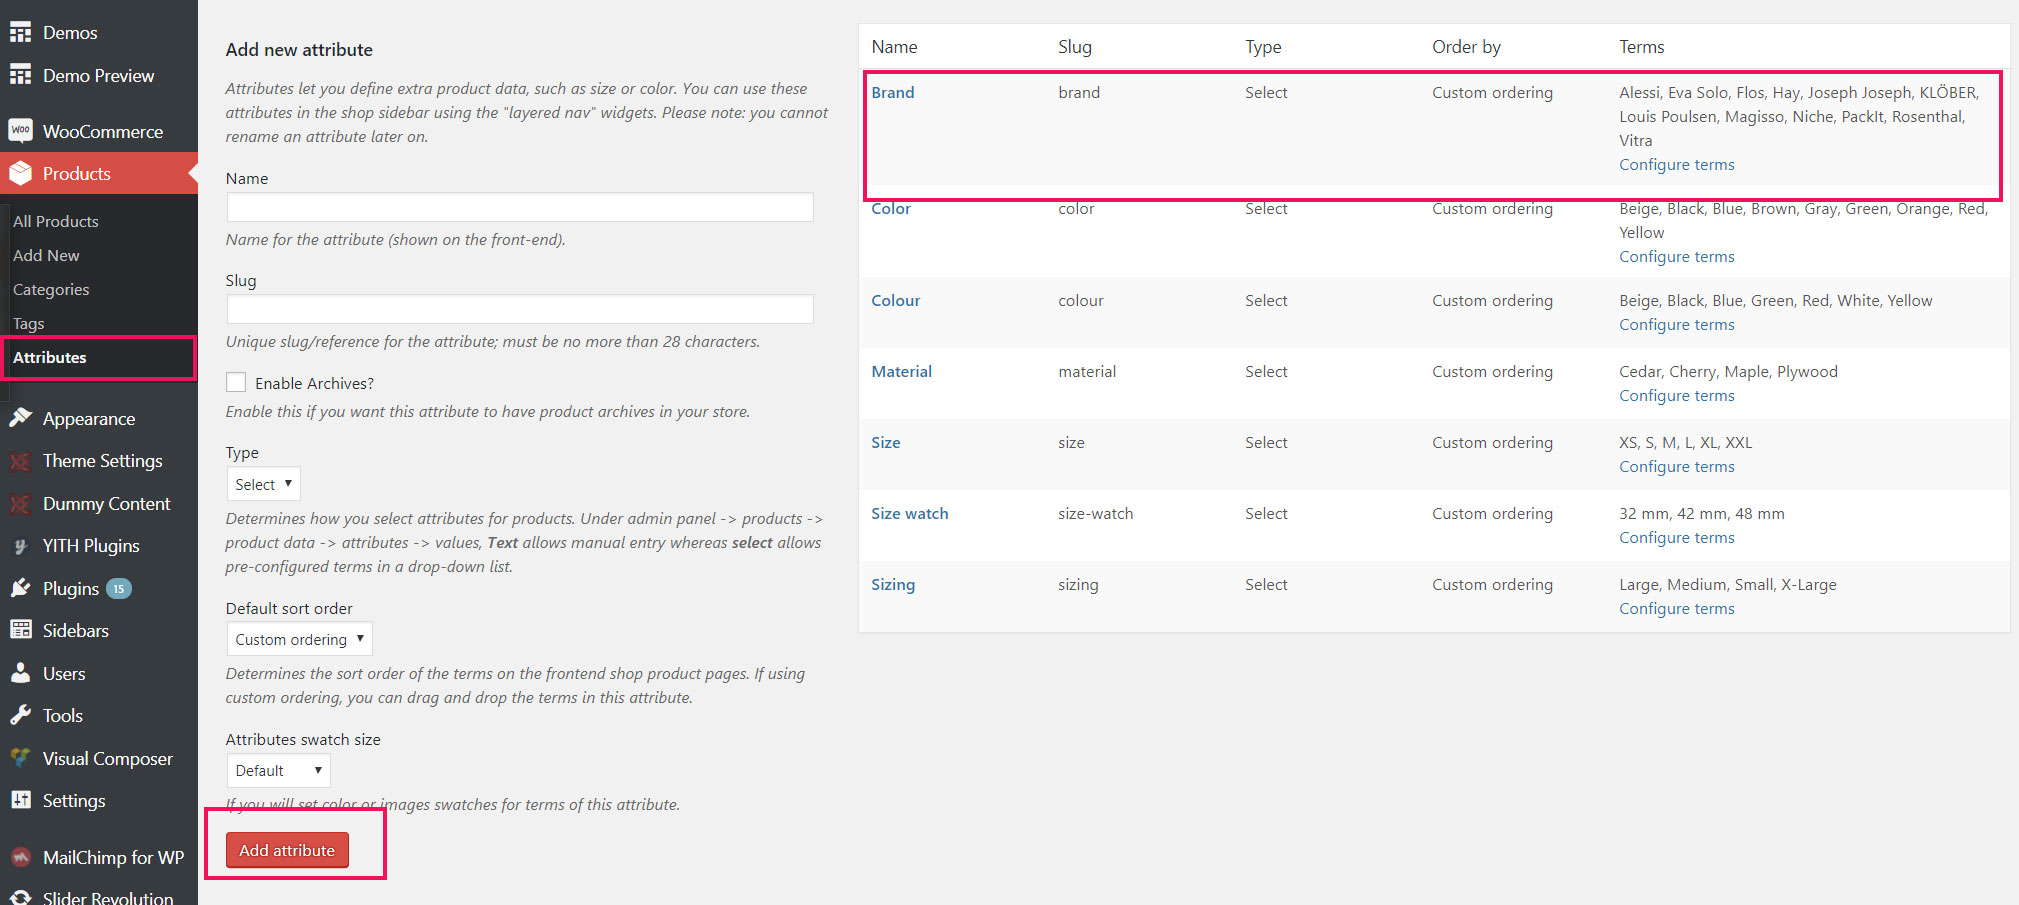
Our theme allows you to create brands and attach them to products in your store. In general, brands are simple product attributes as well as size, color or any other. You can create them in Dashboard -> Products -> Attributes -> Brand -> Configure terms. If you missed our dummy content import the Brand attribute may not be created yet. In this situation, you just need to create it manually in the same section filling the form and click “Add attribute”.

After creating a new attribute, you need to be sure that you have set it as a Brand attribute in Theme Settings -> Shop -> Brands. There, you can also find a few useful options like a position of the brand logo on the single product page or turn on/off brand description tab.

When you add new brands, you can upload an image for that and add a description that will be shown on the product added to this brand under “About brand” tab.

Adding brands to the product is similar to adding any other attributes. Find more information here https://docs.woocommerce.com/document/managing-product-taxonomies/#section-6
If you want to create brands filters, you can use our BASEL WooCommerce Layered Nav widget in Appearance -> Widgets. There, you just need to add it to the filters area or to the shop page sidebar and choose your brands attribute.
 Last updated: February 7, 2022