
WordPress blog
WordPress performance optimization: a step-by-step WoodMart guide

There’s no universal fix for a slow WordPress site. Speed depends on your hosting, your content, and how each page is built, so the same setting that rescues one store does nothing on another. That’s why copy-paste “speed up WordPress” checklists rarely work.
So we went the other way. We optimized one real WoodMart store from scratch and wrote down every change and the reason behind it. Once you understand what each step does, you can repeat the process on almost any site.
The example here is a WoodMart store, but the principles apply to any WordPress or WooCommerce site.
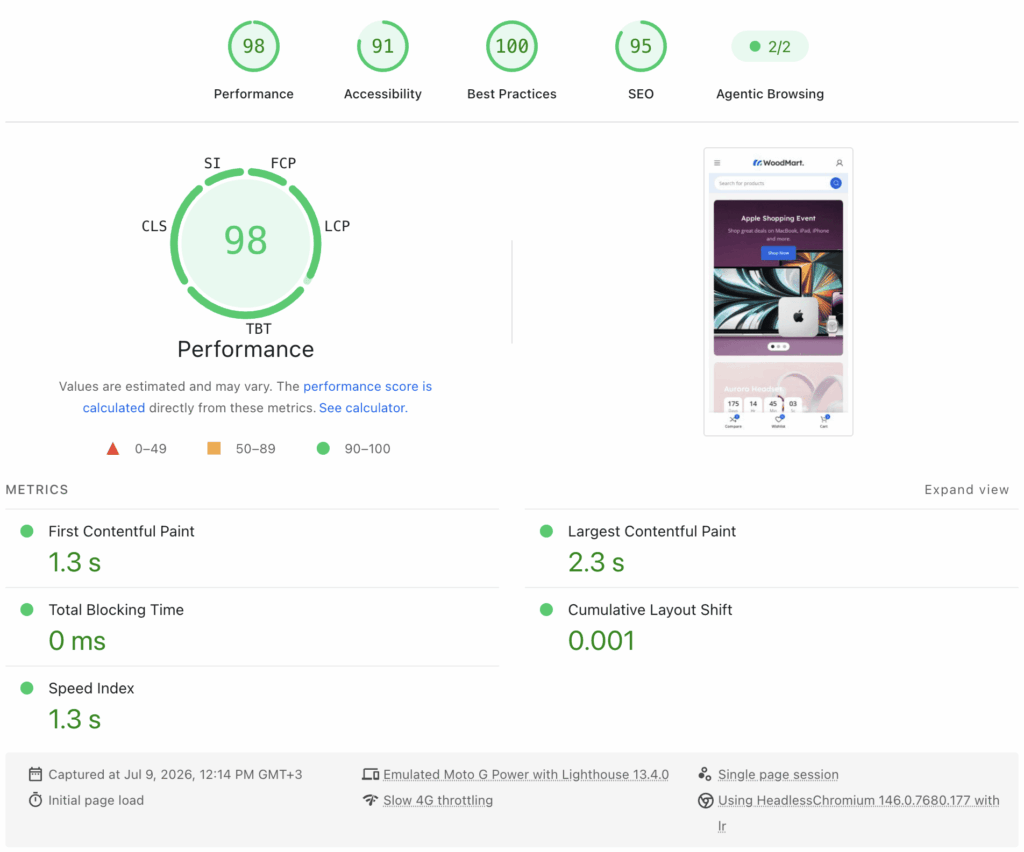
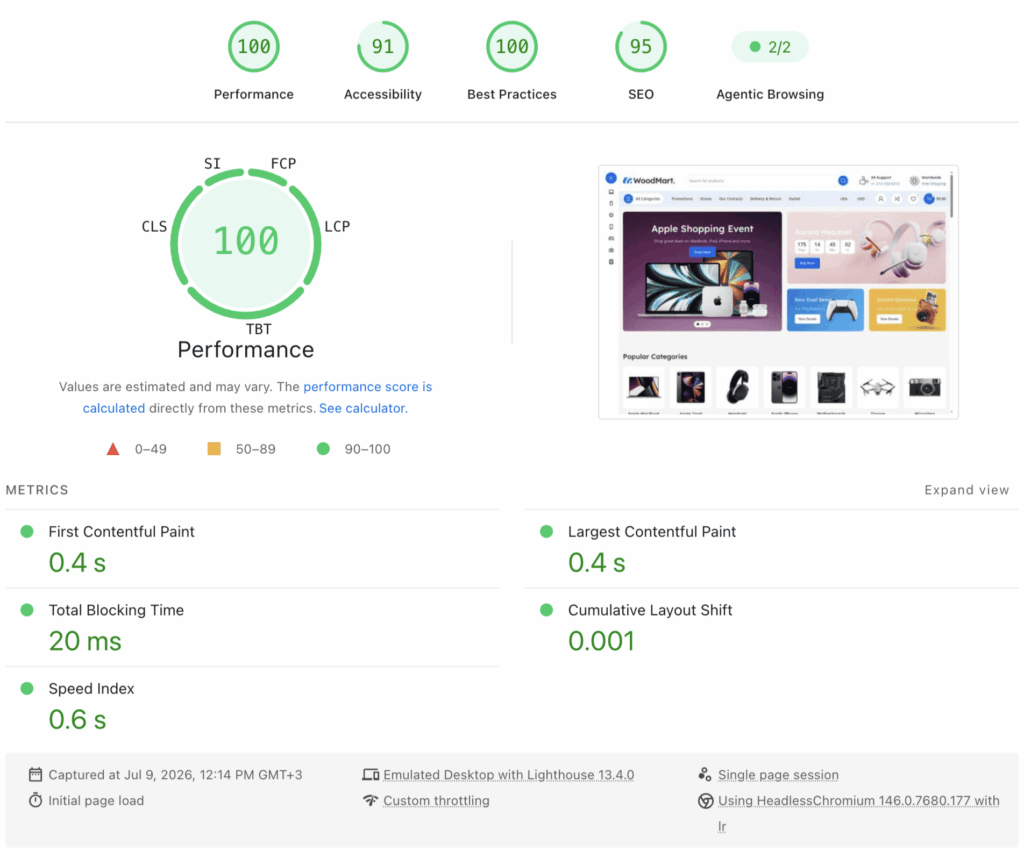
The test case. To prove the point on a hard example, we ordered the cheapest Premium plan from Hostinger and installed WoodMart with the full Mega Electronics prebuilt, one of our heaviest demos, packed with sliders, products, and images. If a large prebuilt on budget shared hosting can hit 90+ on Google PageSpeed for both mobile and desktop, a leaner store on decent hosting will get there easily. After the steps below, that is exactly the score we reached.
What we’ve already optimized in WoodMart
A lot of the work is already done in the theme. Over its development we’ve reduced the CSS and JS shipped on each page, made deferred CSS the default, added an option to inline small CSS files (converting <link> to <style> to save requests), added local Google Fonts hosting, built automatic LCP image detection with a tool to preload it, and added mobile-specific DOM optimization.
A fresh WoodMart install is already tuned for good performance. The steps below are about matching the remaining settings to your content and removing what you don’t use.
Here’s the whole process, in order:
- Install the theme and add real content (Step 1)
- Check server response time and hosting (Step 2)
- Configure WoodMart’s performance settings (Step 3)
- Optimize your images (Step 4)
- Add a caching plugin (Step 5)
- Set up a CDN (Step 6)
After that, a troubleshooting section covers the PageSpeed warnings you’re most likely to see.
Step 1. Install the theme and fill it with your own content
When you install WoodMart, you’ll usually import one of our prebuilt demos. A demo is a showcase: it’s deliberately loaded with extra images, pages, posts, and products so you can see every feature and layout in action. That’s exactly what you want while exploring the theme, but it’s not the site you’ll launch. You’ll replace that content with your own, so there’s no point measuring speed yet. Benchmark performance only after the demo data is gone, otherwise you’re testing pages you’re about to delete.
Go through every section of the site and replace the demo data with your real images, products, posts, and pages. Once the site holds your actual content, it’s worth measuring. Before you start uploading, a few things to get right up front:
- Check that your site has a valid SSL certificate. This is the baseline for both performance and security. If you don’t have one yet, ask your hosting provider, since most offer free certificates.
- Optimize every image before uploading, and use the right dimensions. More on this in Step 4.
- Don’t build bloated pages. Every slider, animation, carousel, and product block adds to the page’s complexity and DOM size, and that turns into performance problems later. Keep pages as simple as the design allows.
Step 2. Check server response time
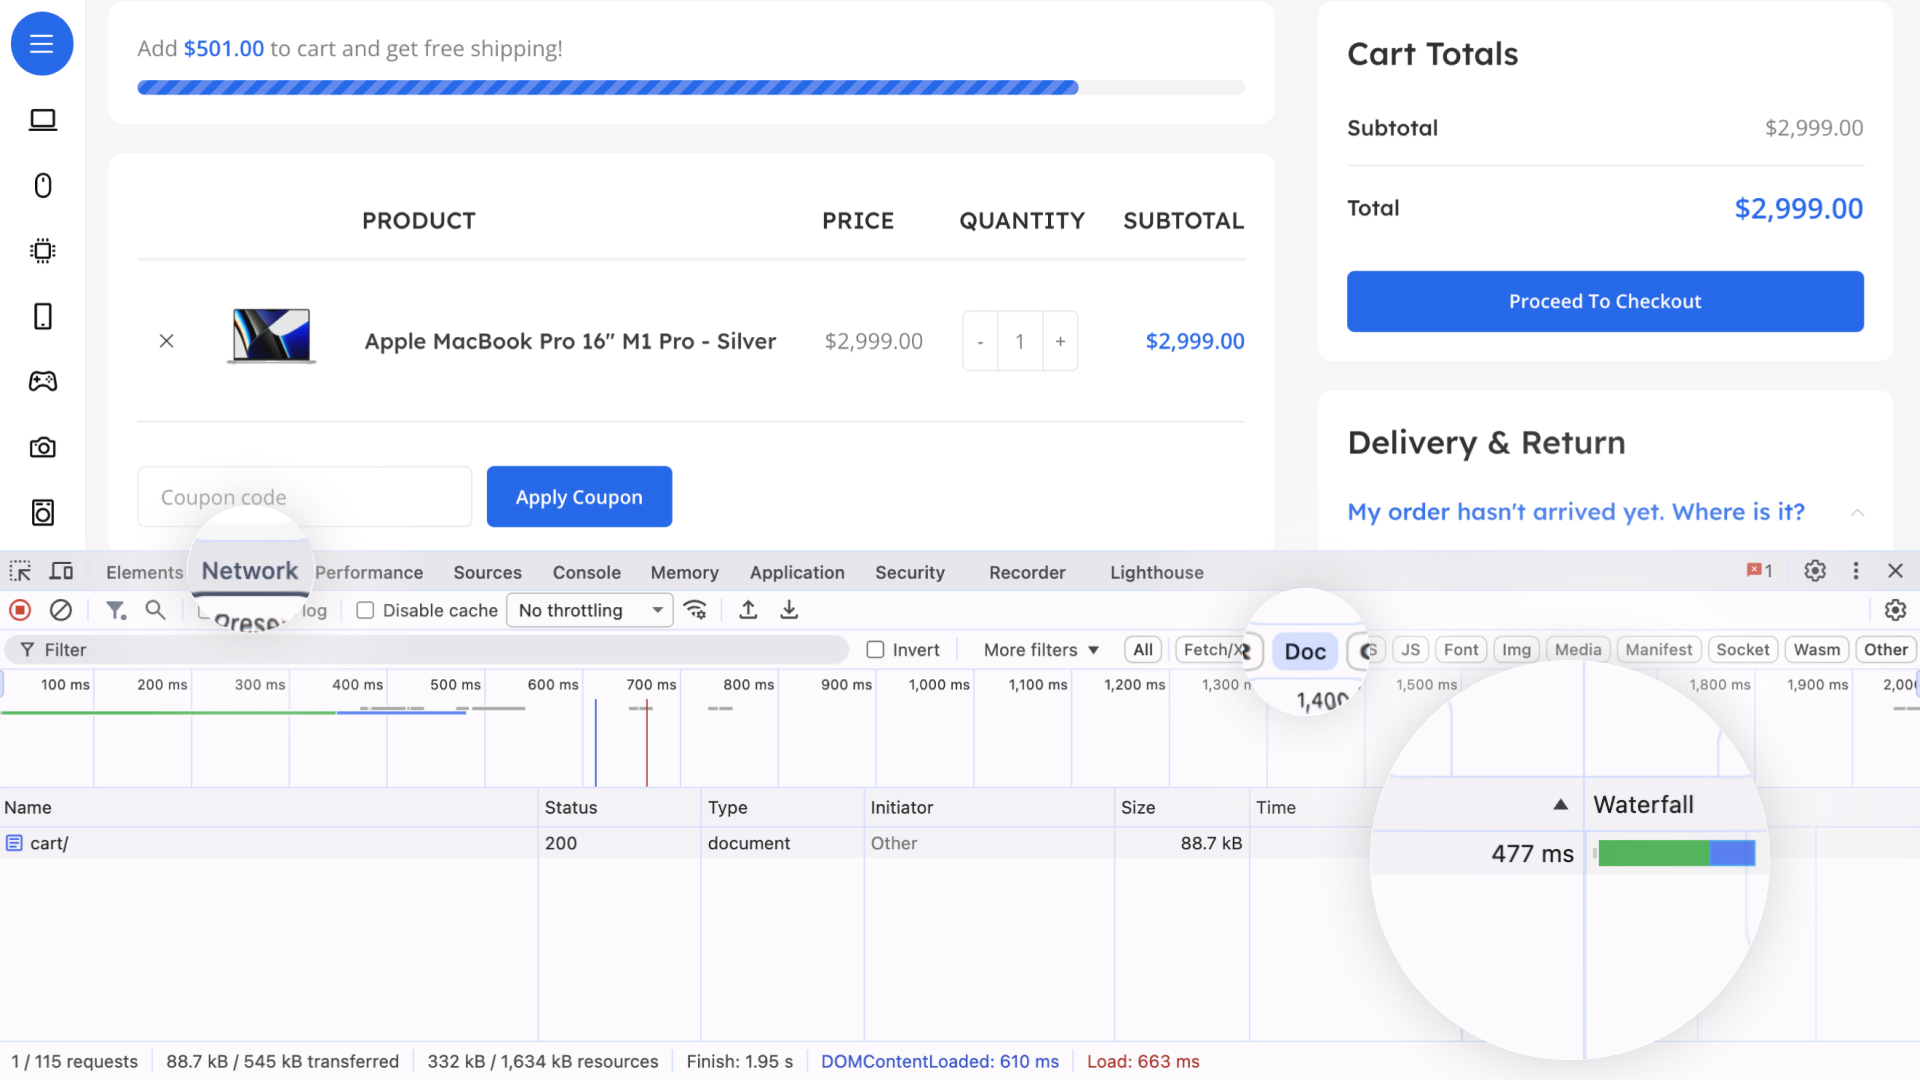
A fast, reliable host is the foundation, so measure your server response time early. On a clean install with no plugins it shouldn’t exceed roughly 0.5-1.2 seconds, even before a caching plugin. How to measure it correctly:
- Response time varies page to page. We test on the cart page, because it has no extra elements and caching plugins don’t cache it, so you see the raw server response.
- Use WebPageTest. Your server response time is the first request in the waterfall (Time to First Byte).
- Or use Chrome DevTools. Right-click anywhere on the page → Inspect (Ctrl+Shift+I) → Network tab → reload → filter by Doc, and read the timing on the document request.
Also enable GZIP (or Brotli) compression on the server to shrink the size of transferred resources. Many hosts turn it on by default; if yours doesn’t, ask your provider. Verify it with the GZIP test.
Step 3. Configure the theme’s performance settings
WoodMart ships tuned for good performance with most features supported out of the box. But if you don’t use a given feature, turning it off gets you an even better score. Here are the settings worth reviewing right after install. All of them live under Theme Settings → Performance.
Every one of these can meaningfully cut page size, but always re-test after toggling anything, because the right choice depends on your content.
CSS
- Disable default Gutenberg block styles (
Performance → CSS). This strips the CSS that ships with WordPress’s default Gutenberg blocks. WoodMart has its own Gutenberg blocks, which we recommend using, so enable this whatever builder you work in. It stays safe even if you mix builders (say Elementor plus Gutenberg): it only removes the default block styles, never your builder’s. - Inline styles size limit (
Performance → CSS). Set it between 40 KB and 80 KB. Small CSS files get inlined as<style>tags instead of separate requests. More on this option here.
JS
- Remove jQuery Migrate (
Performance → JS). If your plugins are modern and actively maintained (written in vanilla JS or current jQuery), you don’t need this compatibility script. Removing it drops a request and eliminates one render-blocking script, which helps FCP and LCP. If an older plugin breaks, turn it back on.
Fonts and icons
- Load Google Fonts locally (
Performance → Fonts & Icons). Serves fonts from your own domain instead of Google’s servers, which removes extra DNS lookups and improves LCP. This is one of the highest-value toggles for Core Web Vitals. font-displayfor text fonts. Set it to Swap so text renders immediately in a fallback font while the web font loads. Full explanation of the values.font-displayfor icon fonts. Pick based on your header:- Swap keeps the icon font off the render-blocking path, but you’ll see a brief FOUT (flash of unstyled text) on the first load, before the browser caches the font. If that flash bothers you, swap the header icons for your own SVGs.
- Fallback, together with Preload key request for woodmart-font.woff2, renders the icons correctly from the first paint. Use it when the FOUT flash is a problem or the icons must look right immediately.
Images and LCP
- Preload LCP image (
Performance → LCP). Your LCP element is almost always the largest above-the-fold image. Since WordPress 6.3, WordPress scans the first three images on the page, guesses the largest, and addsfetchpriority="high"so the browser fetches it first. Two things break that: the real LCP image isn’t always among those first three, and a background image can’t take thefetchpriorityattribute at all. On our prebuilt the LCP image sits on a slider as a background, so WordPress can’t prioritize it and the score suffers. WoodMart’s Preload LCP Image tool fixes exactly this case. Better still, add the LCP image through the Image option instead of a background (see the next point). How to use this option. - Add slider and banner images via the Image option, not as a background image. A background image loads with no priority, and mobile downloads the same full-size file as desktop. The Image option enables priority hints, native lazy loading, and
srcset, so phones download a smaller version. For your LCP image specifically, always use the Image option, and make sure it is not lazy-loaded. (This is the same reason we come back to in Step 4.) - Lazy loading (
Performance). We don’t always enable this. WoodMart fully supports native WordPress lazy loading, which is usually enough. Turn it on only if you need finer control, and never lazy-load the LCP image.
DOM and other
- Mobile DOM optimization (
Performance → Other). Strips resources that aren’t used on the current device. Important caveat: your caching plugin must serve separate cache for mobile and desktop, or you’ll serve the wrong markup. Some plugins do this by default; in others you must enable it. - Initialize carousel on scroll. For any carousel below the first screen, this defers its script until the user scrolls to it, cutting initial JS execution time. Review every carousel on the page. Don’t enable it for carousels in the first screen, since that only delays a script you need immediately.
- AJAX dropdowns. For dropdown menus that contain HTML blocks (Appearance → Menus), load their content via AJAX. This shrinks the initial DOM and speeds up the first load. It matters most if you run a mega menu with a lot of elements packed into the dropdowns; on small menus the gain is negligible.
- Load Contact Form 7 JS only where needed (
Performance → Plugins). Contact Form 7 loads its scripts on every page by default. On our prebuilt the form is only on the Contact page, so we disable it globally and use presets to load it on that page alone.
Step 4. Optimize images
Large, unoptimized, or wrongly sized images are the most common reason pages load slowly. Images are usually the single largest part of a page’s total weight, so getting them right moves every Core Web Vitals metric at once.
Weight targets. Image weight mostly follows pixel dimensions. As a rough guide, no image should exceed 100-200 KB. Product and post thumbnails should land around 50-100 KB. Only large hero and slider images should reach 150-200 KB on desktop, or 30-70 KB on mobile.
Compress before uploading. Run images through a service like TinyPNG before they go into the media library. If you’d rather automate it, install an optimizer plugin. We recommend our own Image Optimizer, which also generates WebP versions that cut image weight further. WoodMart supports WebP, so enable it.
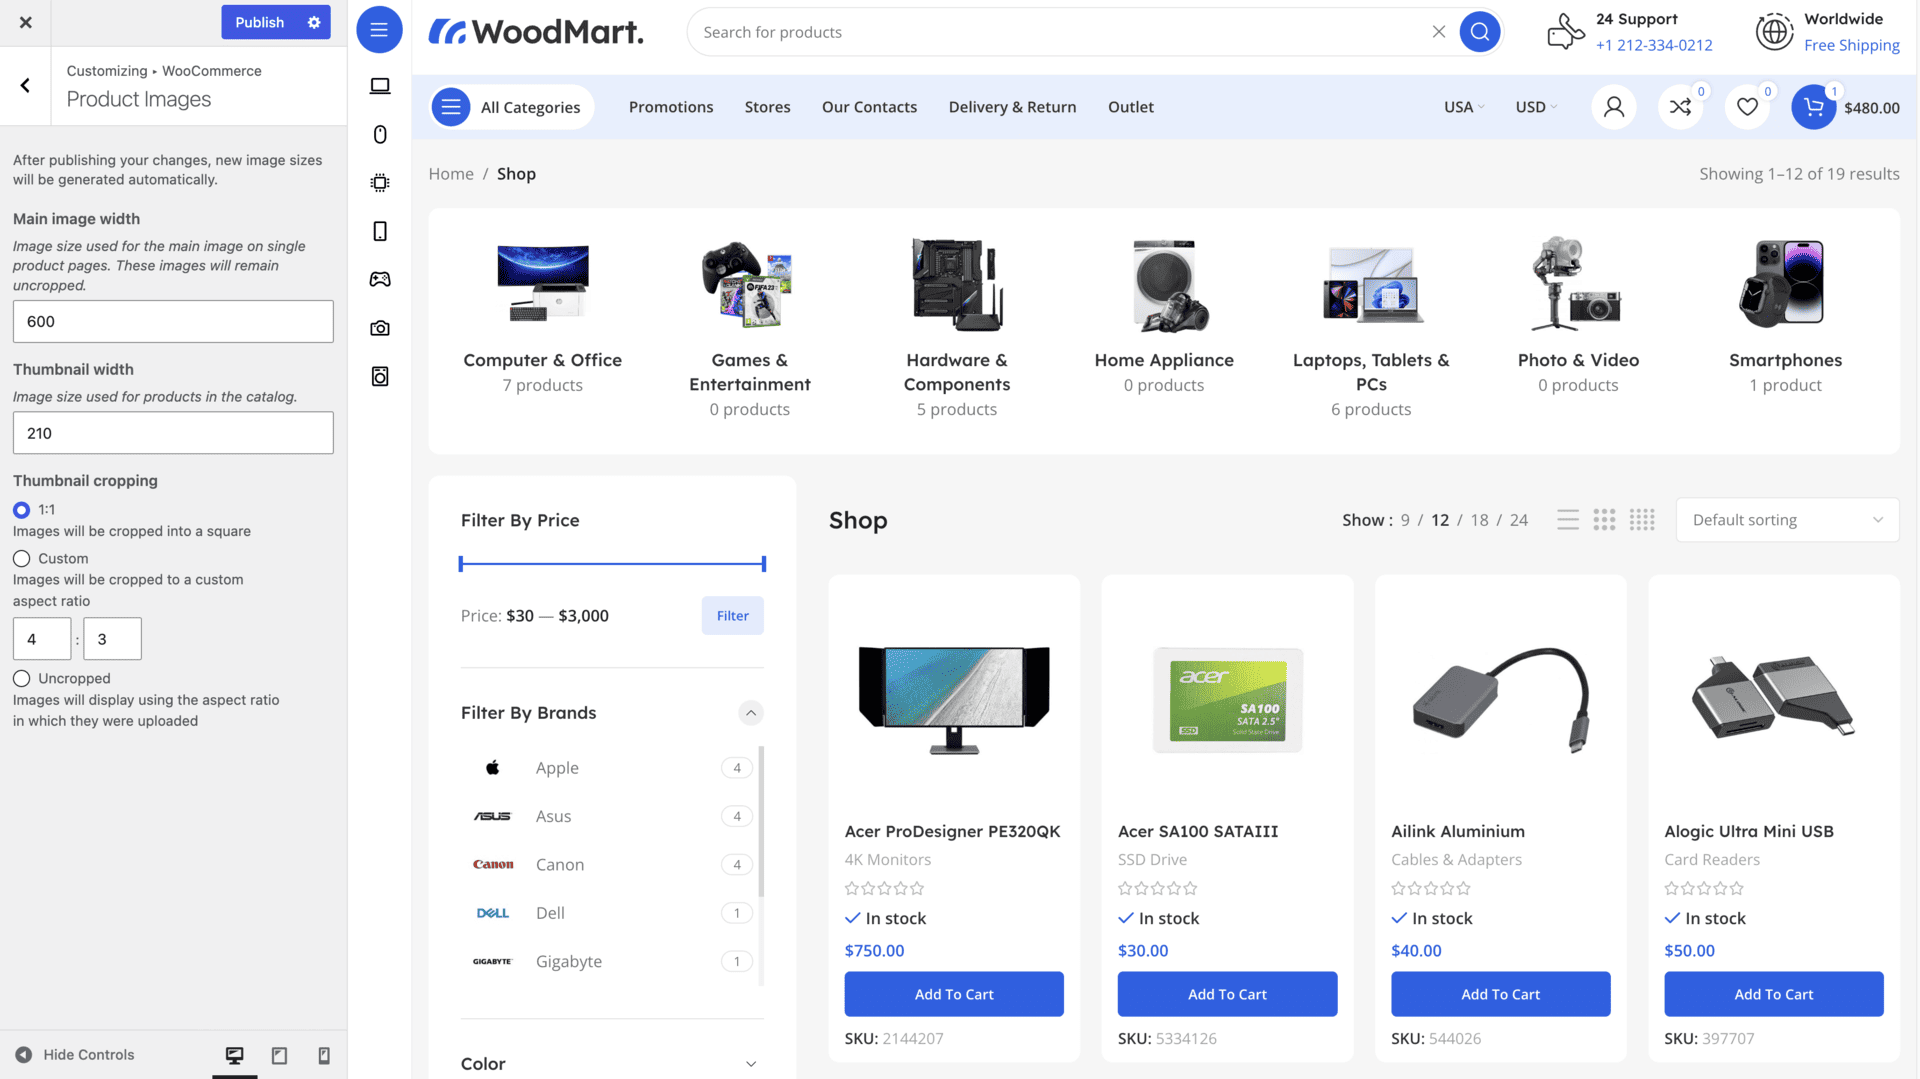
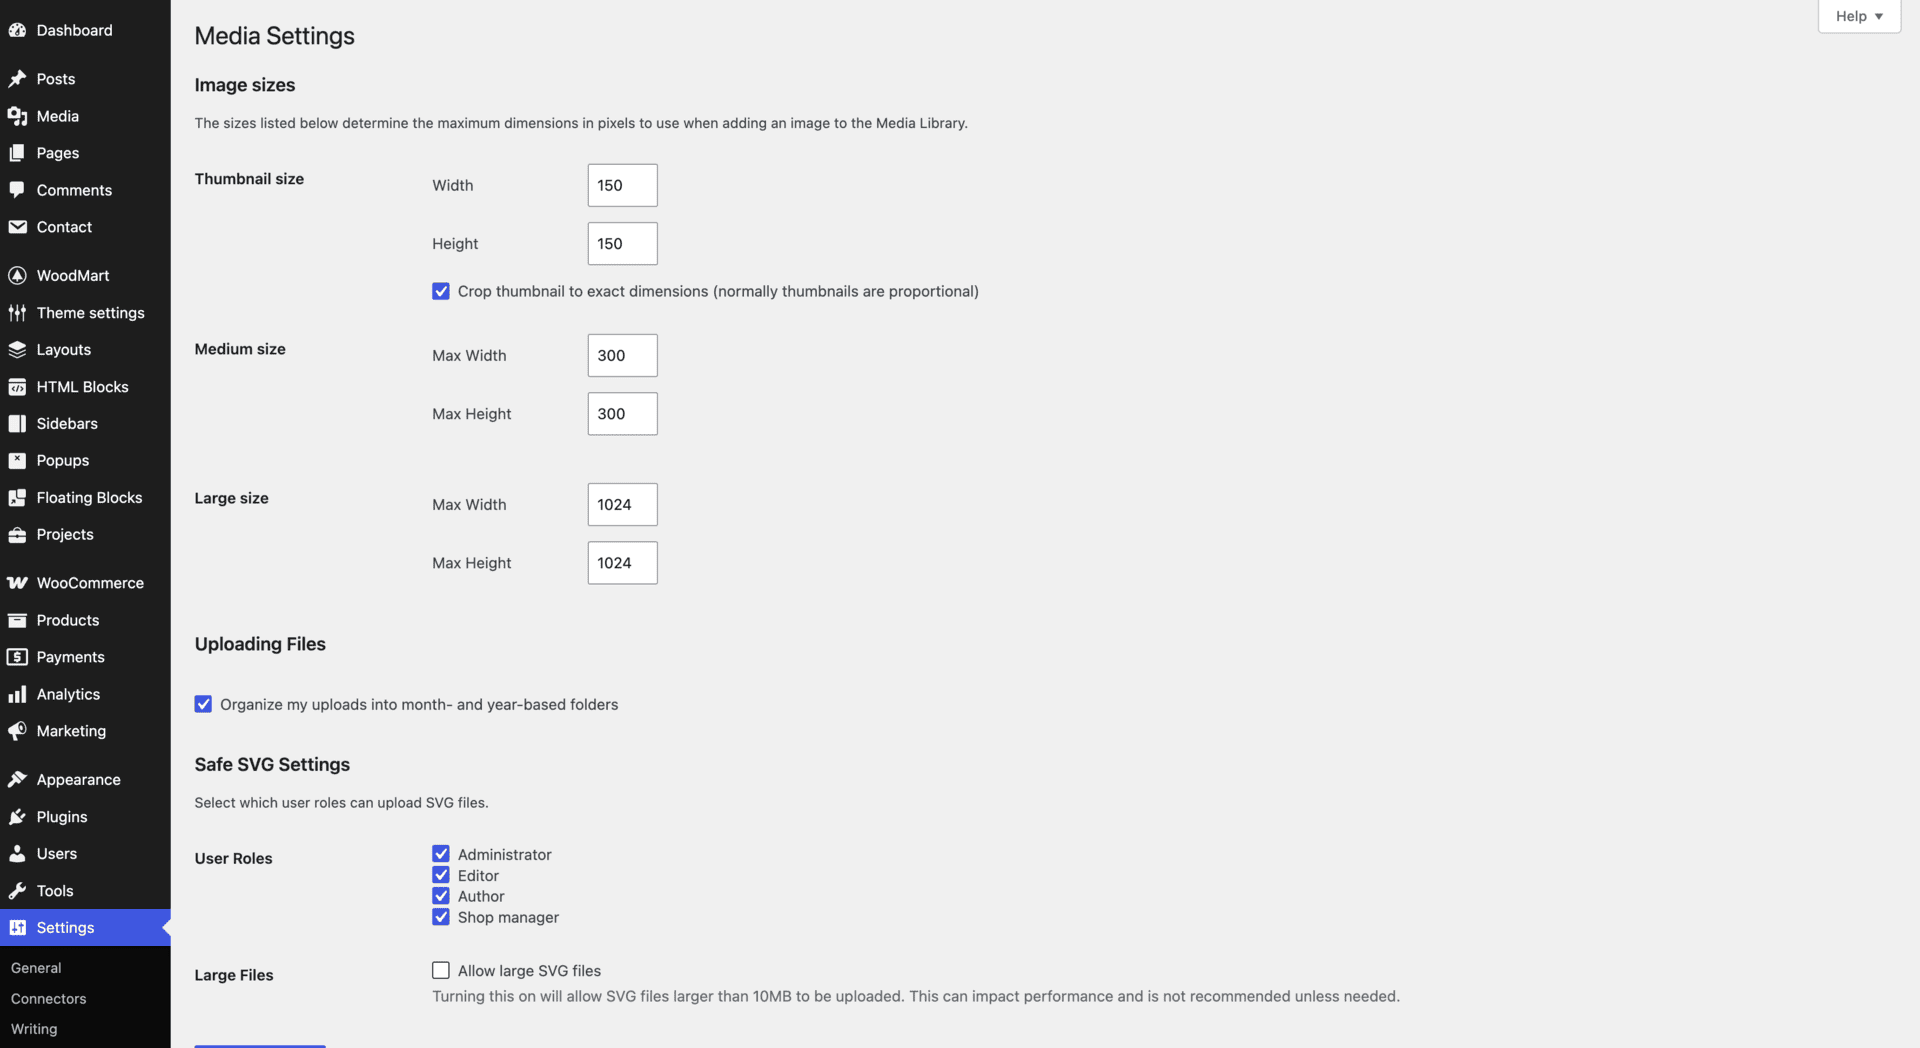
Serve the right size on the page. Compression isn’t enough; the displayed size matters too. If your container is 1200px wide with 6 product columns, each product thumbnail only needs to be about 200px. Set image sizes in the right place for each area:
- Shop product thumbnails: Appearance → Customize → WooCommerce → Product Images.
- Blog post images: Settings → Media.
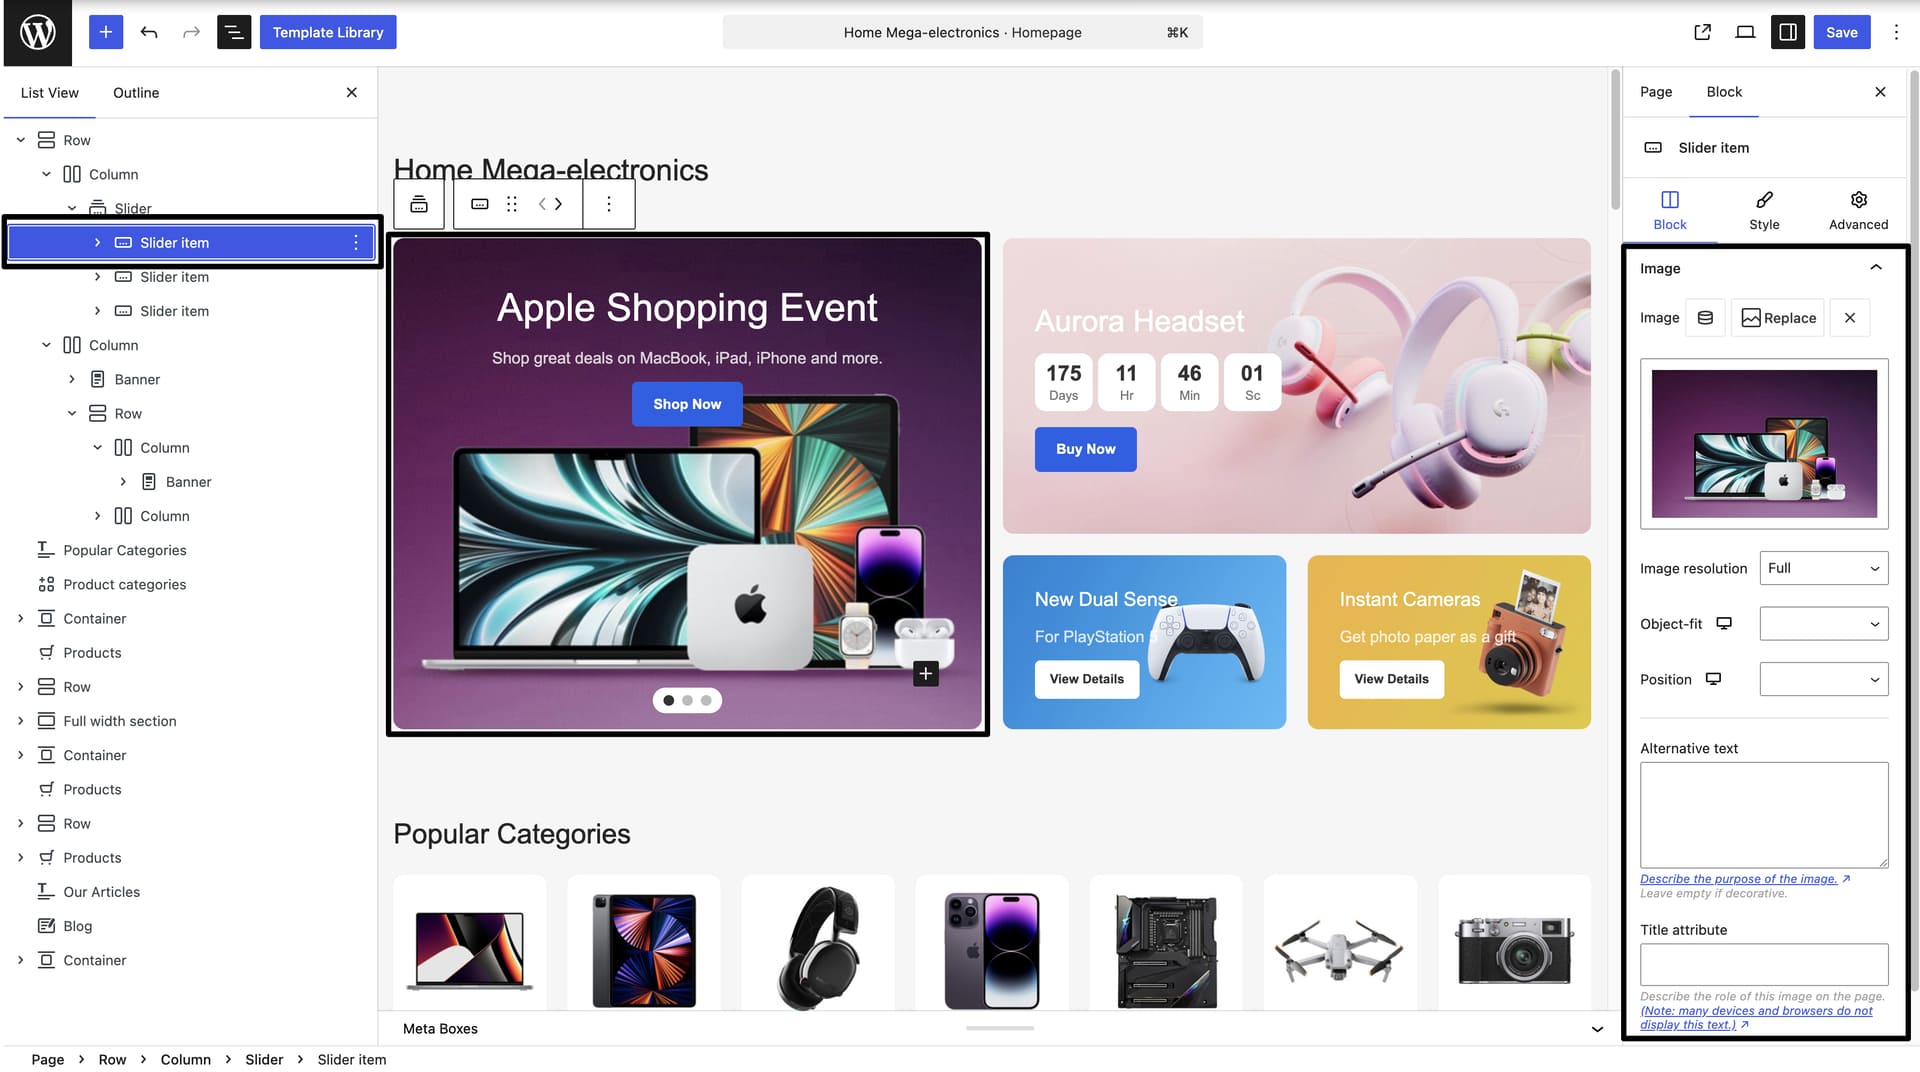
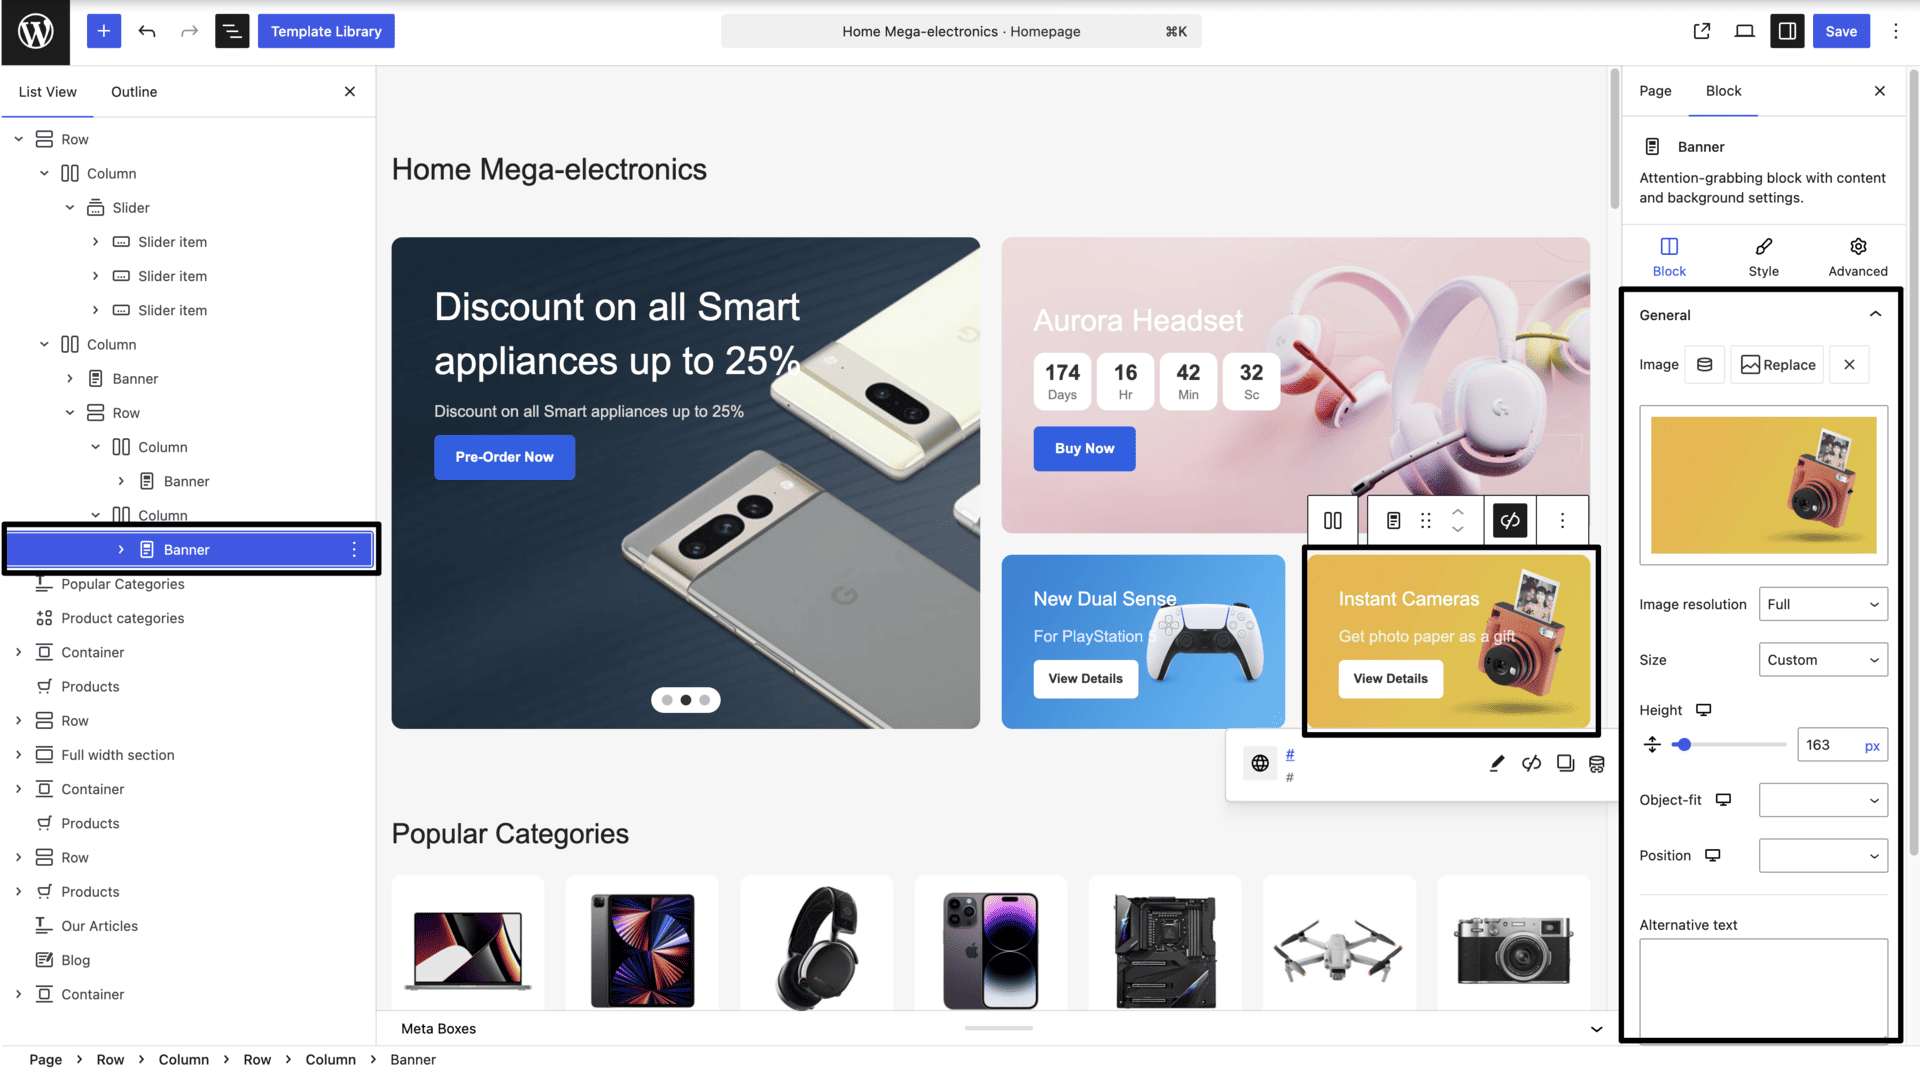
- Individual page elements (banners, info boxes, galleries): set the image size while editing the element in your page builder (WPBakery or Elementor).
- Sliders and banners: upload through the Image option in our Gutenberg blocks, not as a background image. As covered in Step 3, that’s what gives you
srcsetand the right resolution per device.
Step 5. Install a caching plugin (WP Rocket)
A caching plugin is essential for any WordPress site. It cuts server response time and serves pages almost instantly. We use WP Rocket, the most modern and easiest caching plugin to work with. It’s paid; if that’s not an option, free alternatives like Autoptimize, W3 Total Cache, or LiteSpeed Cache apply the same ideas. The settings below are for WP Rocket, but the concepts transfer.
After activating, review the settings and match them to your site. The options that matter most with our theme:
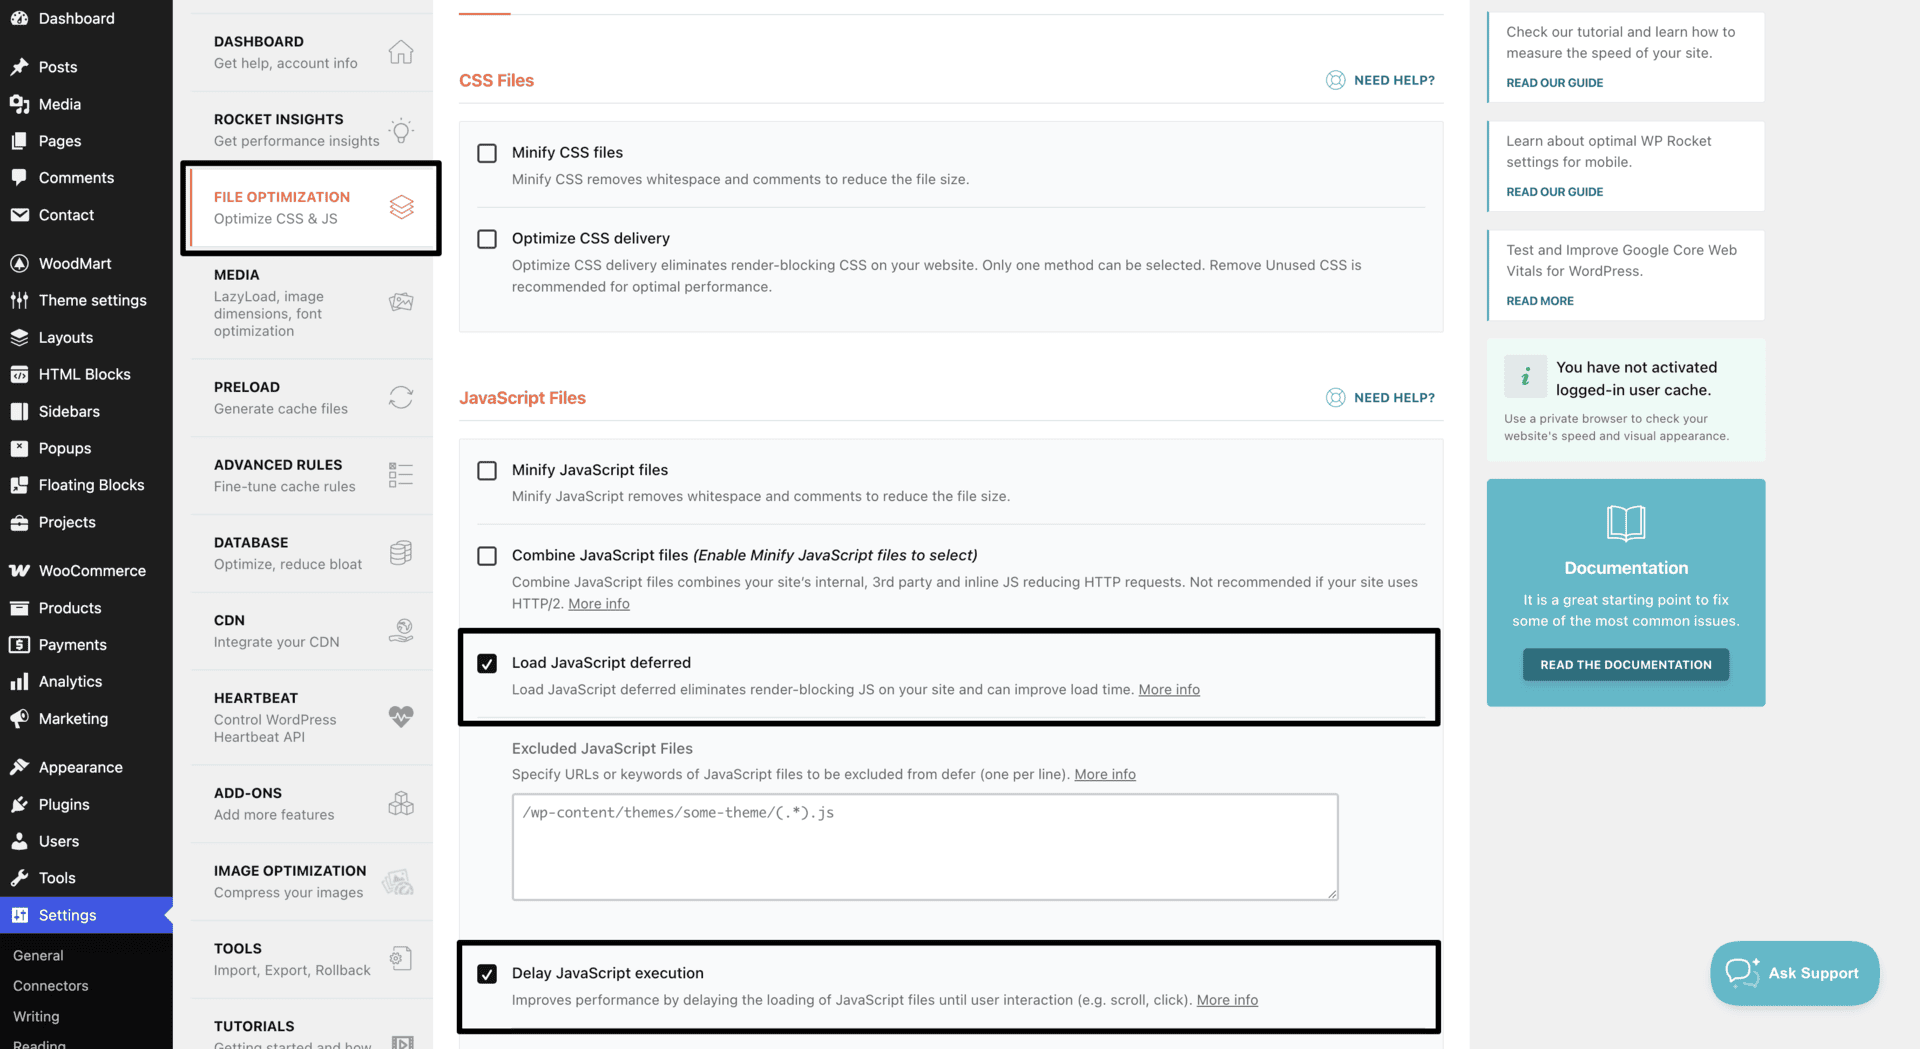
- File Optimization → Load JavaScript deferred. Turn this on. It stops scripts from blocking rendering.
- Delay JavaScript execution. Powerful, but it can hurt UX, because scripts don’t run until the user moves the mouse or scrolls. We enabled it on the test site and turned on Theme Settings → Performance → Plugins → WP Rocket delay JS exclusions so the exclusion list fills automatically and critical scripts aren’t held back.
- Advanced Rules → Never Cache URLs. Add your Wishlist and Compare pages here, since they’re specific to each user and shouldn’t be cached. (WooCommerce already excludes My Account, Cart, and Checkout by default.)
That’s the configuration we run on the demo. Every other option is optional; experiment with combinations and re-test to find what’s best for your site.
Step 6. Set up a CDN
A CDN (Content Delivery Network) is a globally distributed set of servers that store your static assets (images, CSS, JS, fonts) and serve them to visitors from a location near them, faster than your own server can. If your traffic comes from many regions, a CDN cuts static-asset load time and takes load off your origin server. There are two convenient ways to do this, and they work differently.
Option A: Cloudflare (recommended)
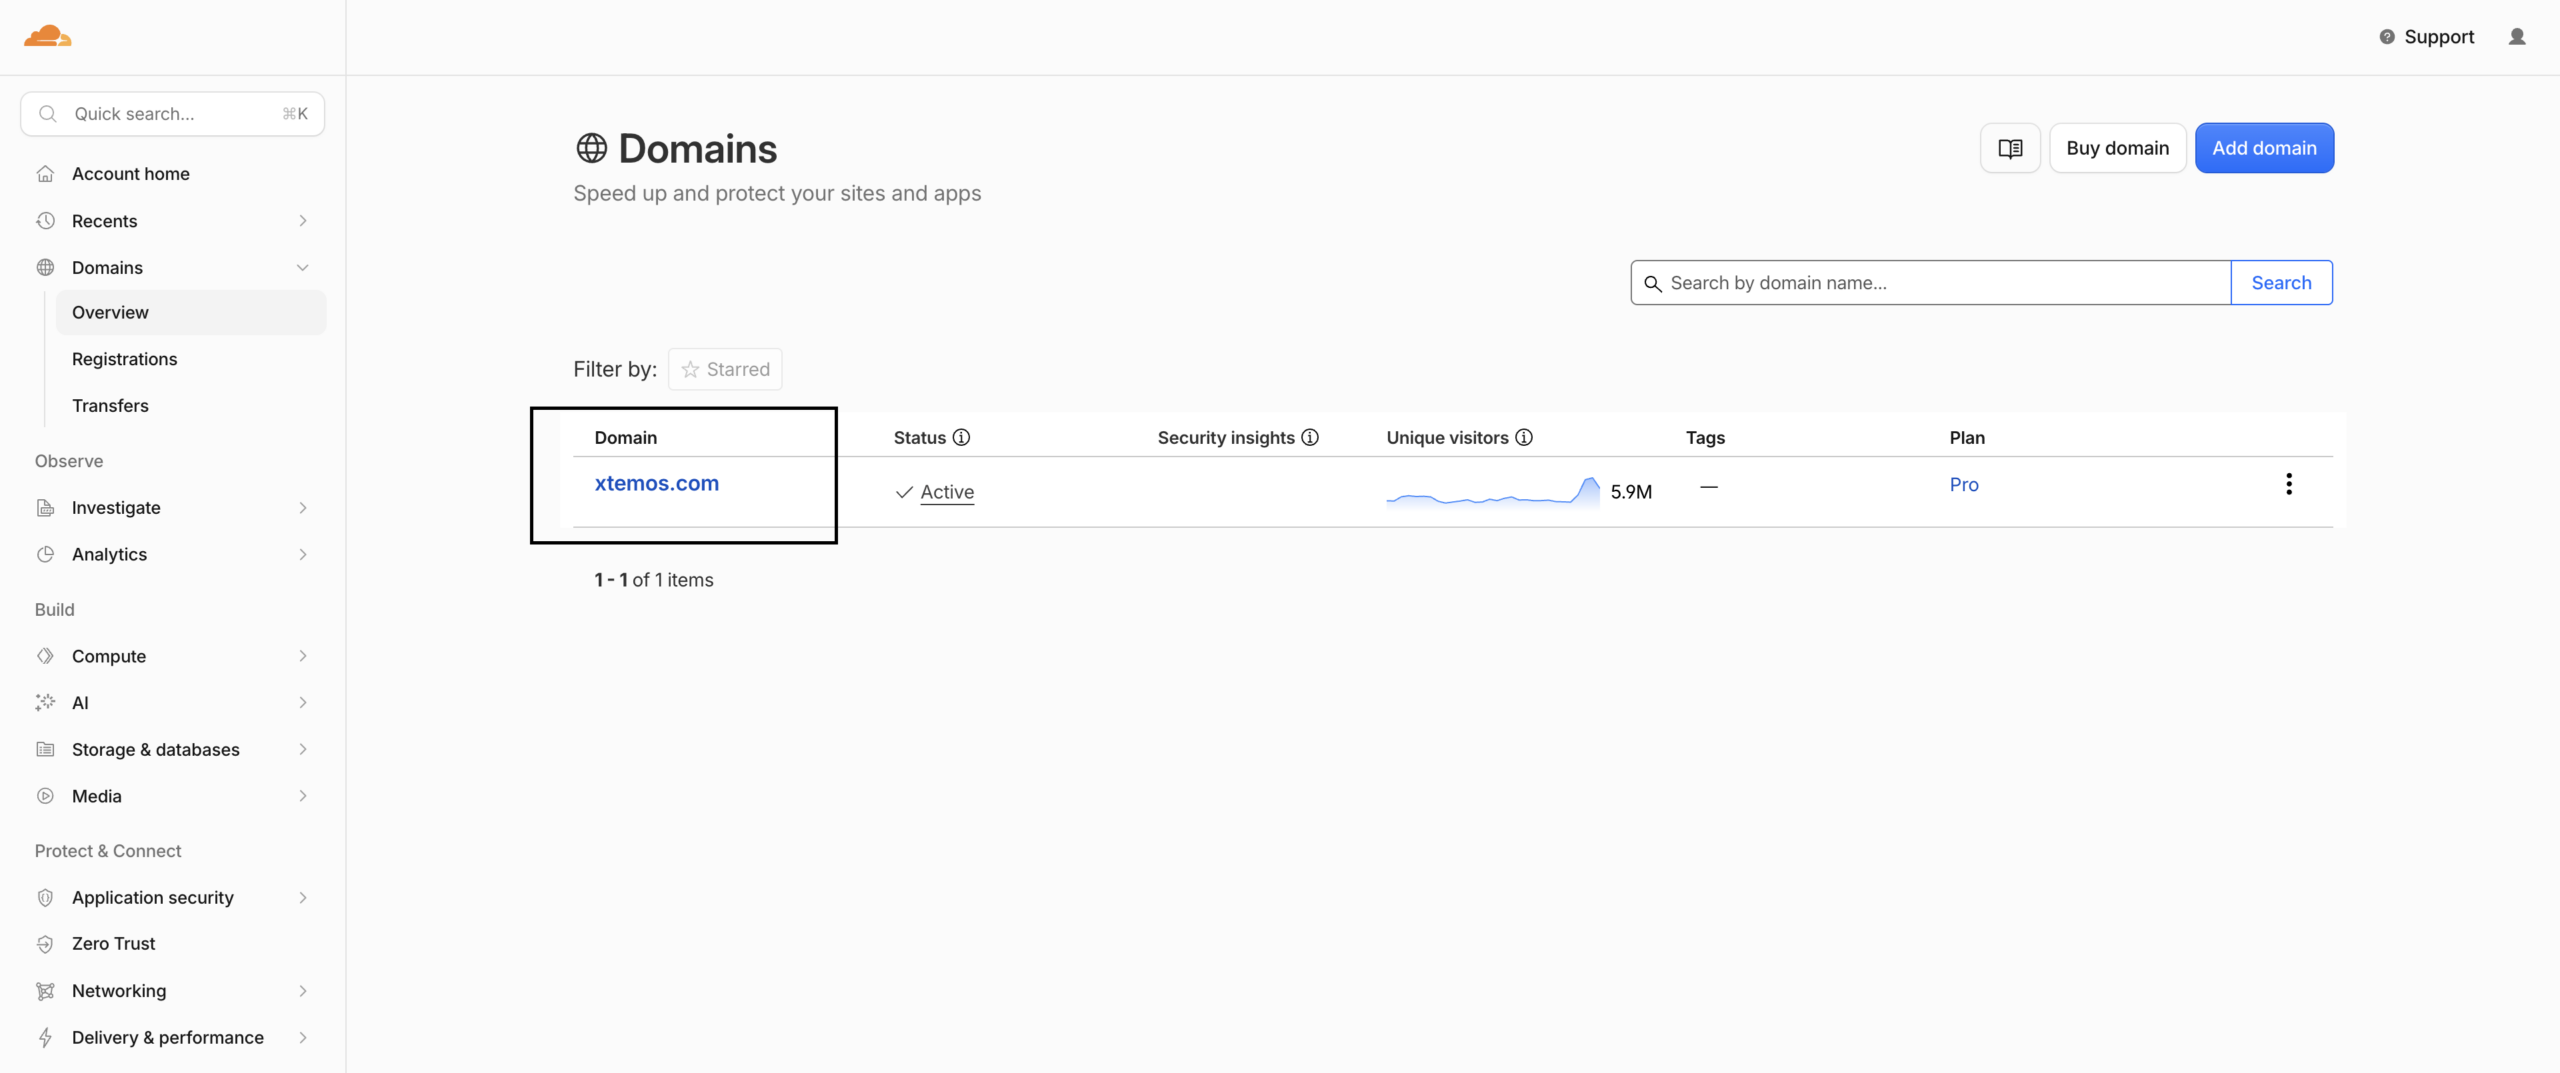
For most stores Cloudflare is the easiest CDN to run, because it needs almost no configuration. Instead of rewriting individual asset URLs, it sits in front of your entire site as a reverse proxy. You point your domain’s nameservers at Cloudflare once, and from then on every request goes through its global edge network (hundreds of locations worldwide) before reaching your server.
What makes it convenient:
- Almost nothing to configure. Once your DNS is on Cloudflare, static assets are cached at the edge automatically. There’s no per-asset setup, no zone URL to paste, and no changes to how your links are written.
- Free SSL and a free plan that’s enough for most stores.
- It protects the origin, not just static files: it absorbs traffic spikes and filters malicious requests before they hit your server.
For a tighter WordPress integration, install the official Cloudflare plugin, or use WP Rocket’s built-in Cloudflare add-on to clear the Cloudflare cache whenever you clear WP Rocket’s.
Option B: KeyCDN (pull-CDN alternative)
If you’d rather use a classic pull CDN with per-asset control that plugs straight into WP Rocket, KeyCDN is fast and simple, and we use it on many projects. Setup takes a few minutes:
- Register an account on KeyCDN.
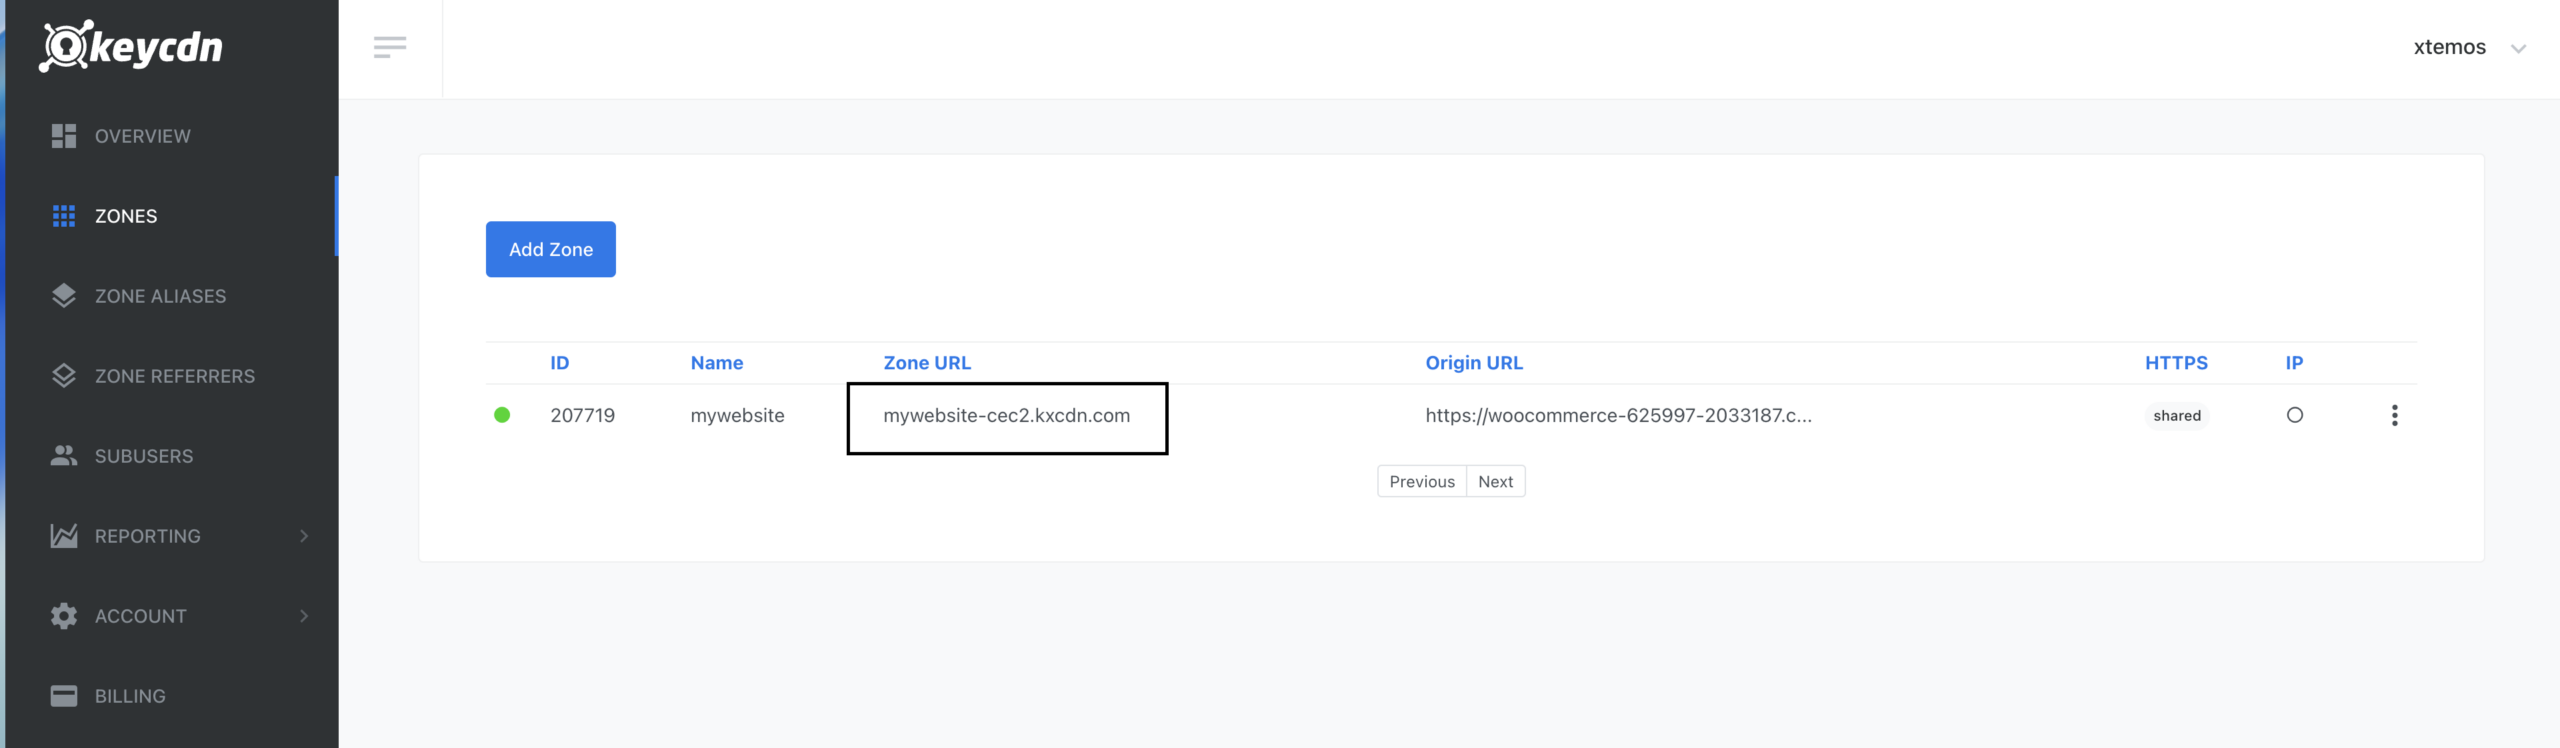
- Go to Zones and click Add new.
- Fill the Origin URL field with your site’s root URL.
- Click Save and wait a few minutes for the network to deploy.
- Copy the Zone URL of the deployed zone.
- Go to WP Rocket → CDN (or your caching plugin’s CDN option), enable CDN, and paste the Zone URL into the field.
- Save and clear the cache.
- Confirm the CDN is active by viewing your page source. The image, CSS, and JS URLs should point to the CDN host.
Which to pick? For most stores, start with Cloudflare: it’s free, covers the whole site, needs almost no setup, and protects your origin as a bonus. Choose KeyCDN if you specifically want a pull CDN with granular per-asset control wired into WP Rocket. You can even run Cloudflare in front with KeyCDN for assets, but for most stores one is enough.
How to fix common Google PageSpeed warnings
Every PageSpeed report is different; it depends on your specific plugins, content, and build. If you followed the steps above, most warnings are already handled. Treat this section as a troubleshooting lens: when a specific warning shows up in your report, here’s where to look.
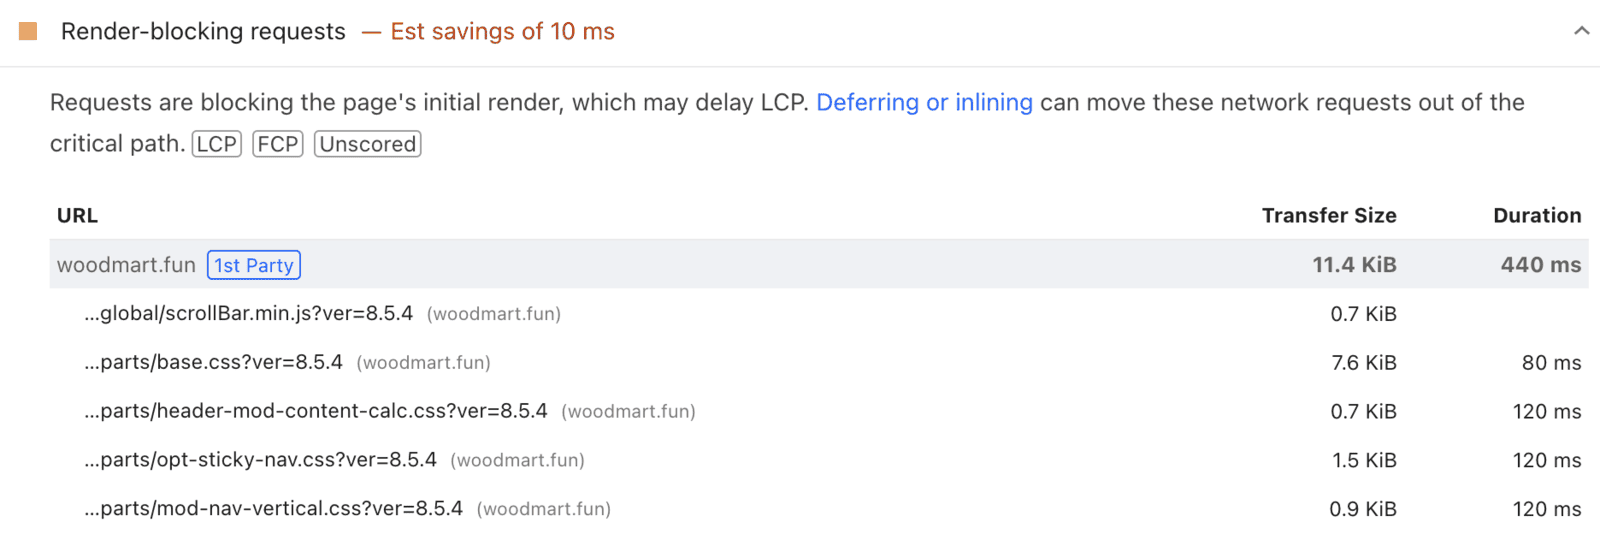
Eliminate render-blocking resources
The most common warning on any WordPress site: CSS, JS, and fonts in your <head> that block the first paint. Steps 3 and 5 already cover most of it (disabled Gutenberg CSS, local fonts, deferred JS). For what’s left, go through every file the report lists and confirm it’s needed on that page. The usual culprits are third-party plugins:
- Fonts. Plugins often add a font family for a single paragraph or button. Keep it to two families at most and Load Google Fonts locally on (Step 3).
- Font Awesome. Plugins frequently load the full Font Awesome CSS and icon fonts just to show a handful of icons. Use it only when you truly need it; otherwise inline SVG icons are lighter.
- JS. Defer it in your caching plugin (the Load JavaScript deferred option from Step 5).
Reduce unused JavaScript
Pay attention to this warning and audit every script file, especially those loaded by third-party plugins. If a plugin ships JS you don’t use on a given page, that’s the first thing to trim.
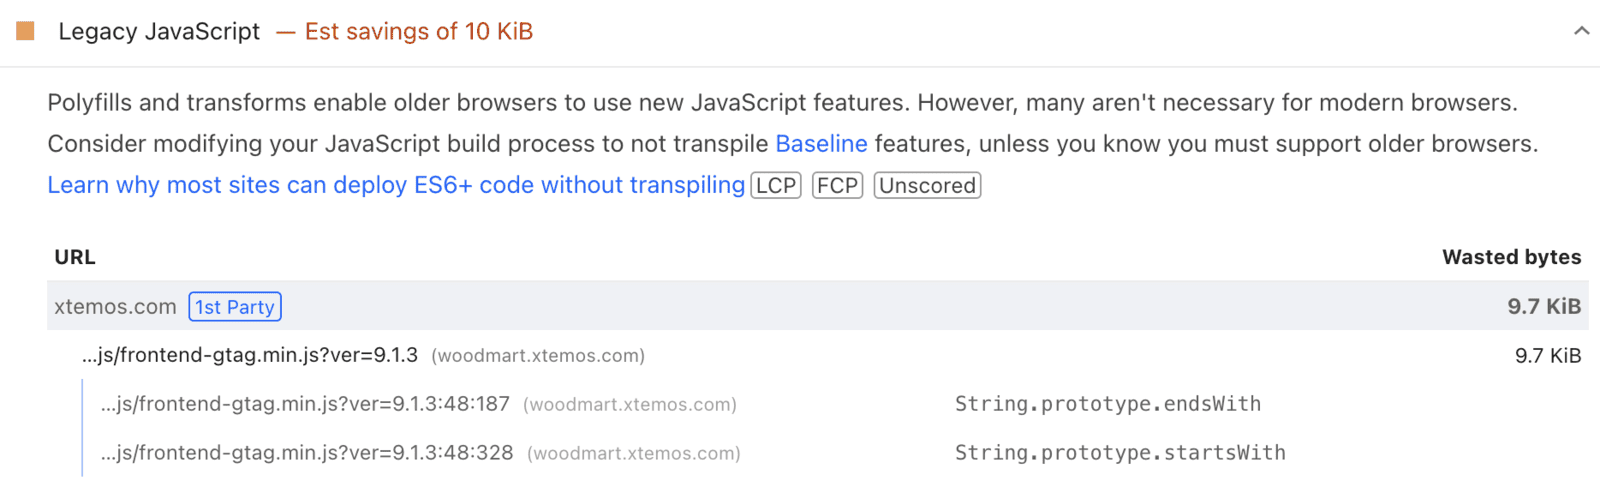
Reduce initial server response time
Usually fixed by any caching plugin, WP Rocket in our case. You may see this warning briefly right after clearing the cache; that’s expected. But if server response exceeds 2 seconds without a caching plugin, something is wrong. Measure it as described in Step 2, then narrow down the cause:
- Disable all third-party plugins and measure again. If it’s much faster, re-enable them one at a time to find the culprit.
- Test with a default WordPress theme to compare against WoodMart. Test on the cart page, since other pages vary in content. A 10-15% difference is normal; if the default theme is 2-3 times faster, contact our support.
- If it’s still slow with no plugins and a default theme, the issue is your hosting. WordPress itself is fast and well optimized, so talk to your host.
Results and takeaway
Following these steps, our Mega Electronics prebuilt, a heavy demo on the cheapest Hostinger plan, reached 90+ on Google PageSpeed for both mobile and desktop. The exact number your site hits will differ, because performance always depends on your content, plugins, and hosting.
The method matters more than any single setting: measure first, understand what each option does, change one thing at a time, and re-test. Do that, and you can optimize almost any WordPress or WooCommerce store, starting with (but not limited to) WoodMart.
Want a fast store on a foundation that’s already optimized? Get WoodMart or explore the theme.

Leave a Reply
You must be logged in to post a comment.
3 thoughts on “WordPress performance optimization: a step-by-step WoodMart guide”
Great guide! Regarding Step 5, there is a major piece of the performance puzzle missing for anyone running on a LiteSpeed web server (like Hostinger’s higher tiers, A2 Hosting, or in my case Synergy Wholesale). The article states that WP Rocket is the “most modern and easiest caching plugin to work with,” but that isn’t really correct if you look at modern hosting architecture. WP Rocket is a fantastic premium file-optimization plugin, but it still relies entirely on application-level (PHP) caching. On LiteSpeed hosting, running a PHP-based caching plugin like WP Rocket actually creates unnecessary server resource usage during traffic spikes.
Calling it the “most modern” ignores the fact that the free LiteSpeed Cache (LSCache) plugin communicates directly with the server to deliver server-side page caching. This completely bypasses PHP, dramatically lowering CPU/RAM usage and serving pages significantly faster. I get that WP Rocket is popular because it directly (to a degree) automates the task of caching WoodMart, but it certainly is not the ideal caching solution on a LiteSpeed setup.
I don’t mind paying $50 or so a year for a premium plugin, but it makes no sense to use WP Rocket when LiteSpeed hosting eliminates that resource overhead entirely for free.
That brings me to my main critique: this guide is heavily biased toward WP Rocket, and the theme settings keep the “WP Rocket delay JS exclusions” toggle entirely “under the hood.”Because so many WoodMart users are on LiteSpeed servers where LSCache is the optimal choice, we are left entirely guessing what that magic toggle actually filters out.
Could you please share the exact JavaScript files or keywords that the WP Rocket toggle excludes? Sharing this list would allow LiteSpeed users to properly map those exclusions into LSCache’s “Delay JS” settings, allowing us to get the same seamless theme compatibility without being forced to pay for a second caching plugin. LiteSpeed servers deserve LiteSpeed Cache!
Hi K1W1,
Thank you for the detailed comments. You make a valid point: this article documents the configuration used in our specific test, but “the most modern” is too absolute. On a LiteSpeed/OpenLiteSpeed server, LSCache’s native server integration makes it a strong—and often more logical—choice. We agree that it deserves WoodMart-specific documentation.
One technical clarification: WP Rocket does not always serve cached pages through PHP. On Apache/LiteSpeed, it can serve its static HTML cache through rewrite rules before WordPress/PHP loads. LSCache still offers tighter native integration with LiteSpeed, but the distinction is more nuanced than server caching versus PHP on every request. WP Rocket documents this behaviour here (https://docs.wp-rocket.me/article/1528-page-caching).
Regarding the WoodMart option: it only integrates with WP Rocket’s rocket_delay_js_exclusions filter. It does not provide any exclusive functionality or require you to install WP Rocket.
The current exclusion list is:
/jquery-?[0-9.](.*)(.min|.slim|.slim.min)?.js
helpers
scrollBar
clickOnScrollButton
searchFullScreen
menuOffsets
menuStickyOffsets
menuOverlay
menuDropdowns
clearSearch
cartWidget
cart-fragments
mobileNavigation
loginSidebar
menuSetUp
productImages
cookie.min
imagesLoaded
ageVerify
magnific-popup
headerBuilder
swiper
swiperInit
trackProductViewed
lazyLoading
For LSCache, add these one per line under LiteSpeed Cache → Page Optimization → Tuning → JS Deferred/Delayed Excludes. Since LiteSpeed accepts partial strings rather than this jQuery regular expression, use jquery for the first entry. LiteSpeed explains the matching format here (https://docs.litespeedtech.com/lscache/lscwp/pageopt/#js-deferred-delayed-excludes).
There is no need to install WP Rocket alongside LSCache just to obtain these exclusions. Please note that the two plugins use different optimization engines, so purge all caches and test menus, AJAX cart, product galleries, swatches, search, and other interactive features after applying them.
Thanks again for raising this. We’ll clarify the wording in the article and take your suggestion for a dedicated LiteSpeed Cache guide into account.
Following up on my previous point,
I don’t get why XTemos seems to entirely avoid creating a general optimization guide for the WoodMart theme based on LiteSpeed Cache and LiteSpeed servers? (NOTE: all other optimisations mentioned in your guide are also valid no matter what caching you use).
In my opinion, addressing this could significantly improve how people use WoodMart in the modern world of server-side caching. I would think that, just like me, a massive portion of WoodMart websites are running on LiteSpeed-based hosting. I really don’t understand why XTemos hasn’t officially addressed the benefits of this stack or provided the same level of configuration detail for it. In my opinion, it would be a game-changer for the community if you did!
It’s not about saving $50 bucks, it’s about eliminating unnecessary PHP resource overhead entirely and letting the server do what it does best.