Installation via WordPress
WordPress theme installation
There are a few ways to install our themes on your website. The first and most traditional way is to use a default WordPress Themes interface. So you need to download the theme file and then install it via WordPress -> Themes -> Add new. It is the simplest way and works in most cases. But first, you need to purchase the theme or join our club. Then you will be able to download and use the theme.
Here is a step by step instruction about the process:
- Join our premium club or purchase a single theme
- Download theme files from Account -> Downloads or on the theme’s page
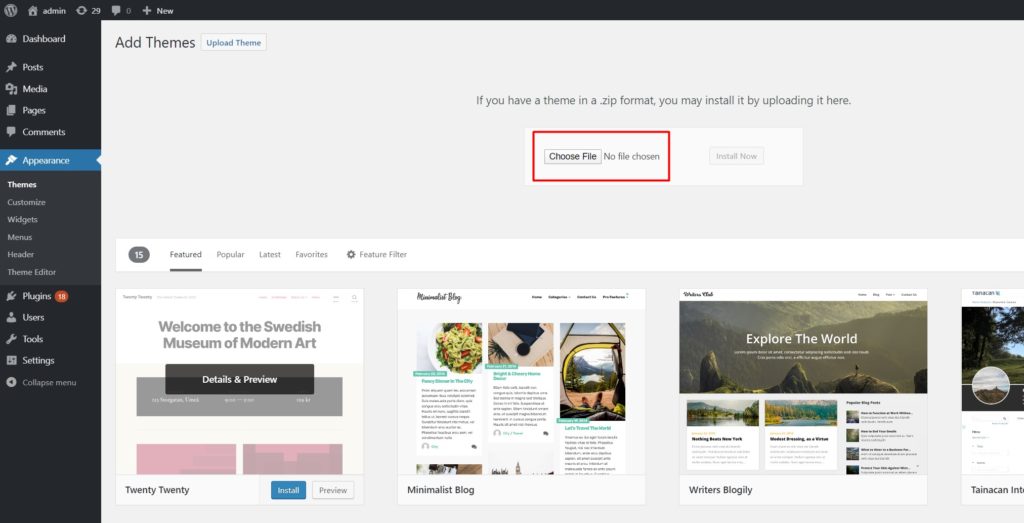
- Open your WordPress Dashboard and go to Appearance -> Themes -> Add new
- Click on the Upload Theme and then on the Choose file button in the form
- Select the file you downloaded in point 2 and click on Install now
- The uploading and installing process may take up to a few minutes. After this, you need to click on the Activate button to enable the theme and complete the installation

Further steps
When you have installed our theme completely you will be redirected to our Setup Wizard to finish the installation in a few steps. You can skip it and do everything manually. You need to activate the theme, install the required plugins, and import the dummy content (optional). Follow the following instruction next.
Video tutorial
Here is a short video clip that demonstrates the full process of theme installation.
“Are you sure you want to do this?” message
Sometimes you may get “Are You Sure You Want To Do This” error while installing the theme file via WordPress. And it means you have a low upload file size limit that is set on your hosting server. In such cases, you need to install the theme via FTP or contact your hosting provider and ask them to increase that limit.
 Last updated: February 23, 2022