How to configure Facebook login
In this article, we will provide you with step-by-step instructions on how to configure your Facebook APP and enable Facebook login on your website with our WoodMart theme.
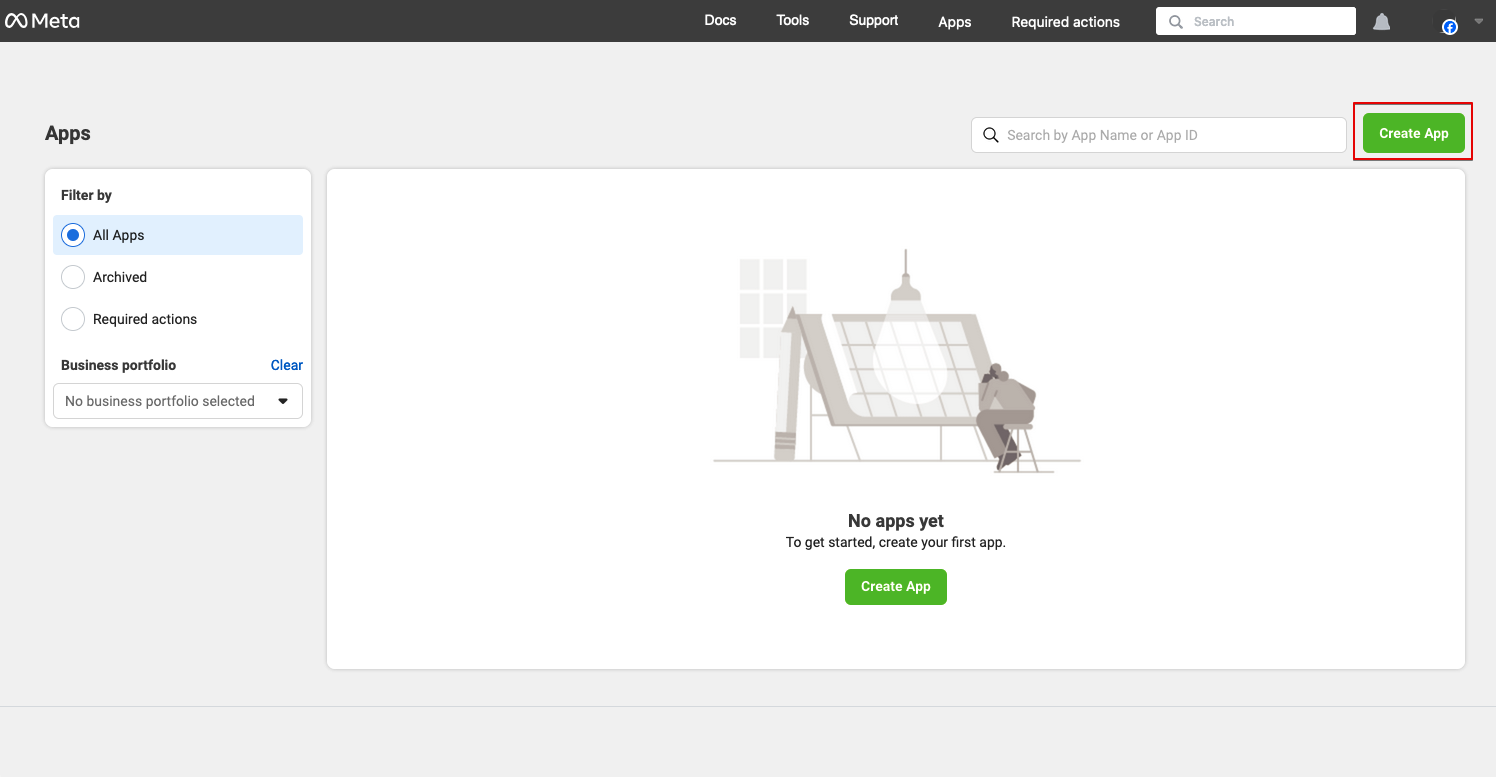
- You need to go to https://developers.facebook.com/ and create a new APP for your website and set its name

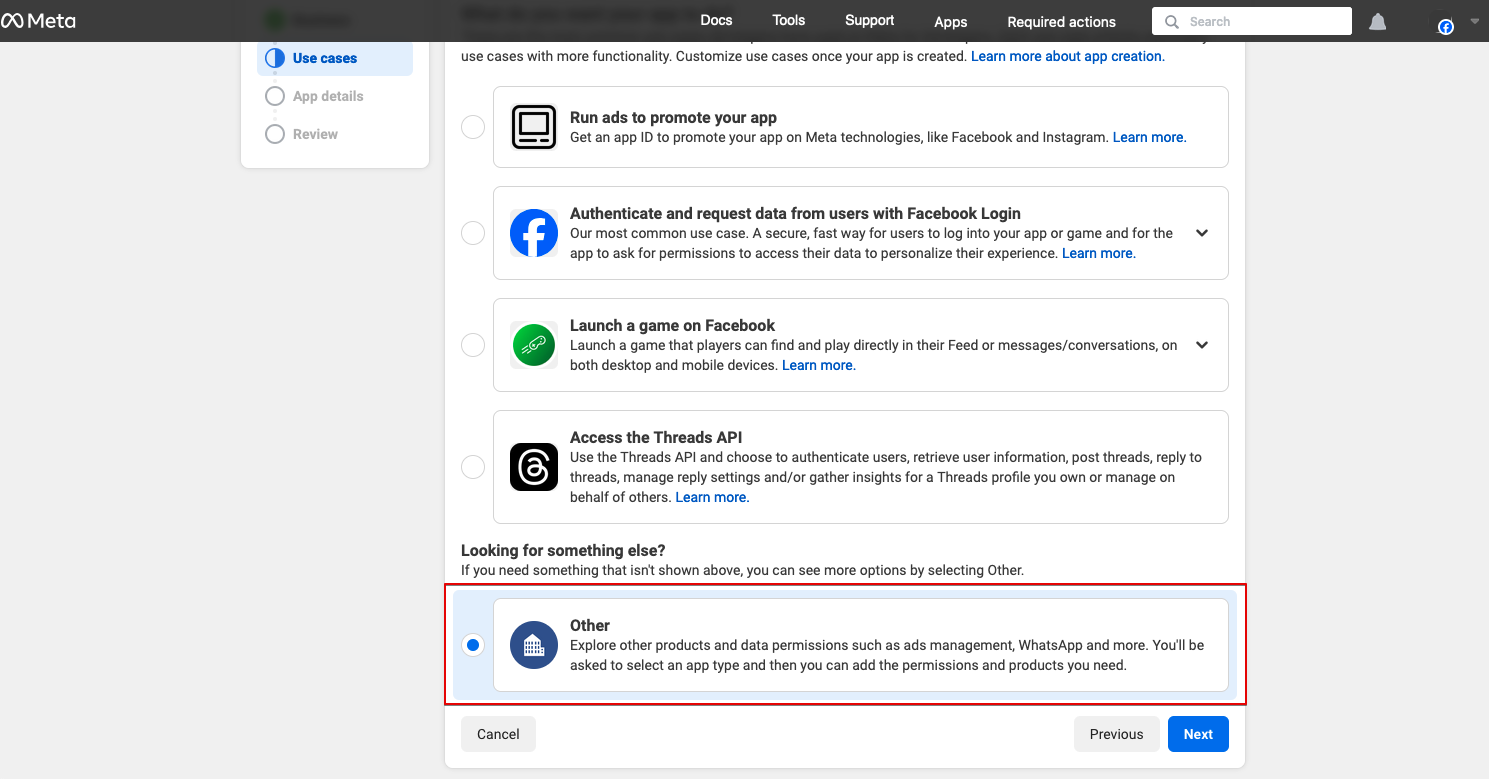
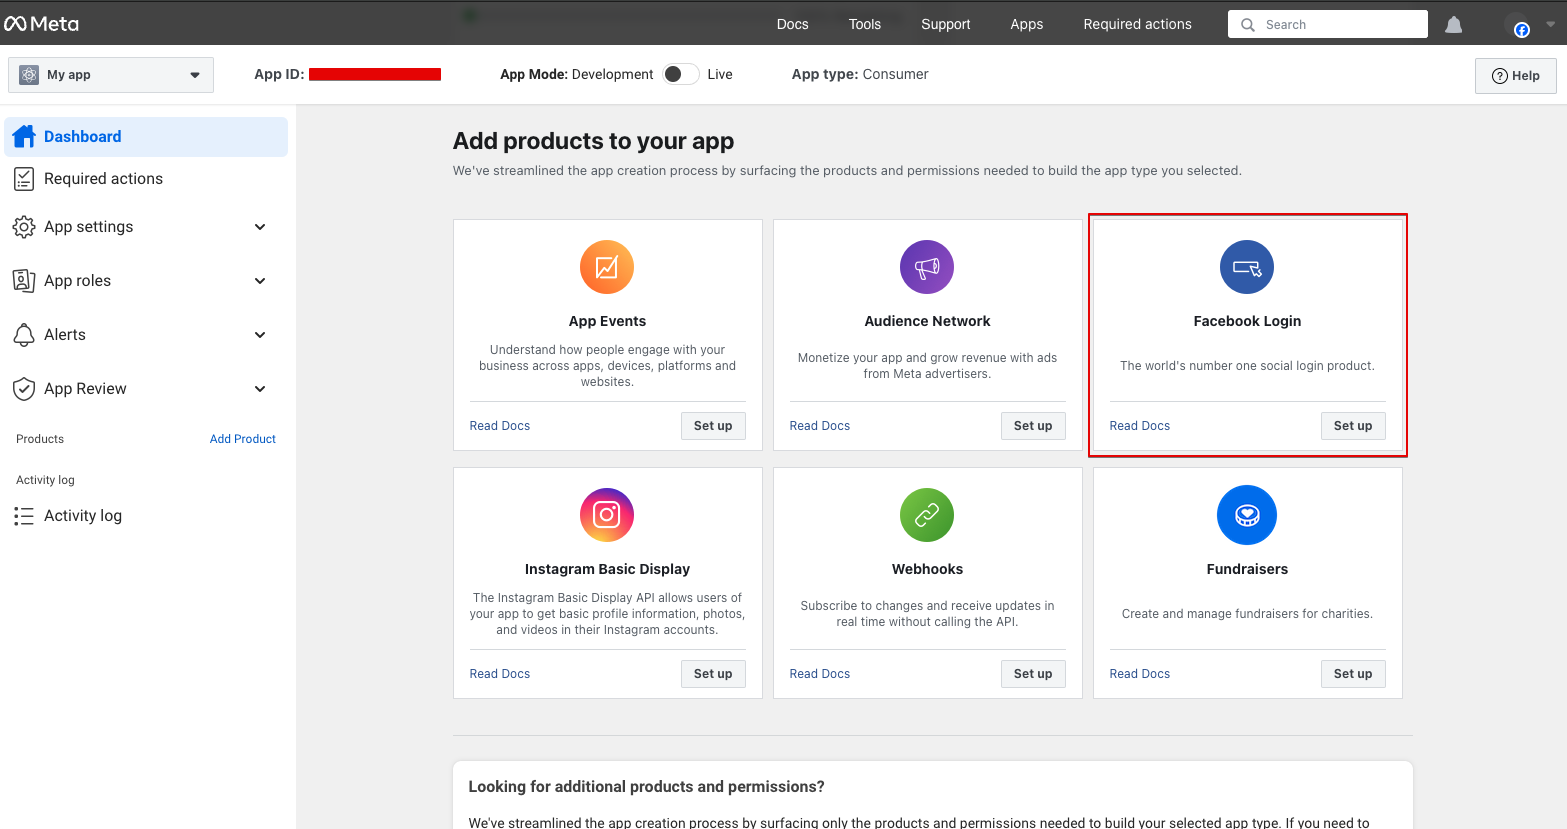
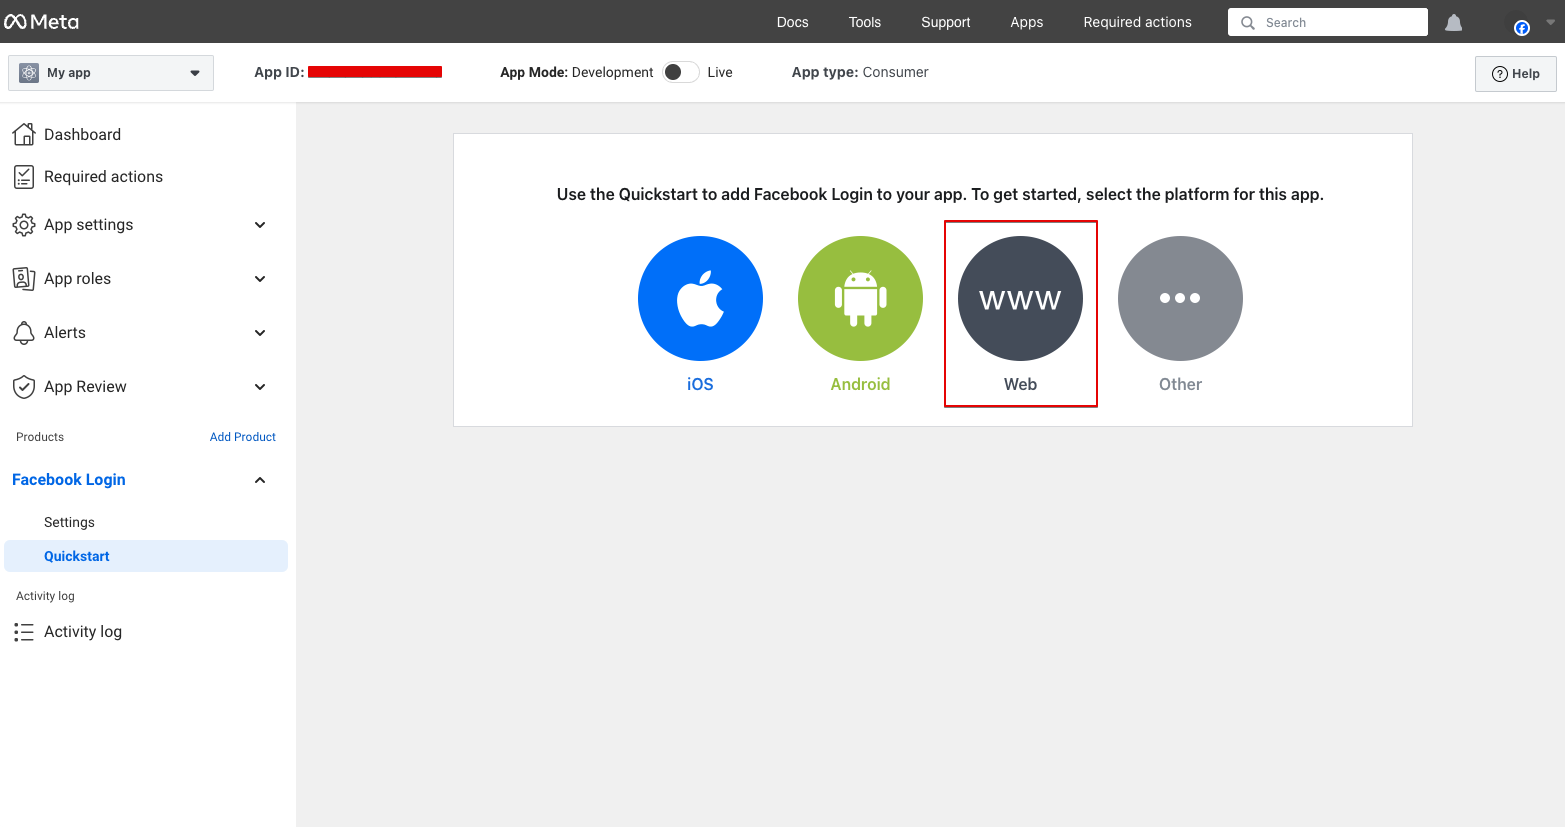
- Click on the +Add product button in your APP’s dashboard and add a “Facebook login” APP for your website
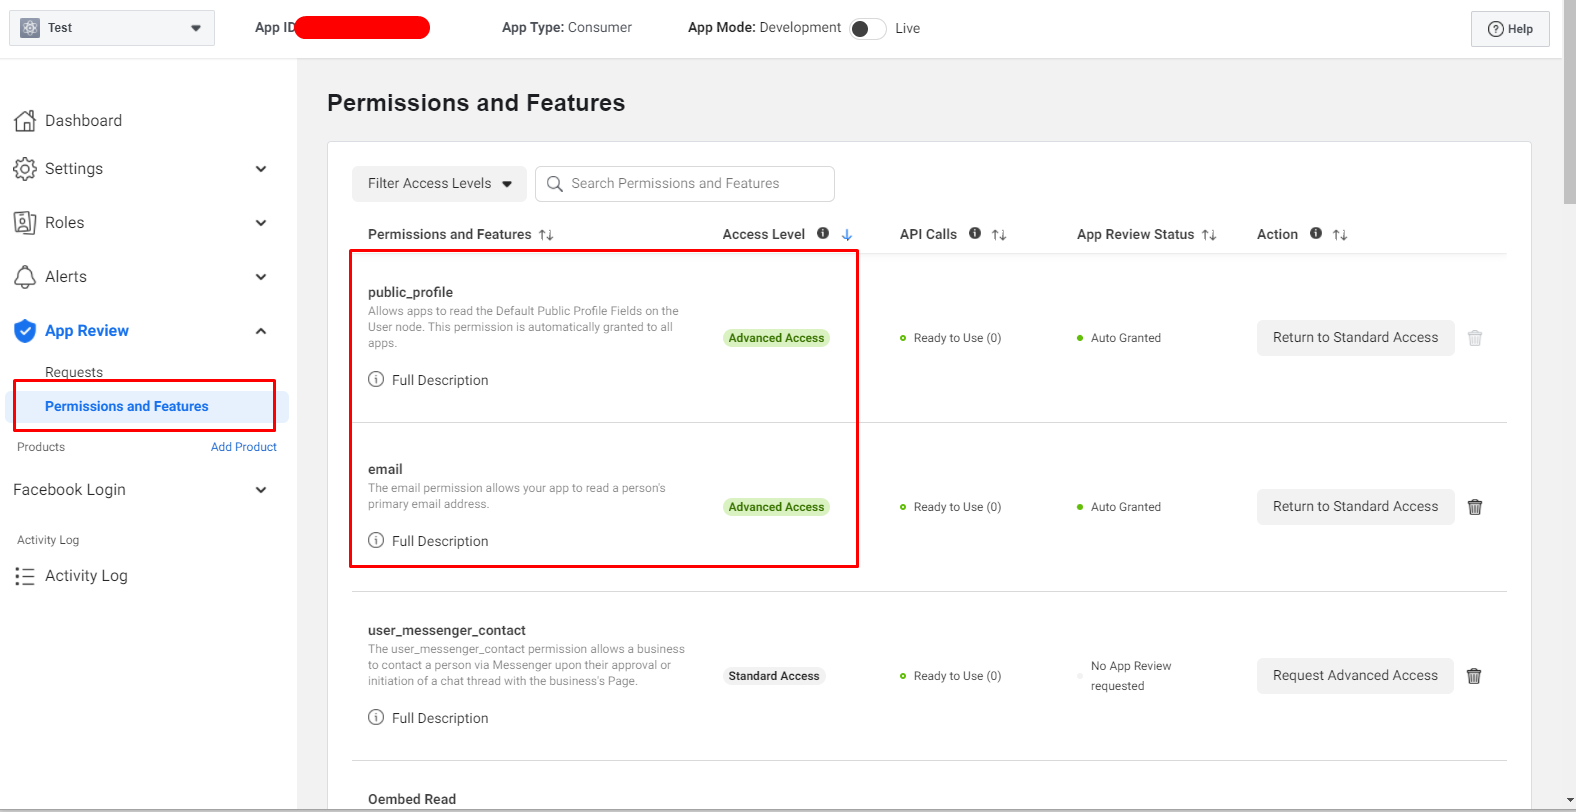
- In your APP dashboard go to App review -> Permissions and features and request advanced access to public profile and email
- In your APP dashboard go to Facebook Login -> Settings and fill Valid OAuth redirect URIs option with your account page URL

- Open your APP’s Dashboard in the menu and copy your App ID and Secret fields
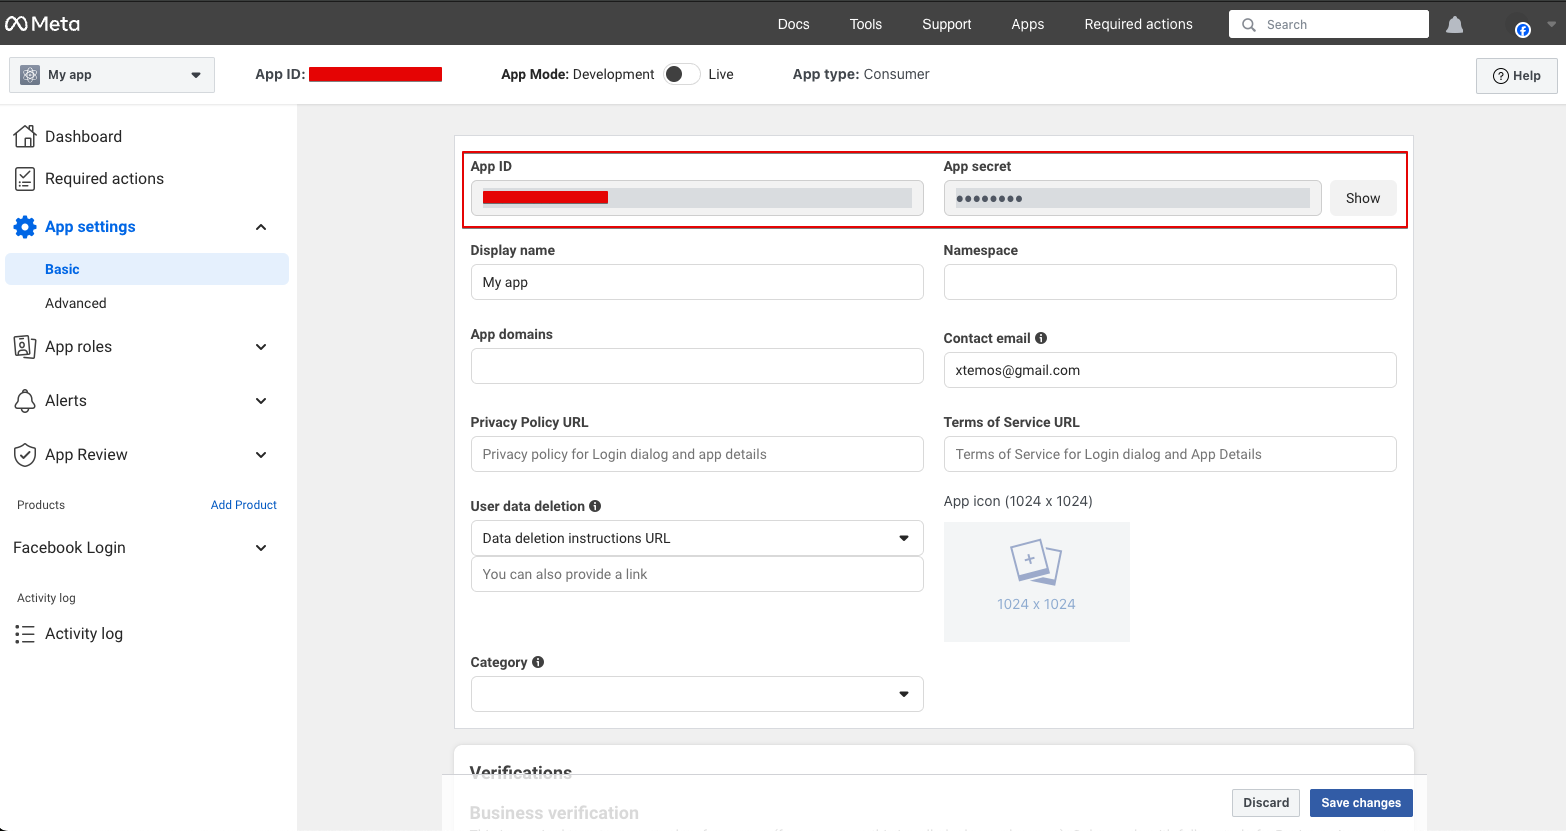
- Paste these values in your WordPress Dashboard -> Theme Settings -> API integrations -> Social authentication as shown on the screenshot

Now, you should be able to see the Facebook login button on your account page and be able to log in.
NOTE: That you will need to make your Application live to allow other visitors to use this function. You can find this option as shown on the screenshot

 Last updated: October 21, 2025