
Global typography settings
Configure fonts and typography styles across your website from Theme Settings. Use the basic groups for the global design, then create advanced rules for individual elements when needed.
Configure basic typography
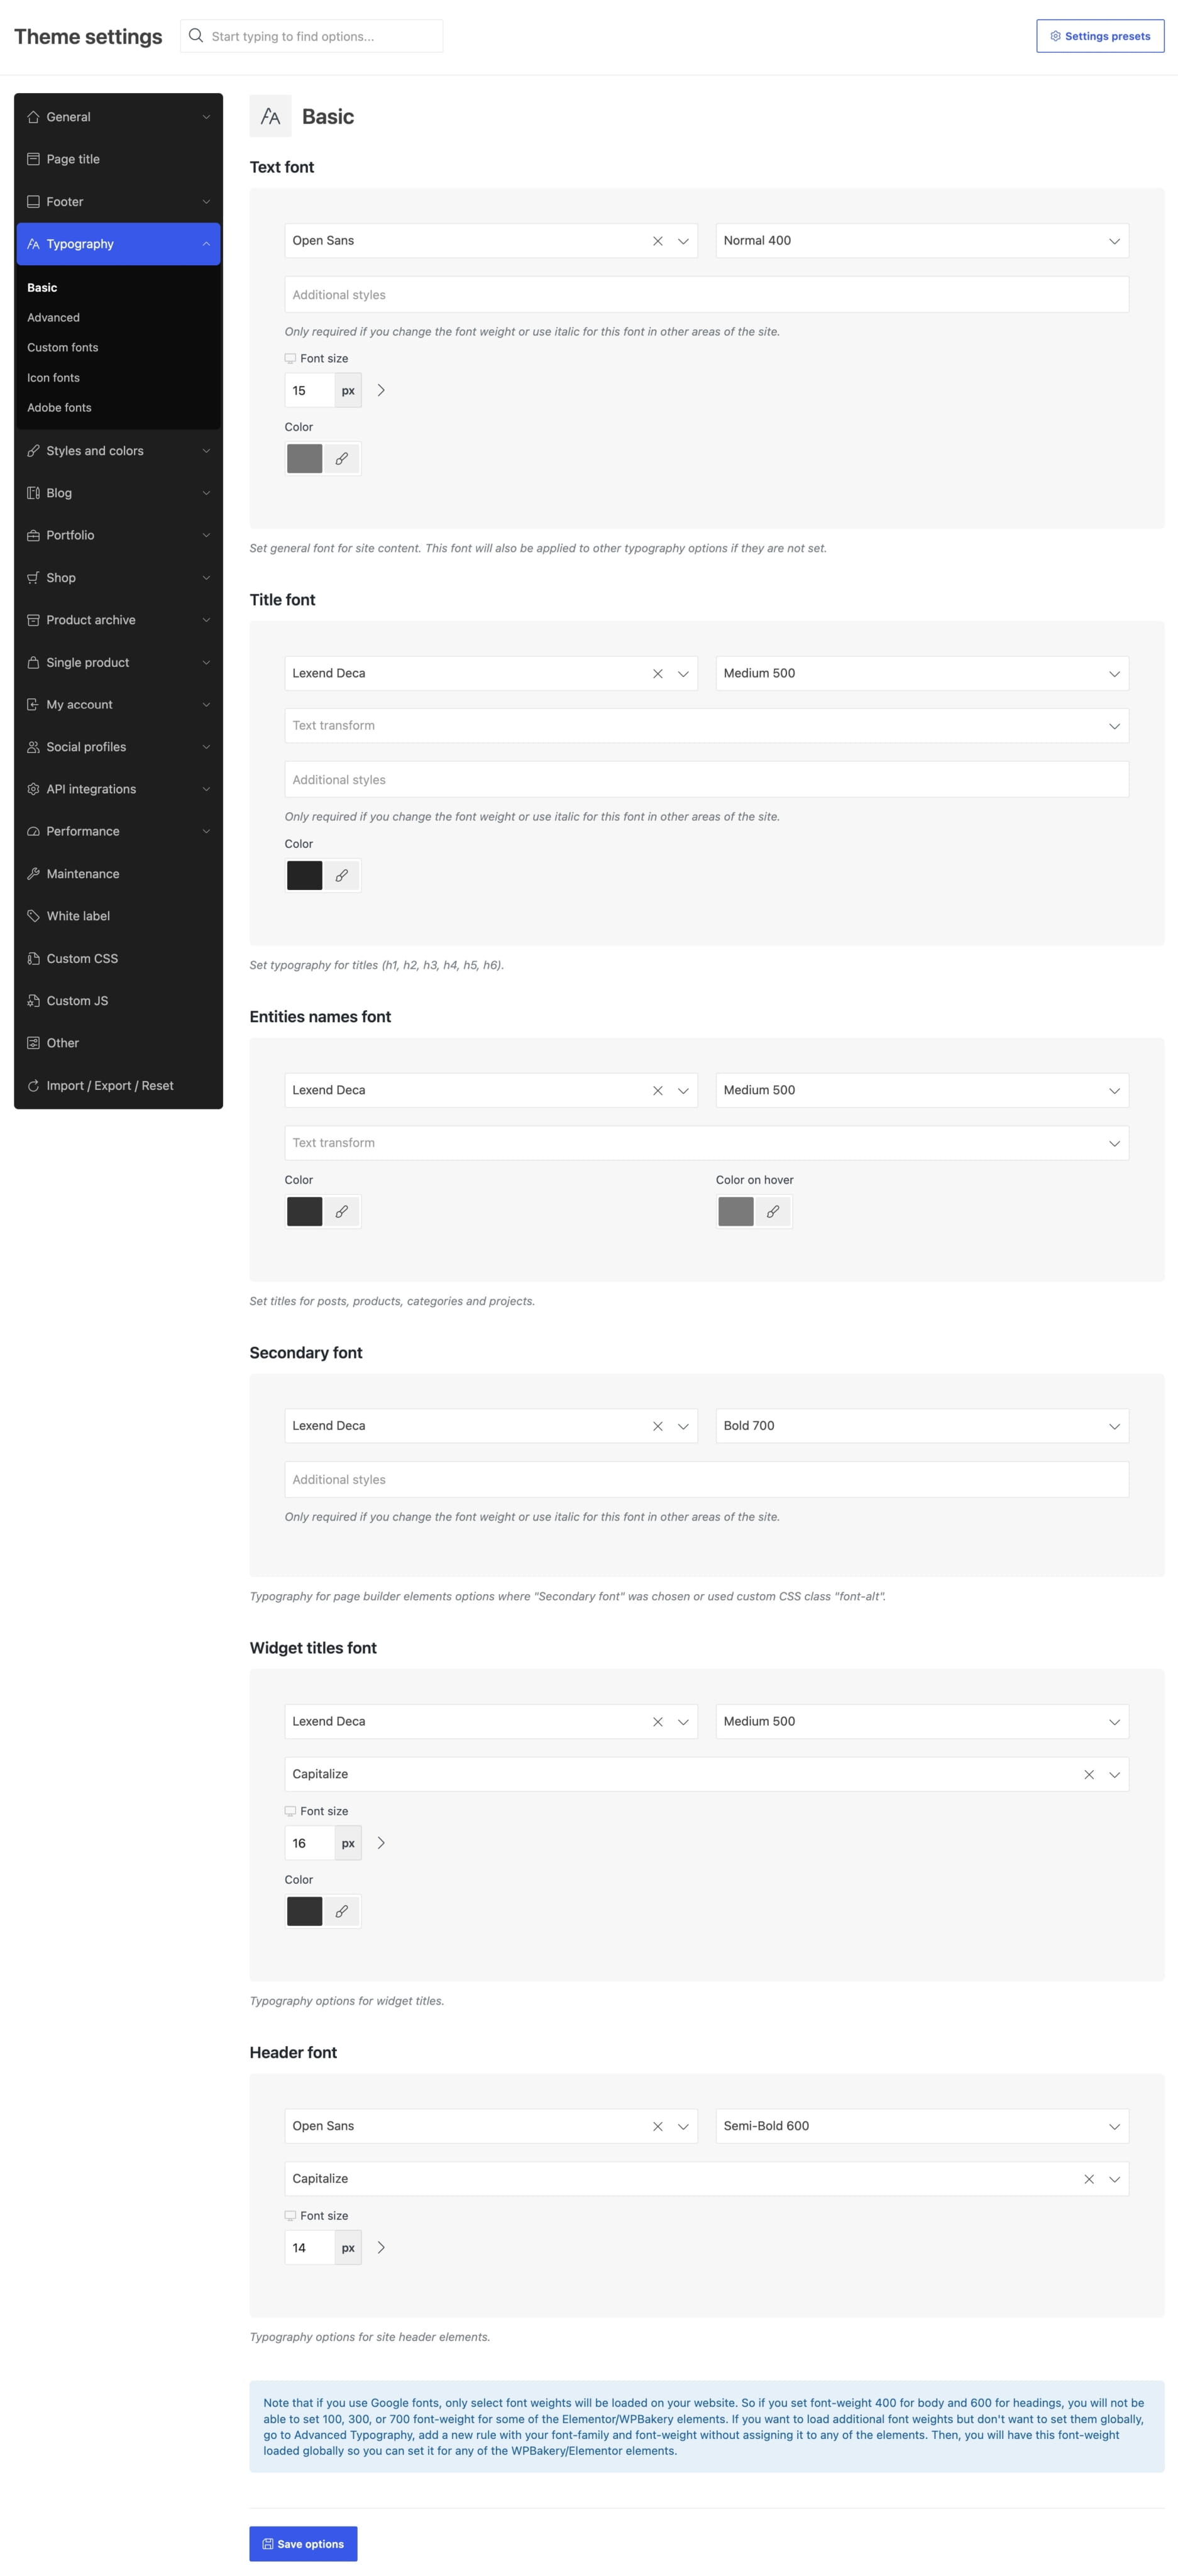
Navigate to Dashboard -> Theme Settings -> Typography -> Basic. The Basic section contains six typography groups. Each group provides only the controls supported by the elements it affects.
Text font
Sets the general font for website content. It is also used as the fallback for other typography groups when their font is not configured separately.
Title font
Controls the typography of heading elements from H1 to H6.
Entities names font
Controls the titles of posts, products, categories, and projects.
Secondary font
Defines the secondary font available in page builder element settings and for content that uses the font-alt CSS class.
Widget titles font
Controls the typography of widget titles.
Header font
Controls the typography of elements displayed in the website header.
Customize specific elements
Navigate to Dashboard -> Theme Settings -> Typography -> Advanced when a specific element should use typography that differs from the basic settings.
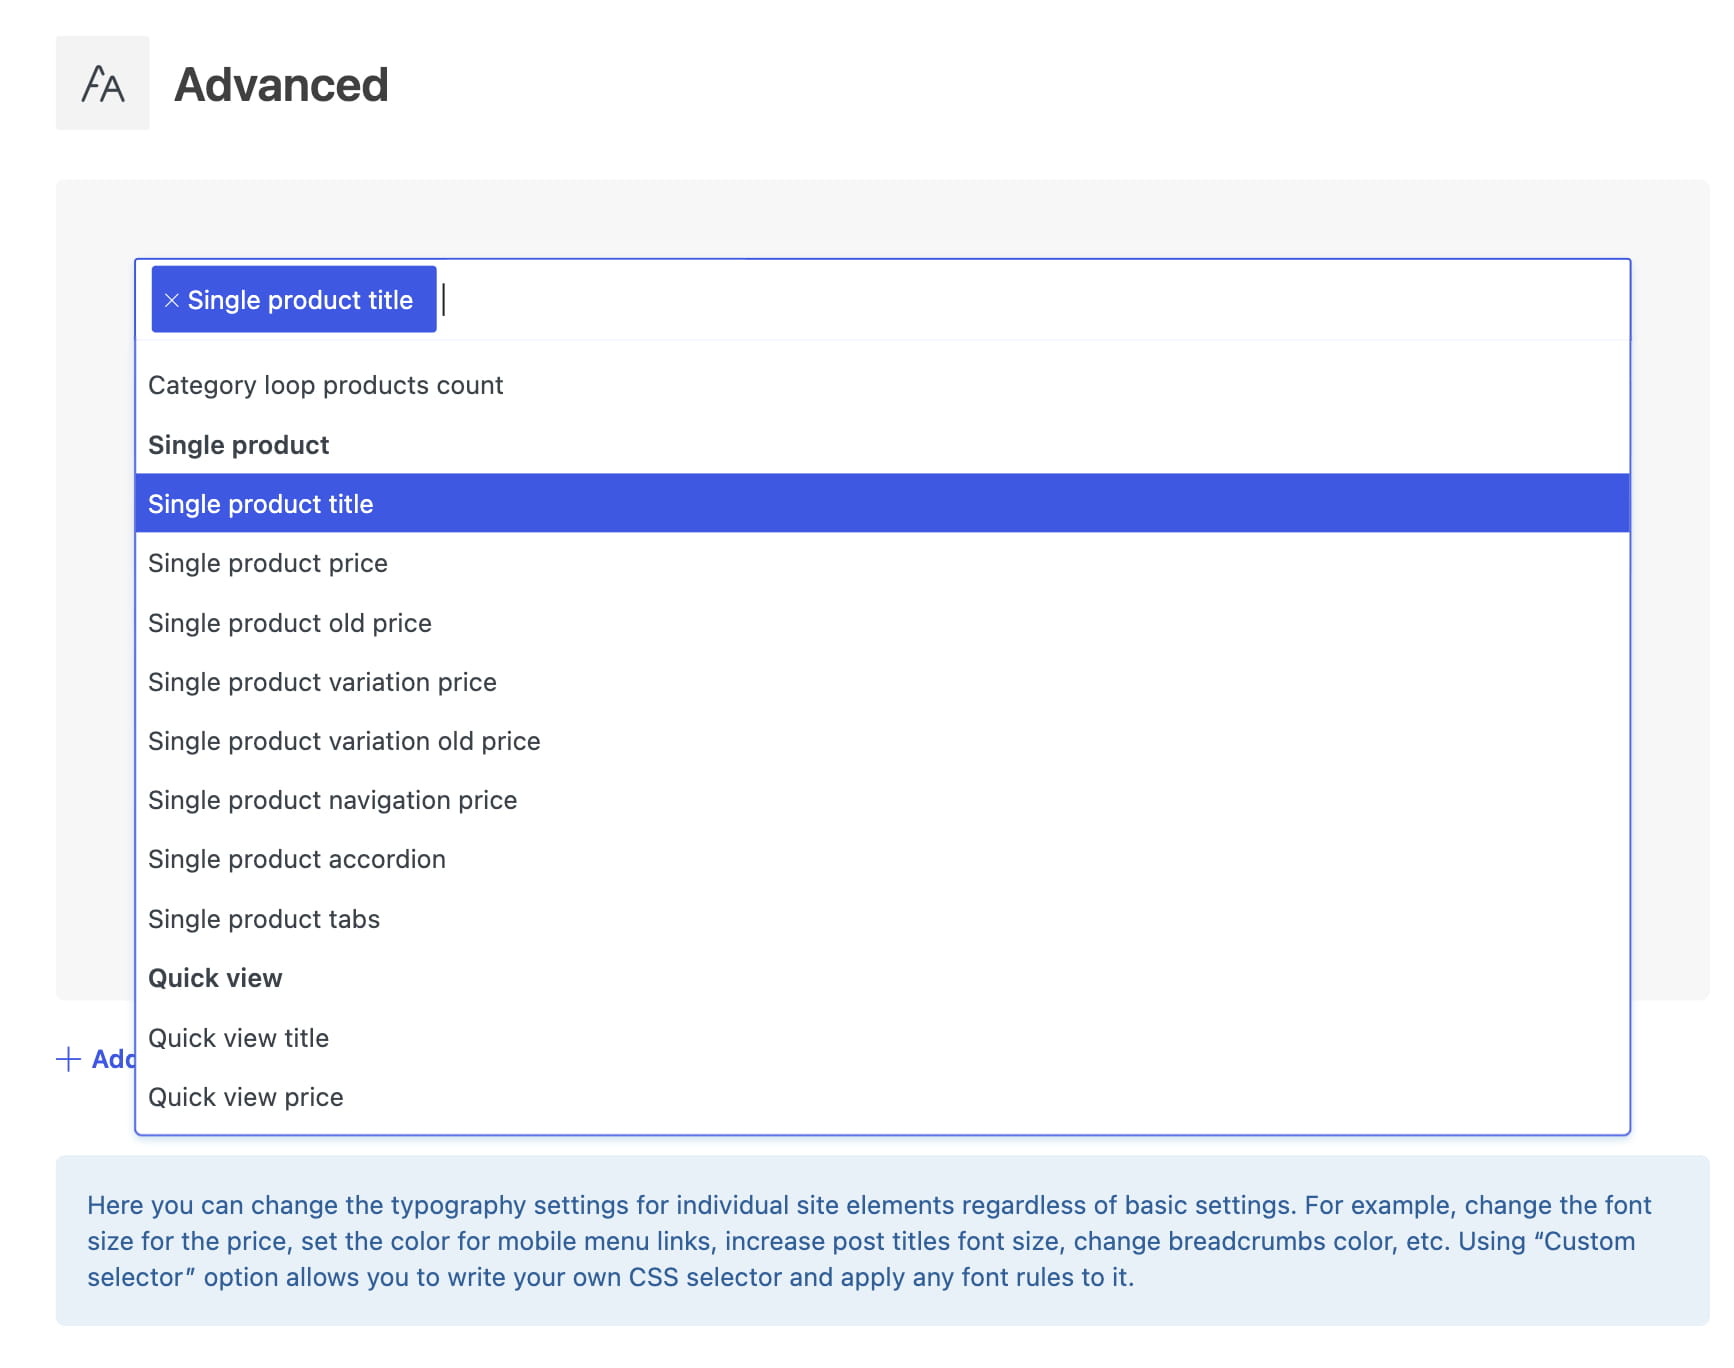
- In Assigned to elements, select one or more elements that should use the rule.
- Configure the font family, weight, style, responsive font size and line height, text transform, and normal or hover colors. Leave a field empty if the rule should not change that property.
- Click Add rule to create another typography rule for a different group of elements.
- Save the Theme Settings.
The predefined selectors are organized into groups for main and secondary navigation, mobile menus, page headings, products and categories, single products, quick view, blog content, single blog posts, widgets, and tables.
Use a custom selector
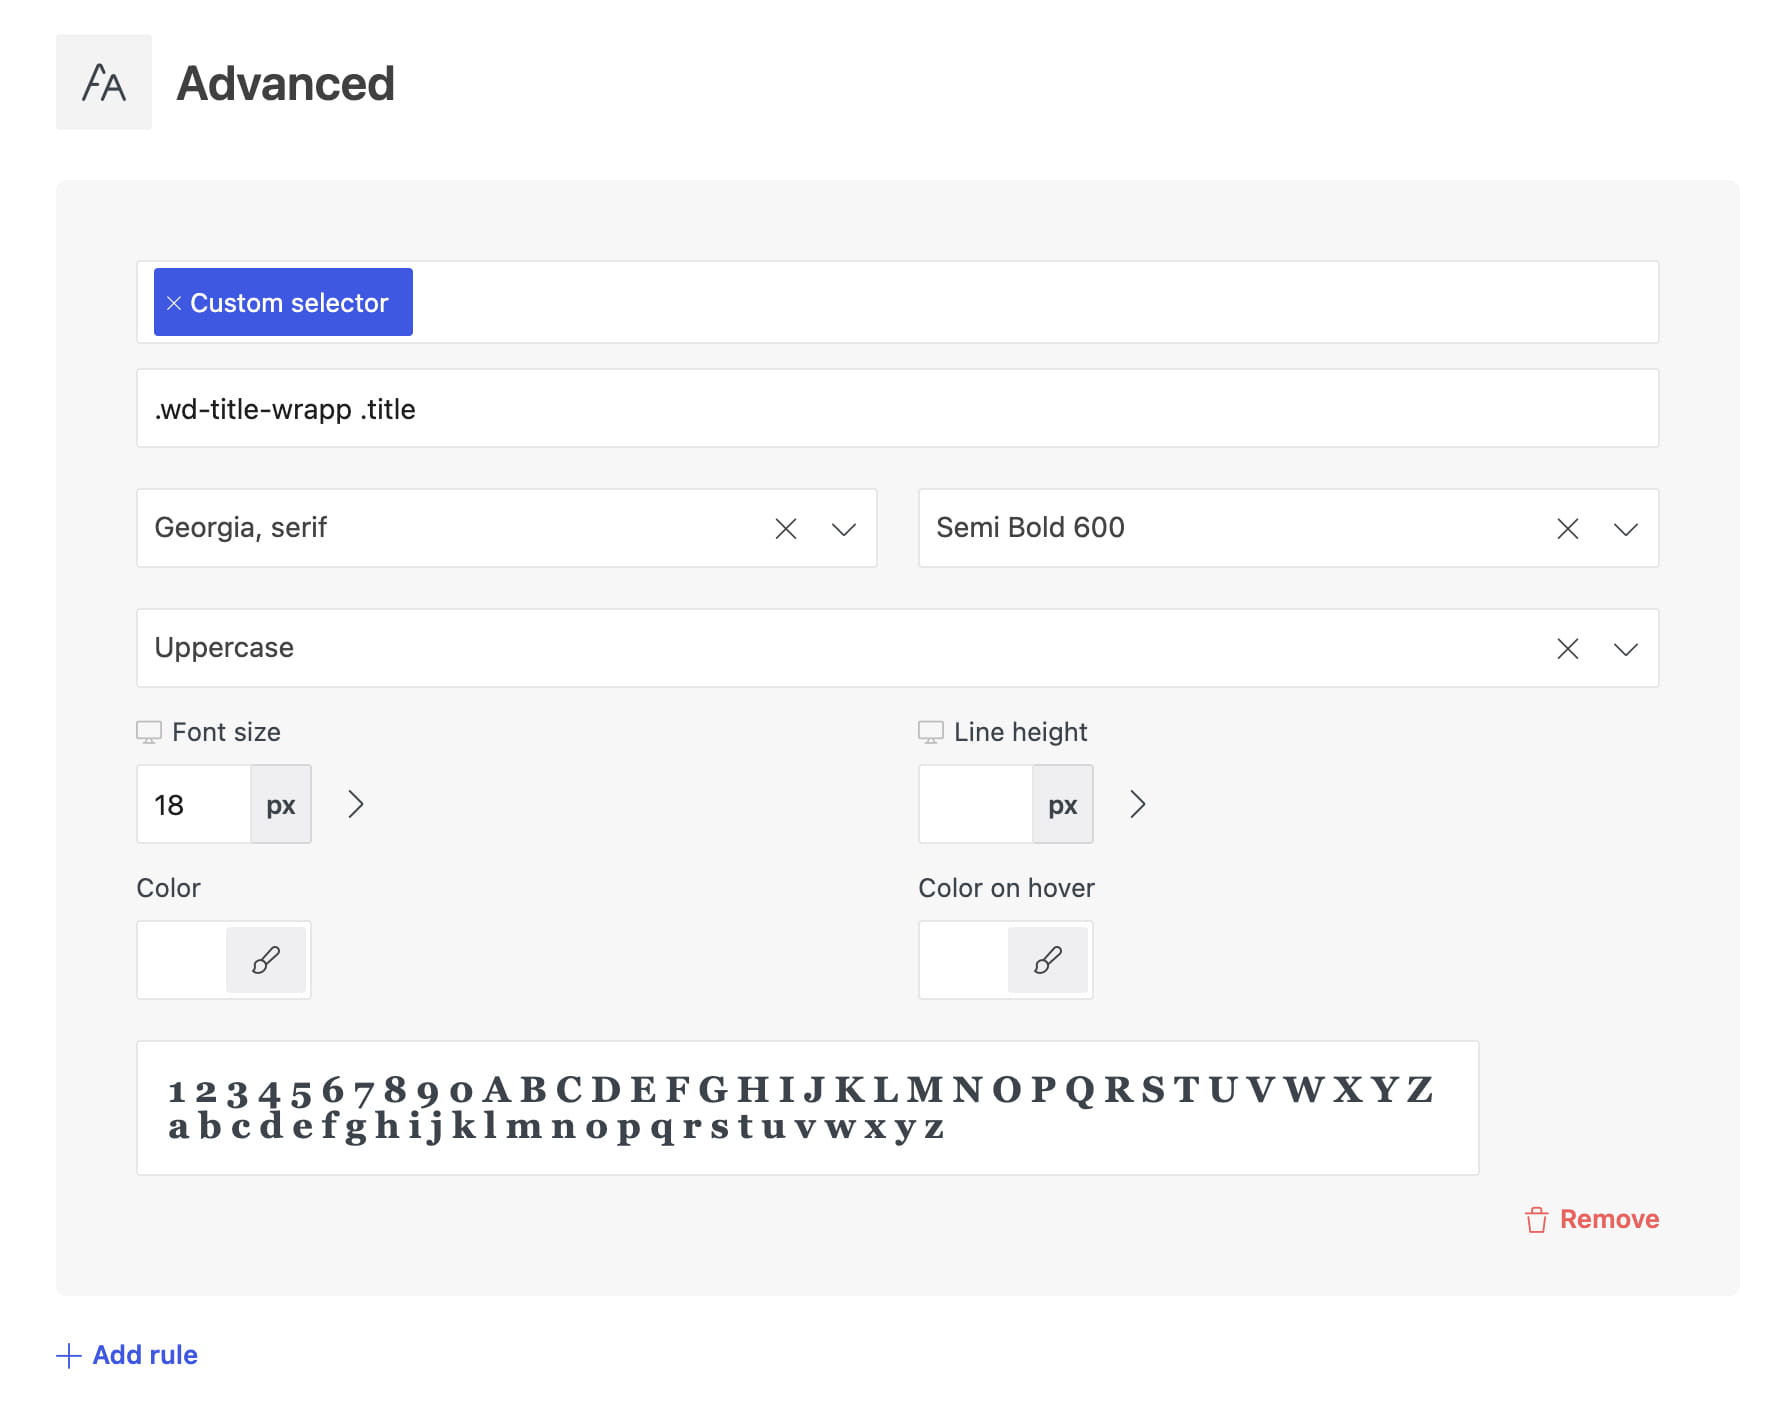
If the required element is not available in the predefined list, select Custom selector in Assigned to elements and enter its CSS selector.
For example, .woocommerce-billing-fields h3 targets the Billing details heading in the classic WooCommerce checkout form. Configure the required typography settings and save the Theme Settings.
Load additional Google Font weights
Only the Google Font weights selected in Theme Settings are loaded on the website. To make another weight available in Gutenberg, Elementor, or WPBakery without applying it globally, create an advanced typography rule, select the font family and weight, and leave Assigned to elements empty. Save the Theme Settings, and the selected weight will then be available for individual elements.
Don’t miss WoodMart updates
Receive feature updates, tutorials, and WoodMart news via email.
 Last updated: August 11, 2026