Translate with Loco Translate plugin
If your language is not included in our predefined translations, or you want to customize some texts and translate them differently, you can use the Loco Translate plugin. Loco Translate allows you to easily translate or change texts from our theme or plugins without any effort. All you need to do for that is simply follow the instructions below.
1. Installing the Loco Translate plugin
If you haven’t installed and enabled the Loco Translate plugin yet, please navigate to the Plugins > Add New from the WordPress Dashboard -> Search for “Loco Translate” and install it.

2. New custom translation
Follow the steps below to create a new translation to your language with Loco Translate:
Step 1. From Loco Translate -> Themes, you will see all installed themes. Click on the WoodMart theme to translate.

Step 2. On the preference page, click on the “New Language”.

Step 3. Select the language you want to translate from the “Choose a Language” option. Also, you need to choose a location from the “Choose a Location” option to save the translation file. We require that you select “Custom” languages/loco/themes for the location, this is protected folder which is safe from automatic updates and provides priority over other locations.
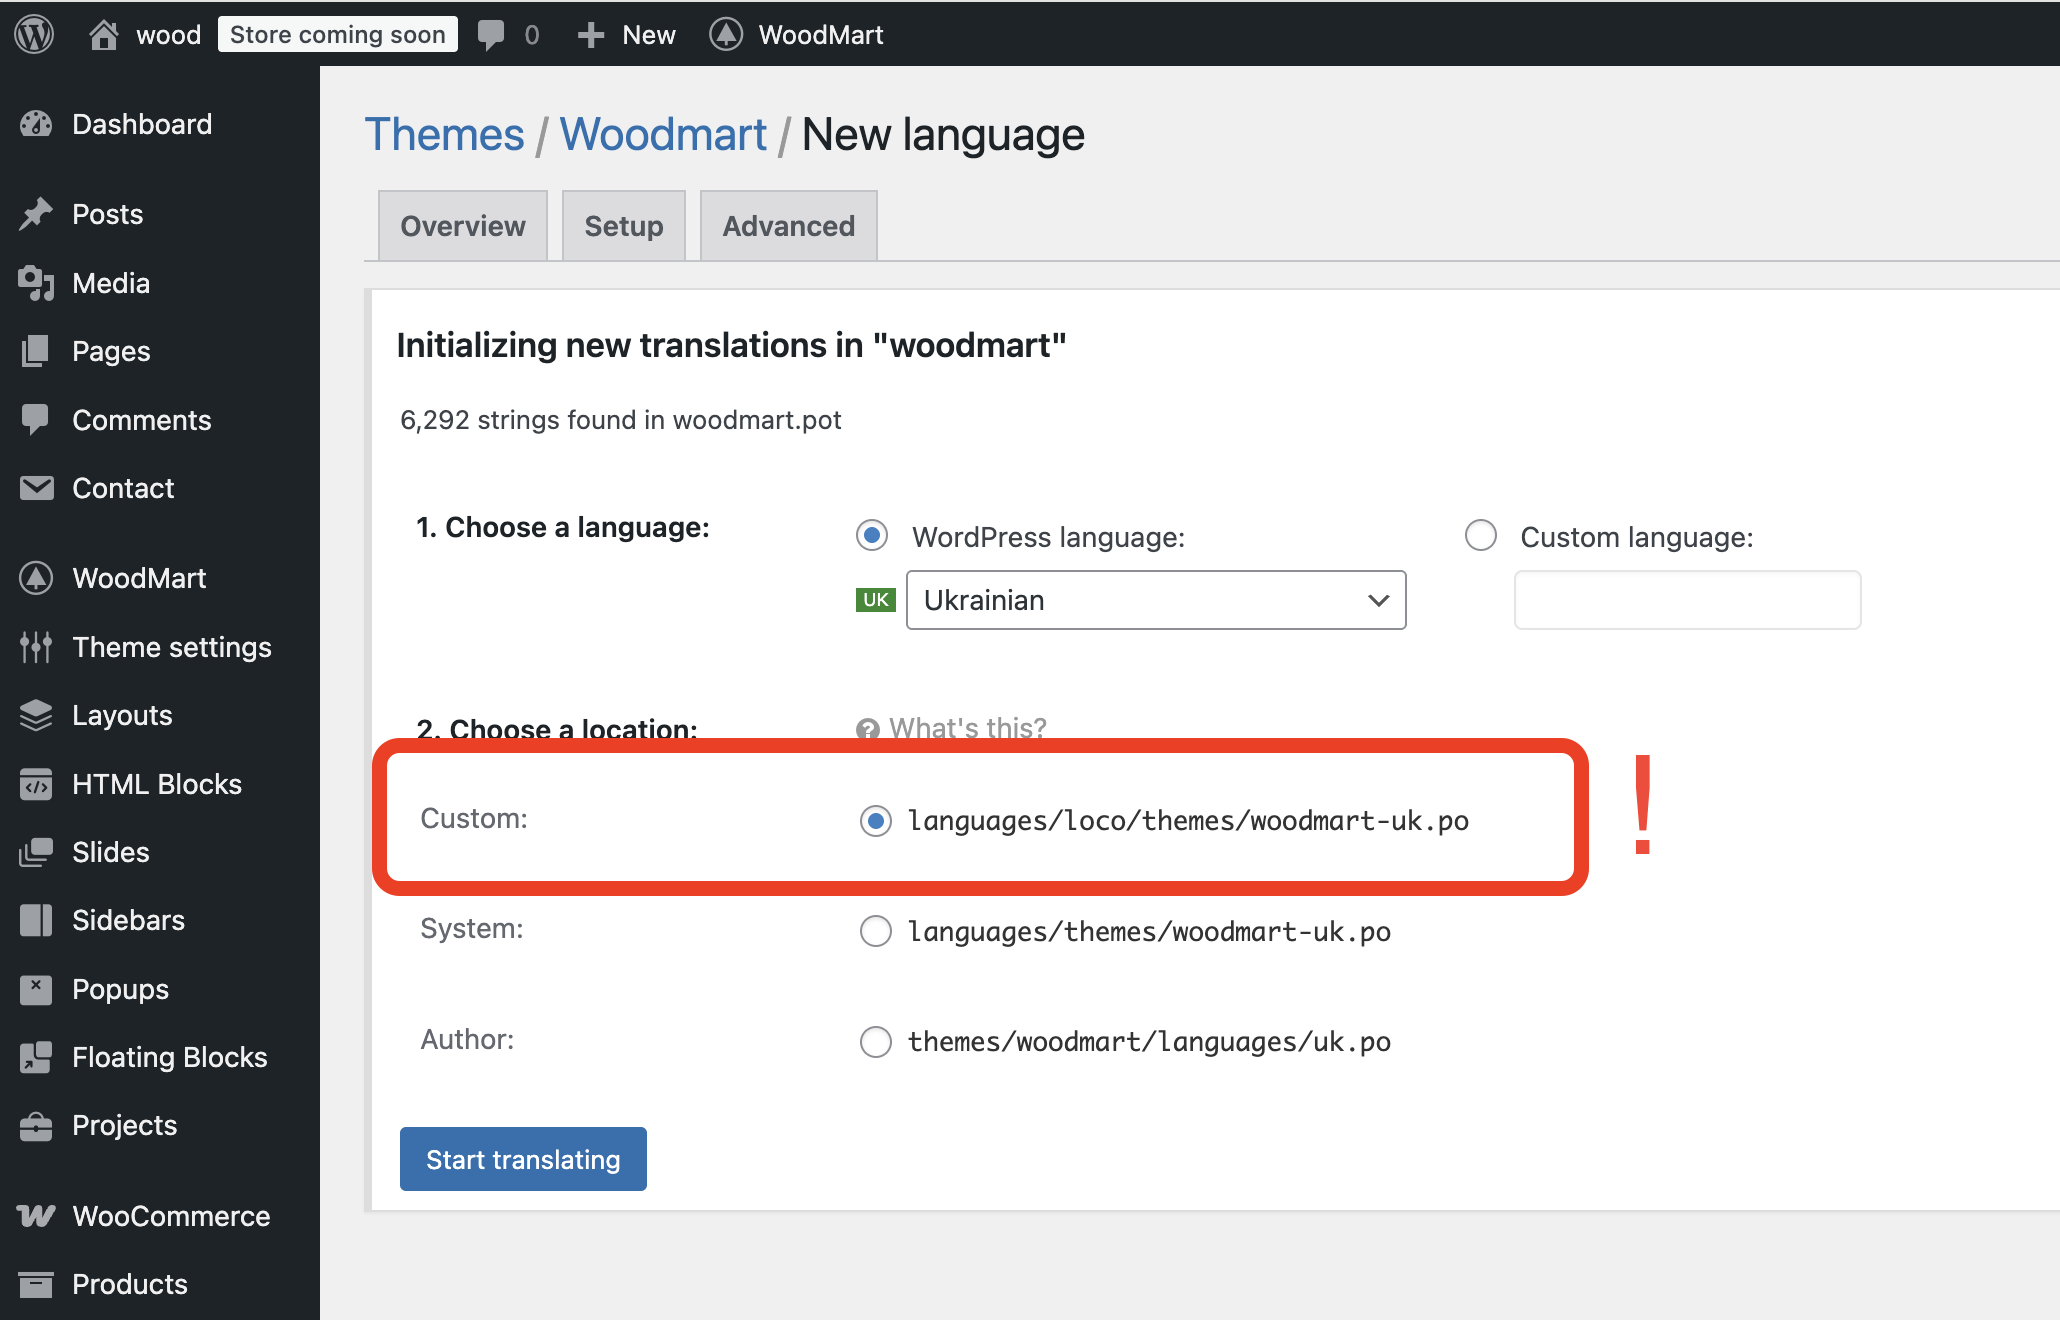
Click on the ‘Start Translating’ button after making your choices.
Step 4. Then select the English string at the top and enter your translation in the pane at the bottom.

Continue to translate as much as you like and when you’re ready click the “Save” button in the editor toolbar.
3. Customize predefined translation
If your preferred language is already available in our predefined translations and has been downloaded to your website, you can override it with your custom translation and make only minor modifications to the necessary texts.
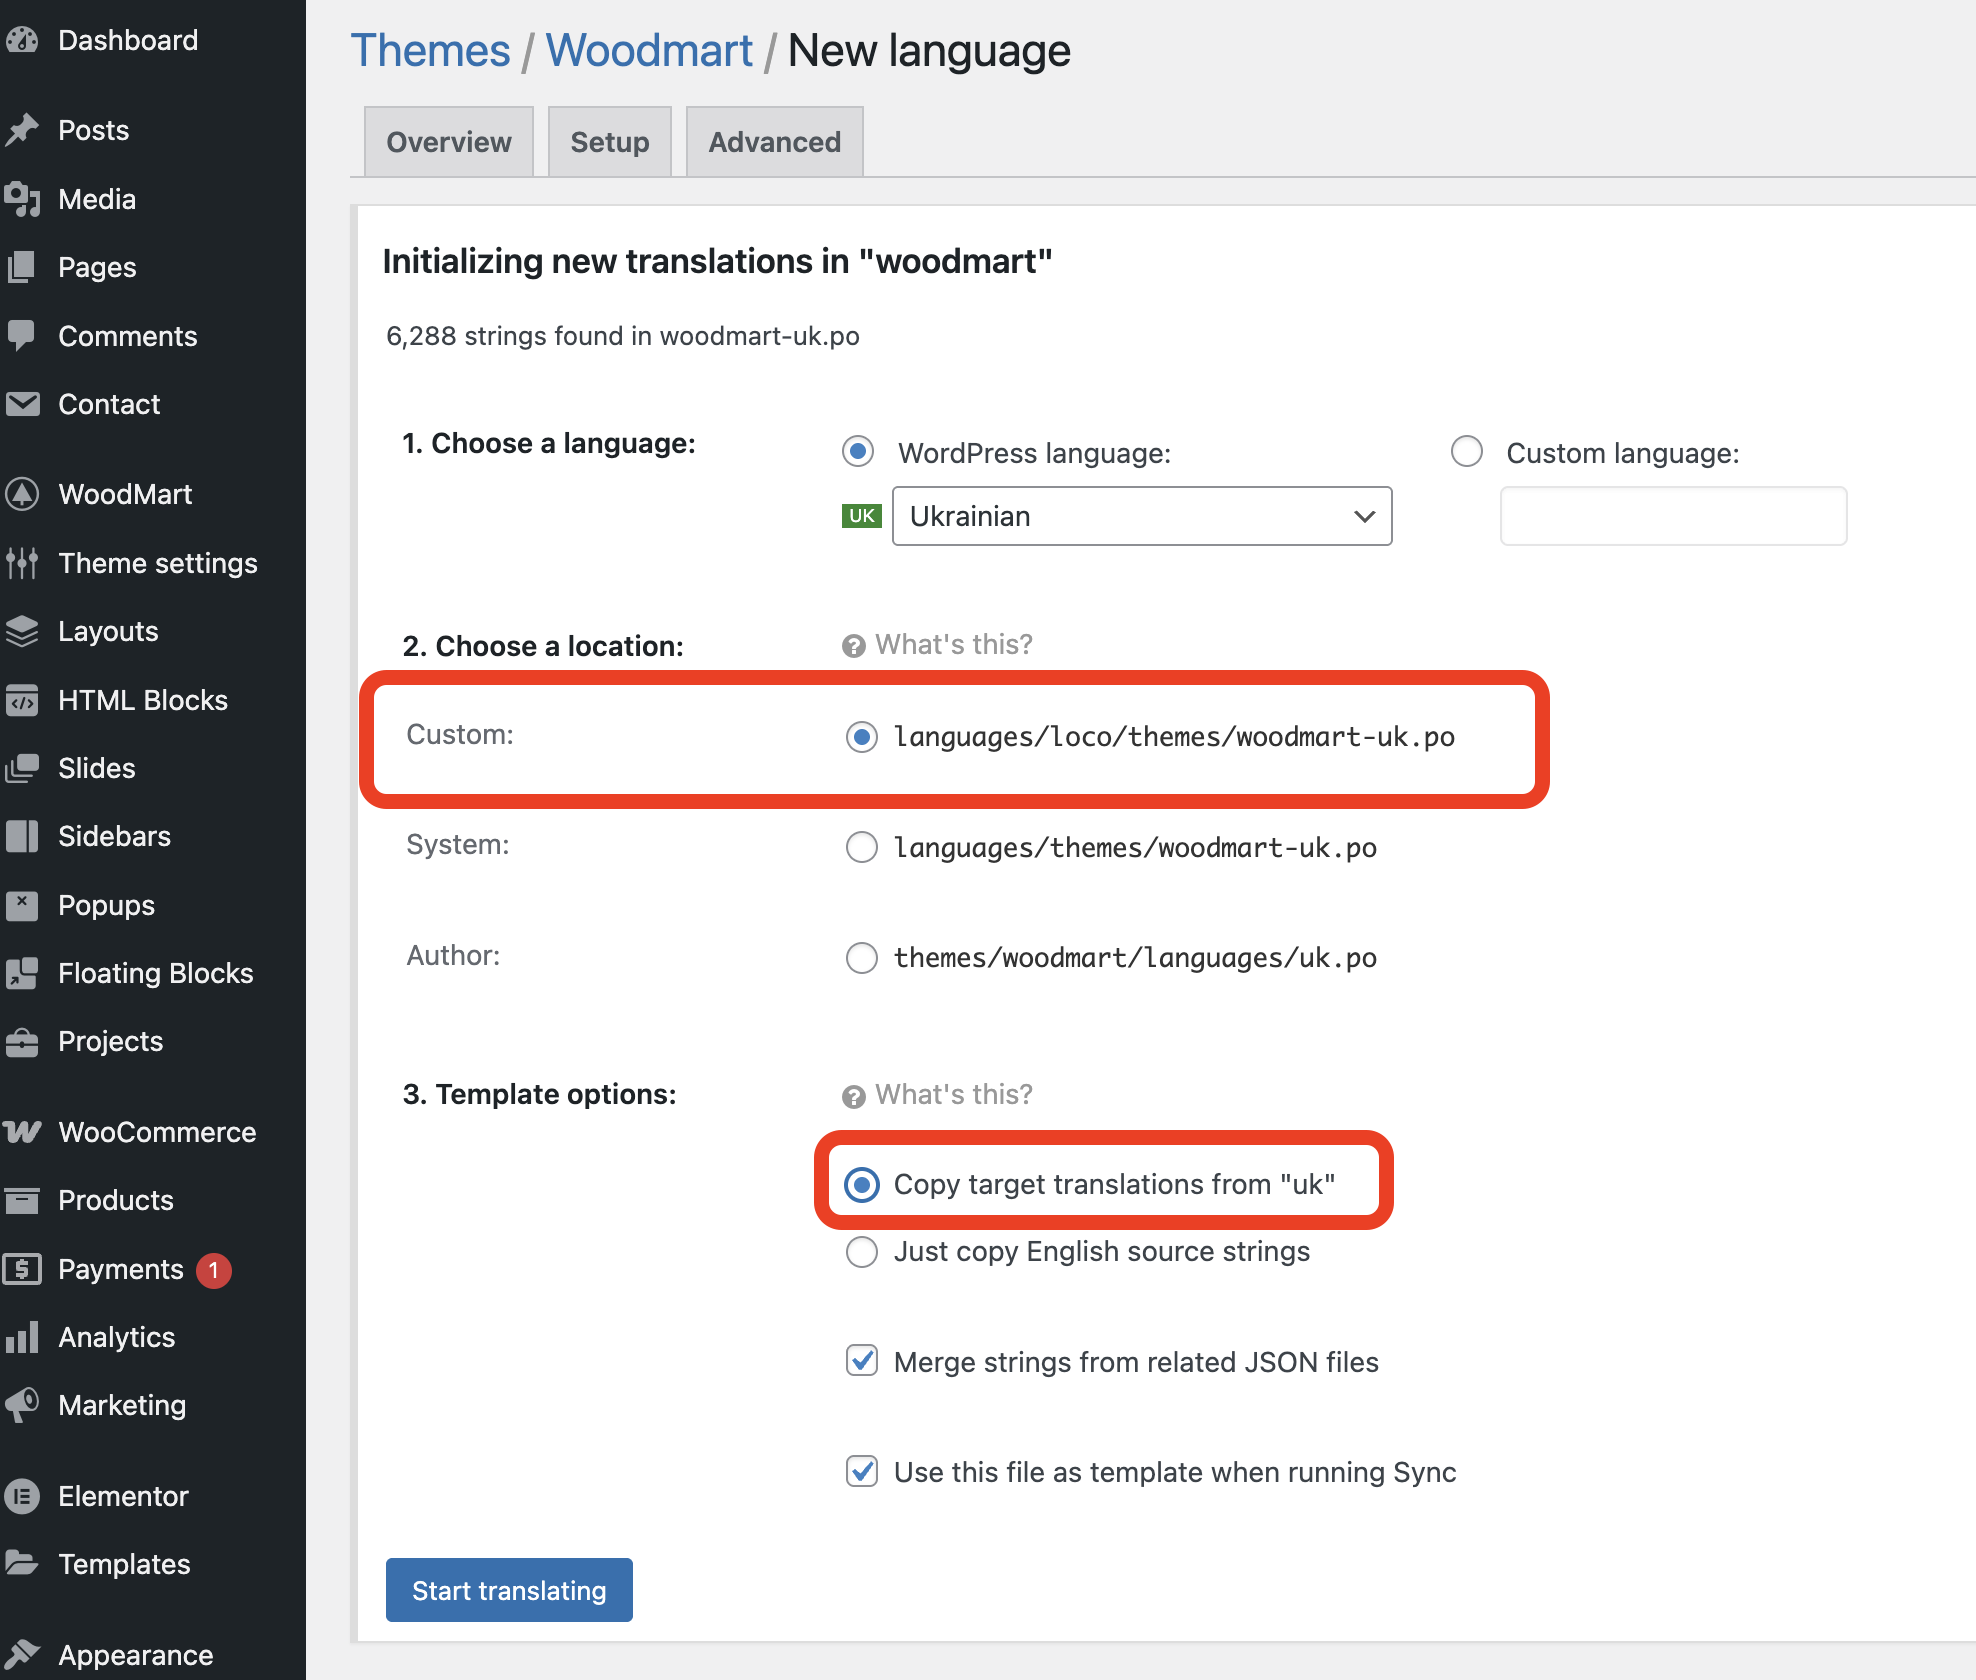
Step 1. From Loco Translate -> Themes, click on the WoodMart theme to translate. Select one of the predefined languages and click on the “Copy” button.

Step 2. On the next screen, it is important to use the “Custom” location in languages/loco/themes directory. Also, you need to “Copy target translations” to keep all the predefined translations and easily customize them.
Step 3. After creation of the translation file, you can search for texts you want to change and customize them. Then save the translation.

4. Syncrhonize the translation after update
After updating the theme and downloading the latest translations, you should synchronize your custom translation. This process will scan for new or updated strings from the theme’s translation files or the original source, allowing you to translate them manually into your language.
To do this, go to Loco Translate → Themes → WoodMart, choose your custom translation, and click the “Sync” button.
Depending on what your custom translation is based on, the synchronization will use either the woodmart/languages/woodmart.pot file or the file located in wp-content/languages/themes/woodmart-*_*.po.

 Last updated: November 27, 2025