How to configure Google login
In this article, we will provide you with step-by-step instructions on how to configure your Google APP and enable Google login on your website with our WoodMart theme.
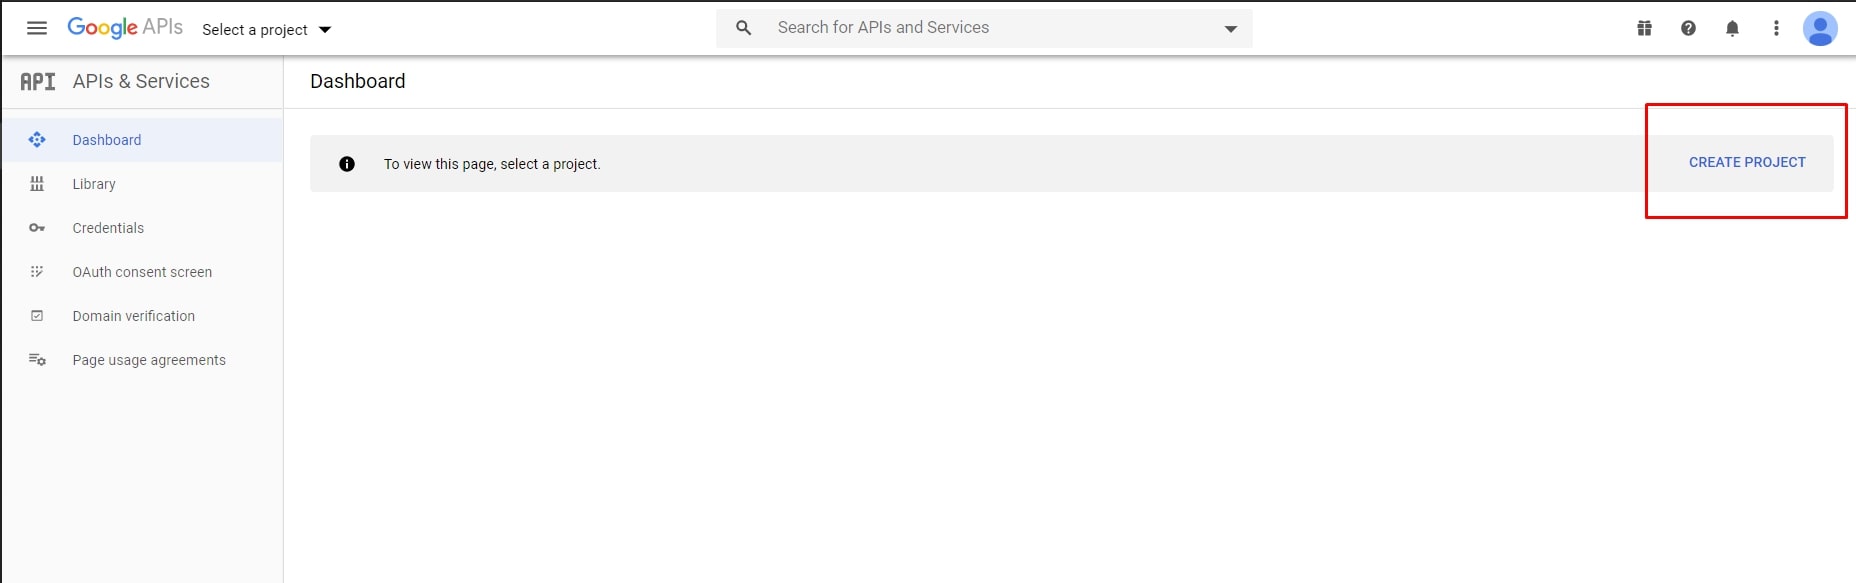
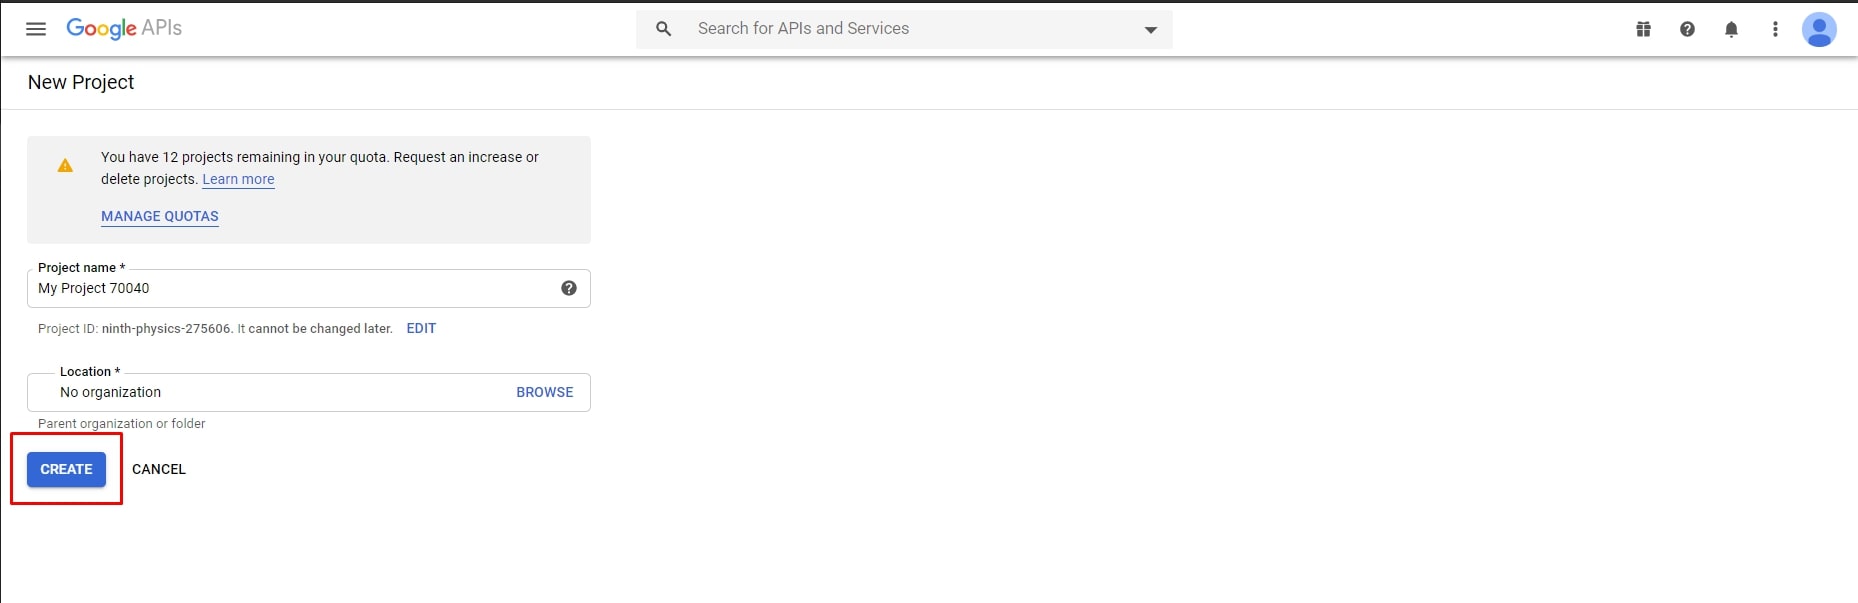
- You need to go to https://console.developers.google.com/apis/dashboard/ and create a new project for your website
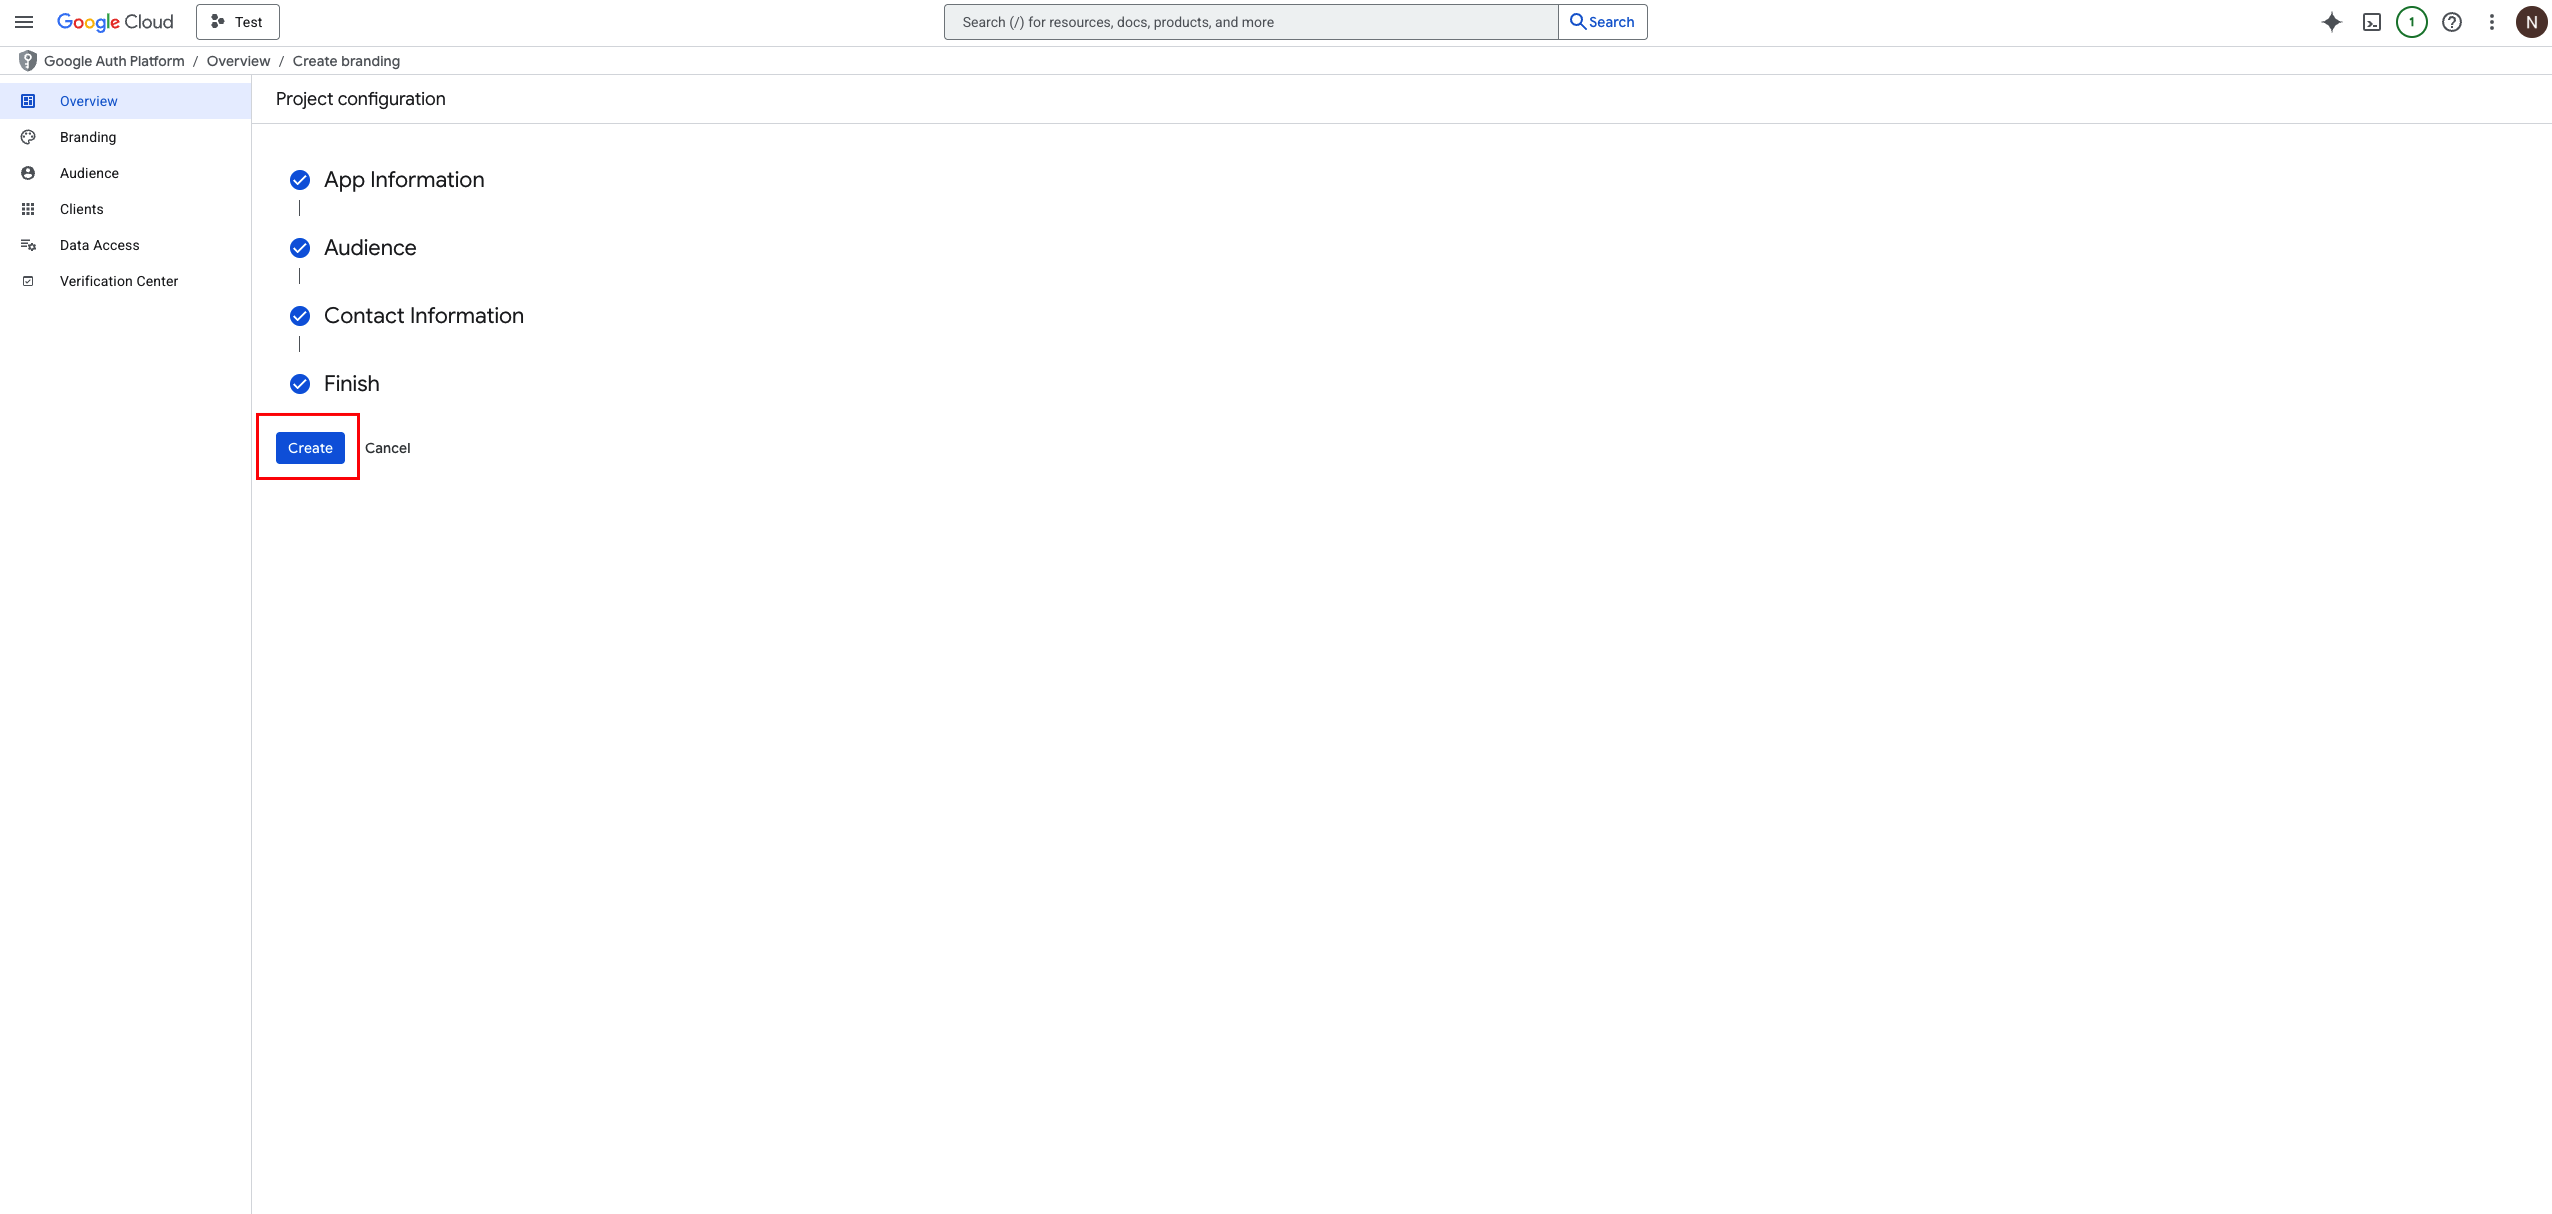
- Then open the Overview section in your APP’s dashboard and configure the “Audience” as an External type

Fill the “Contact information” section and finish the configuration.
Adjust the “Branding” page as shown below:

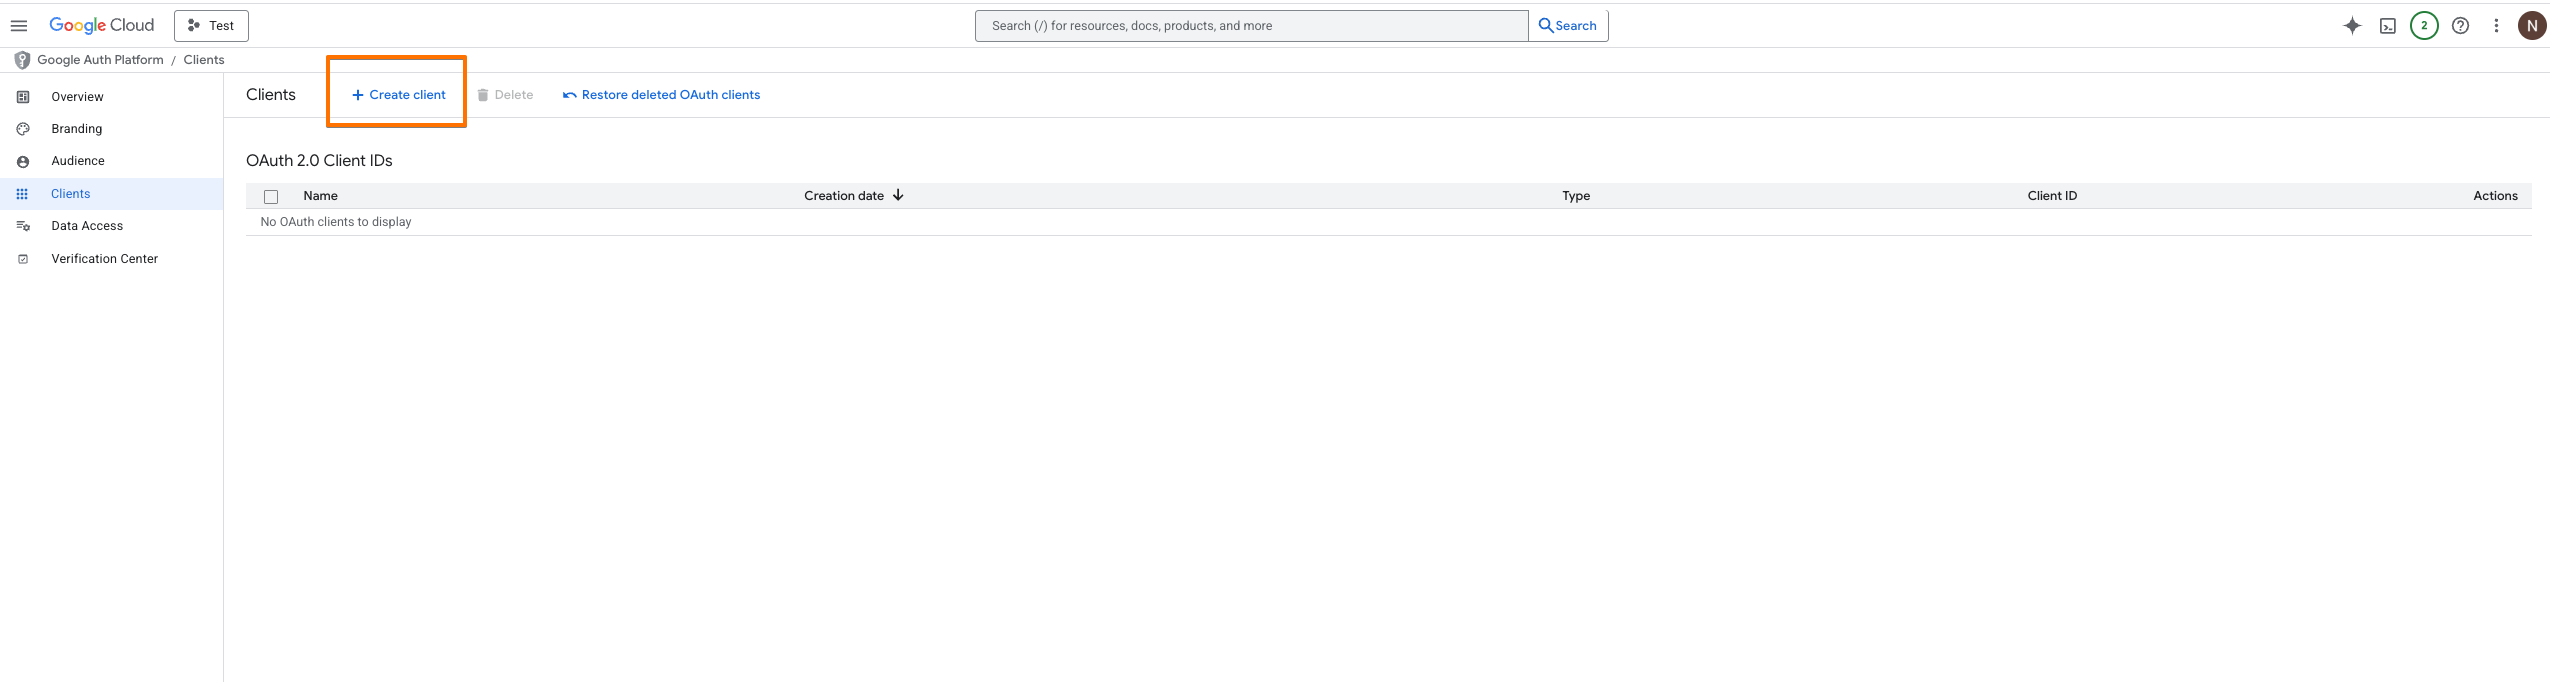
- Go ahead and create new OAuth 2.0 credentials for your web application in the “Clients” tab as per the screenshots:

- When you create new credentials you will see a popup with your client’s ID and secret word. You need to copy them and paste them into your WordPress Dashboard -> Theme Settings -> API integrations -> Social authentication google fields


After all these steps, you should be able to log in to your website using the Google button.
 Last updated: October 21, 2025