
Create mega menu
WoodMart mega menus extend standard WordPress navigation with wide dropdowns that can contain columns, images, banners, product grids, categories, text, and other page builder content. The dropdown content is created as an HTML Block and assigned to a parent menu item.
How mega menus work
Create or select a WordPress menu in Appearance -> Menus and add the parent item that will open the mega menu. If you need help creating a menu, adding menu items, or organizing parent and child items, see the official WordPress Appearance Menus Screen guide.
The WoodMart theme offers flexible menu display options, allowing you to create multiple menus and place them anywhere on your site.
- Main menu: displayed in the header.
- Mobile menu: displayed on mobile devices.
For detailed information about menu placement options, see Adding a menu to the site.
The same menu can be assigned to both locations, or you can create separate menus for each. WoodMart also allows you to display menus in custom locations throughout your site.
You can build mega menu content with Gutenberg, Elementor, or WPBakery, depending on the page builder configured for your website. For a general introduction to reusable content, see the HTML Blocks guide.
Create a mega menu
Step 1. Create an HTML Block
- Navigate to Dashboard -> HTML Blocks -> Add New.
- Give the block a descriptive title.
- Create the dropdown content with Gutenberg, Elementor, or WPBakery.
- Publish the HTML Block.
Step 2. Configure the parent menu item
- Navigate to Appearance -> Menus.
- Select the menu you want to edit.
- Expand the parent menu item that should open the mega menu.
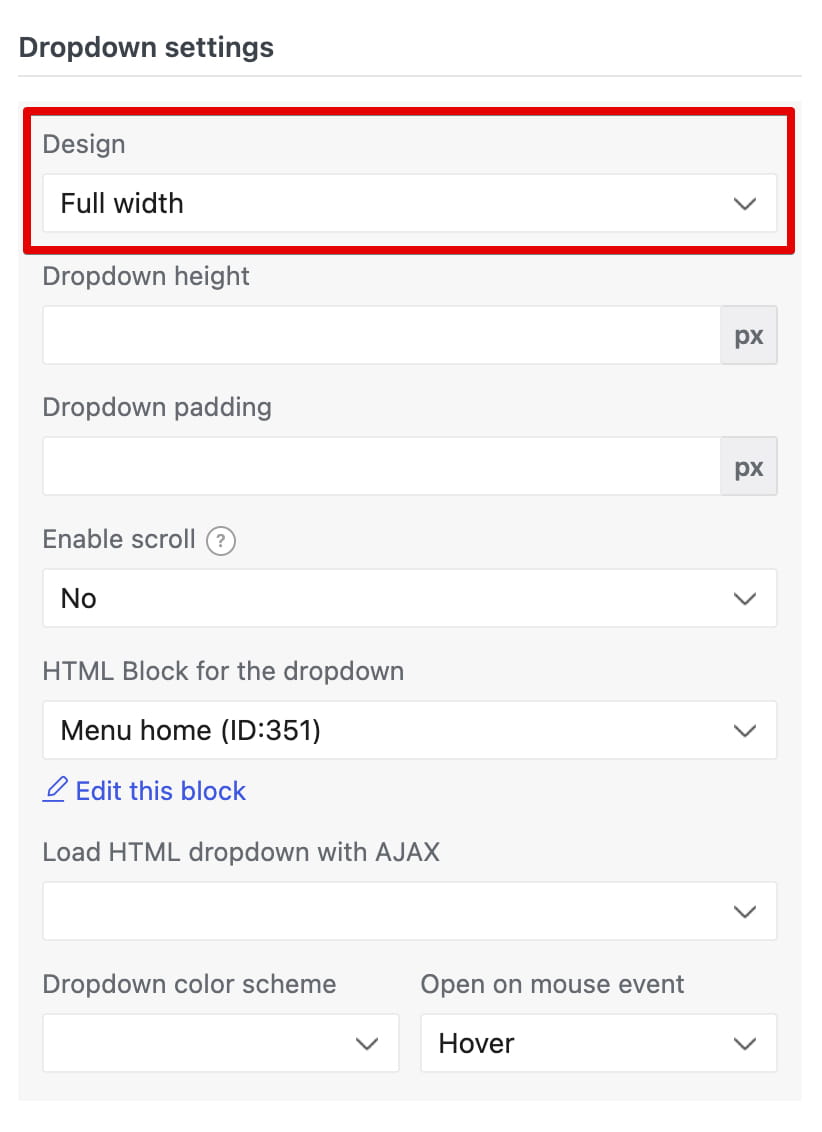
- In the Design field, select Full width, Full height, Set sizes, or Aside.
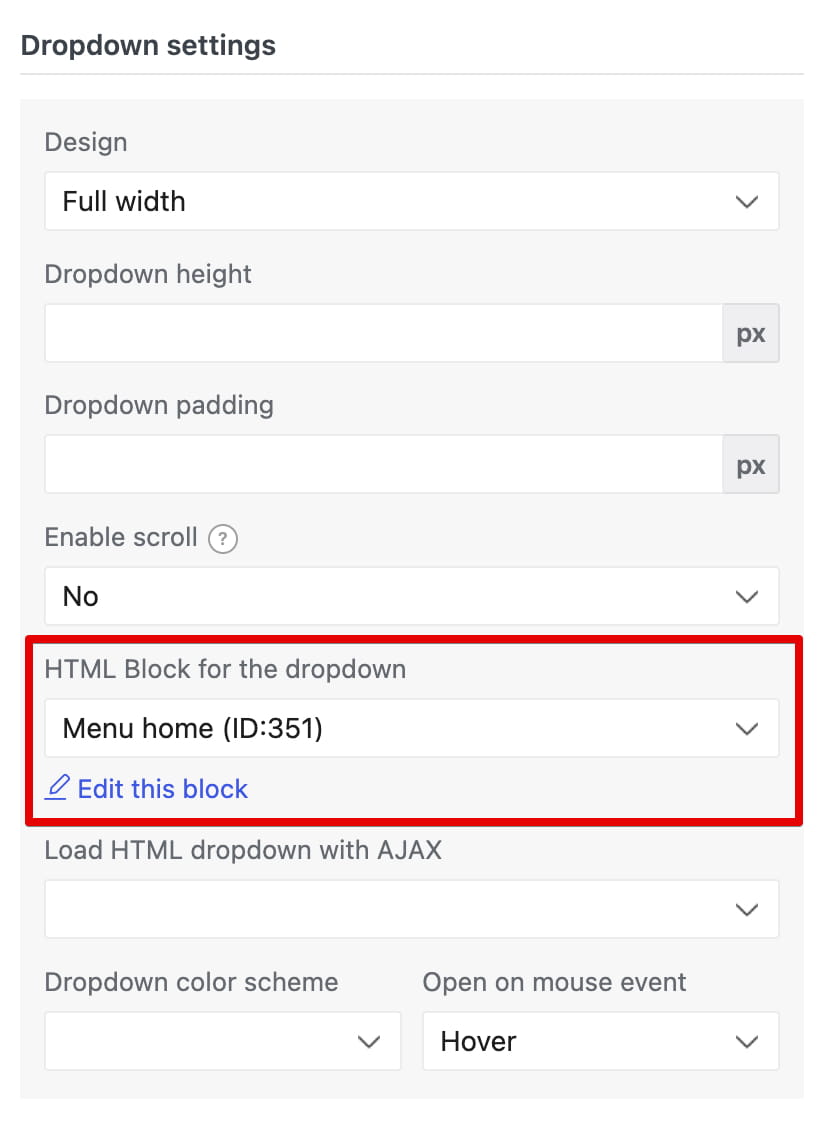
Step 3. Select the HTML Block
- Find the HTML Block for the dropdown field.
- Select the HTML Block created in Step 1.
- Configure any additional dropdown options.
- Click Save Menu.
Mega menu design options
- Default: displays the standard WordPress dropdown and does not use an HTML Block.
- Full width: creates a wide dropdown that extends across the available header width.
- Full height: creates a vertically expanded dropdown aligned to the side of the menu.
- Set sizes: lets you define custom dropdown dimensions.
- Aside: displays navigation items on one side and their dropdown content as panels. You can see this design on the MegaMarket demo.
The HTML Block for the dropdown field is available for all non-default designs.
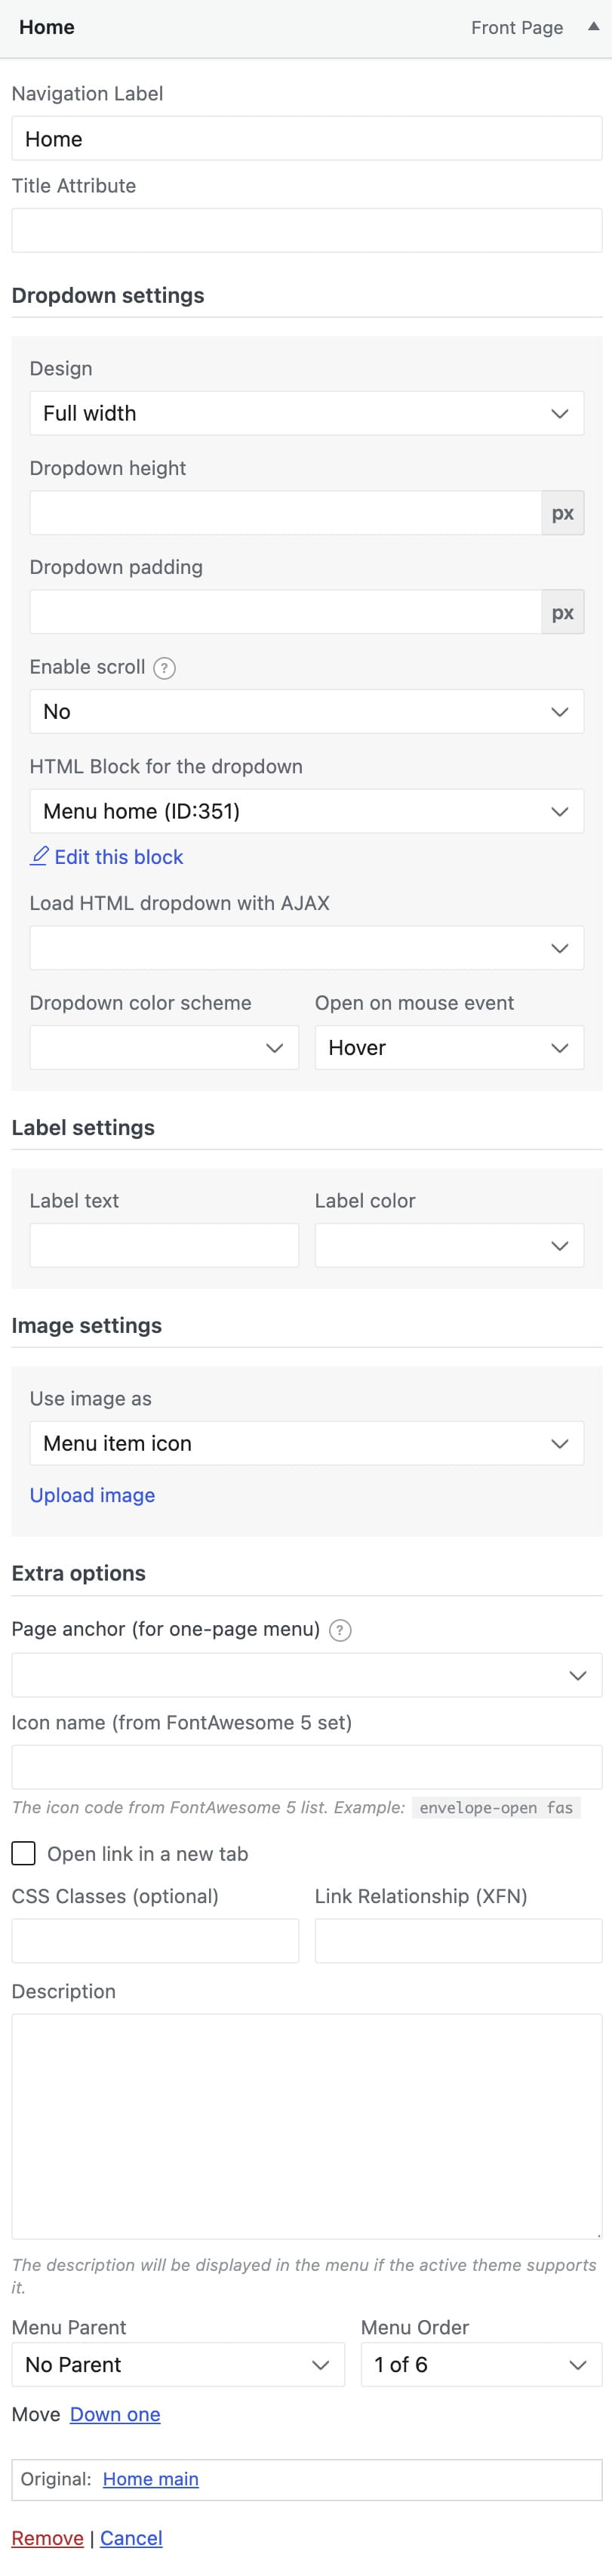
Dropdown settings
- Aside style: selects the default Aside design or the version with a background.
- Dropdown width: sets a custom width in pixels when the selected design supports it.
- Dropdown height: sets the dropdown height in pixels.
- Dropdown padding: controls the internal spacing around the dropdown content.
- Enable scroll: limits the dropdown to the specified height and adds scrolling when the content is taller. When disabled, the height acts as a minimum value.
- Load HTML dropdown with AJAX: loads the assigned HTML Block when the dropdown is requested instead of including it in the initial page markup.
- Dropdown color scheme: switches the text and icon colors between light and dark schemes.
- Open on mouse event: opens the dropdown on hover or click.
The color scheme does not create a background automatically. Choose a scheme that provides sufficient contrast with the background configured in the HTML Block or menu item settings.
Labels and images
- Label text: adds a short badge such as “New” or “Sale” next to the menu item.
- Label color: selects the badge color.
- Upload image: adds an image to the menu item.
- Use image as: displays the uploaded image as a menu item icon or as the dropdown background.
Performance optimization
Enable Load HTML dropdown with AJAX for large mega menus with many products, images, or nested elements. This can reduce the initial page markup because the HTML Block is loaded only when the dropdown is requested.
After enabling AJAX loading, test the menu on desktop and mobile devices to make sure the first interaction and all dropdown content work as expected.
Page anchors and custom CSS classes
Enable Page anchor (for one-page menu) when the menu item should scroll to a section on the same page. Set the menu item URL to a value such as /#contact, where contact matches the target section ID.
Use the standard WordPress CSS Classes field to add a custom class to a menu item. If this field is hidden, open Screen Options at the top of the Menus screen and enable CSS Classes.
Video tutorials
Gutenberg
Elementor
WPBakery
Don’t miss WoodMart updates
Receive feature updates, tutorials, and WoodMart news via email.
 Last updated: August 6, 2026