
Add a banner to a product category page
You can add a banner to a product category page by creating the banner as an HTML Block and displaying it through the category description. HTML Blocks can be built with Gutenberg, Elementor, or WPBakery and may contain images, text, buttons, sliders, and other elements.
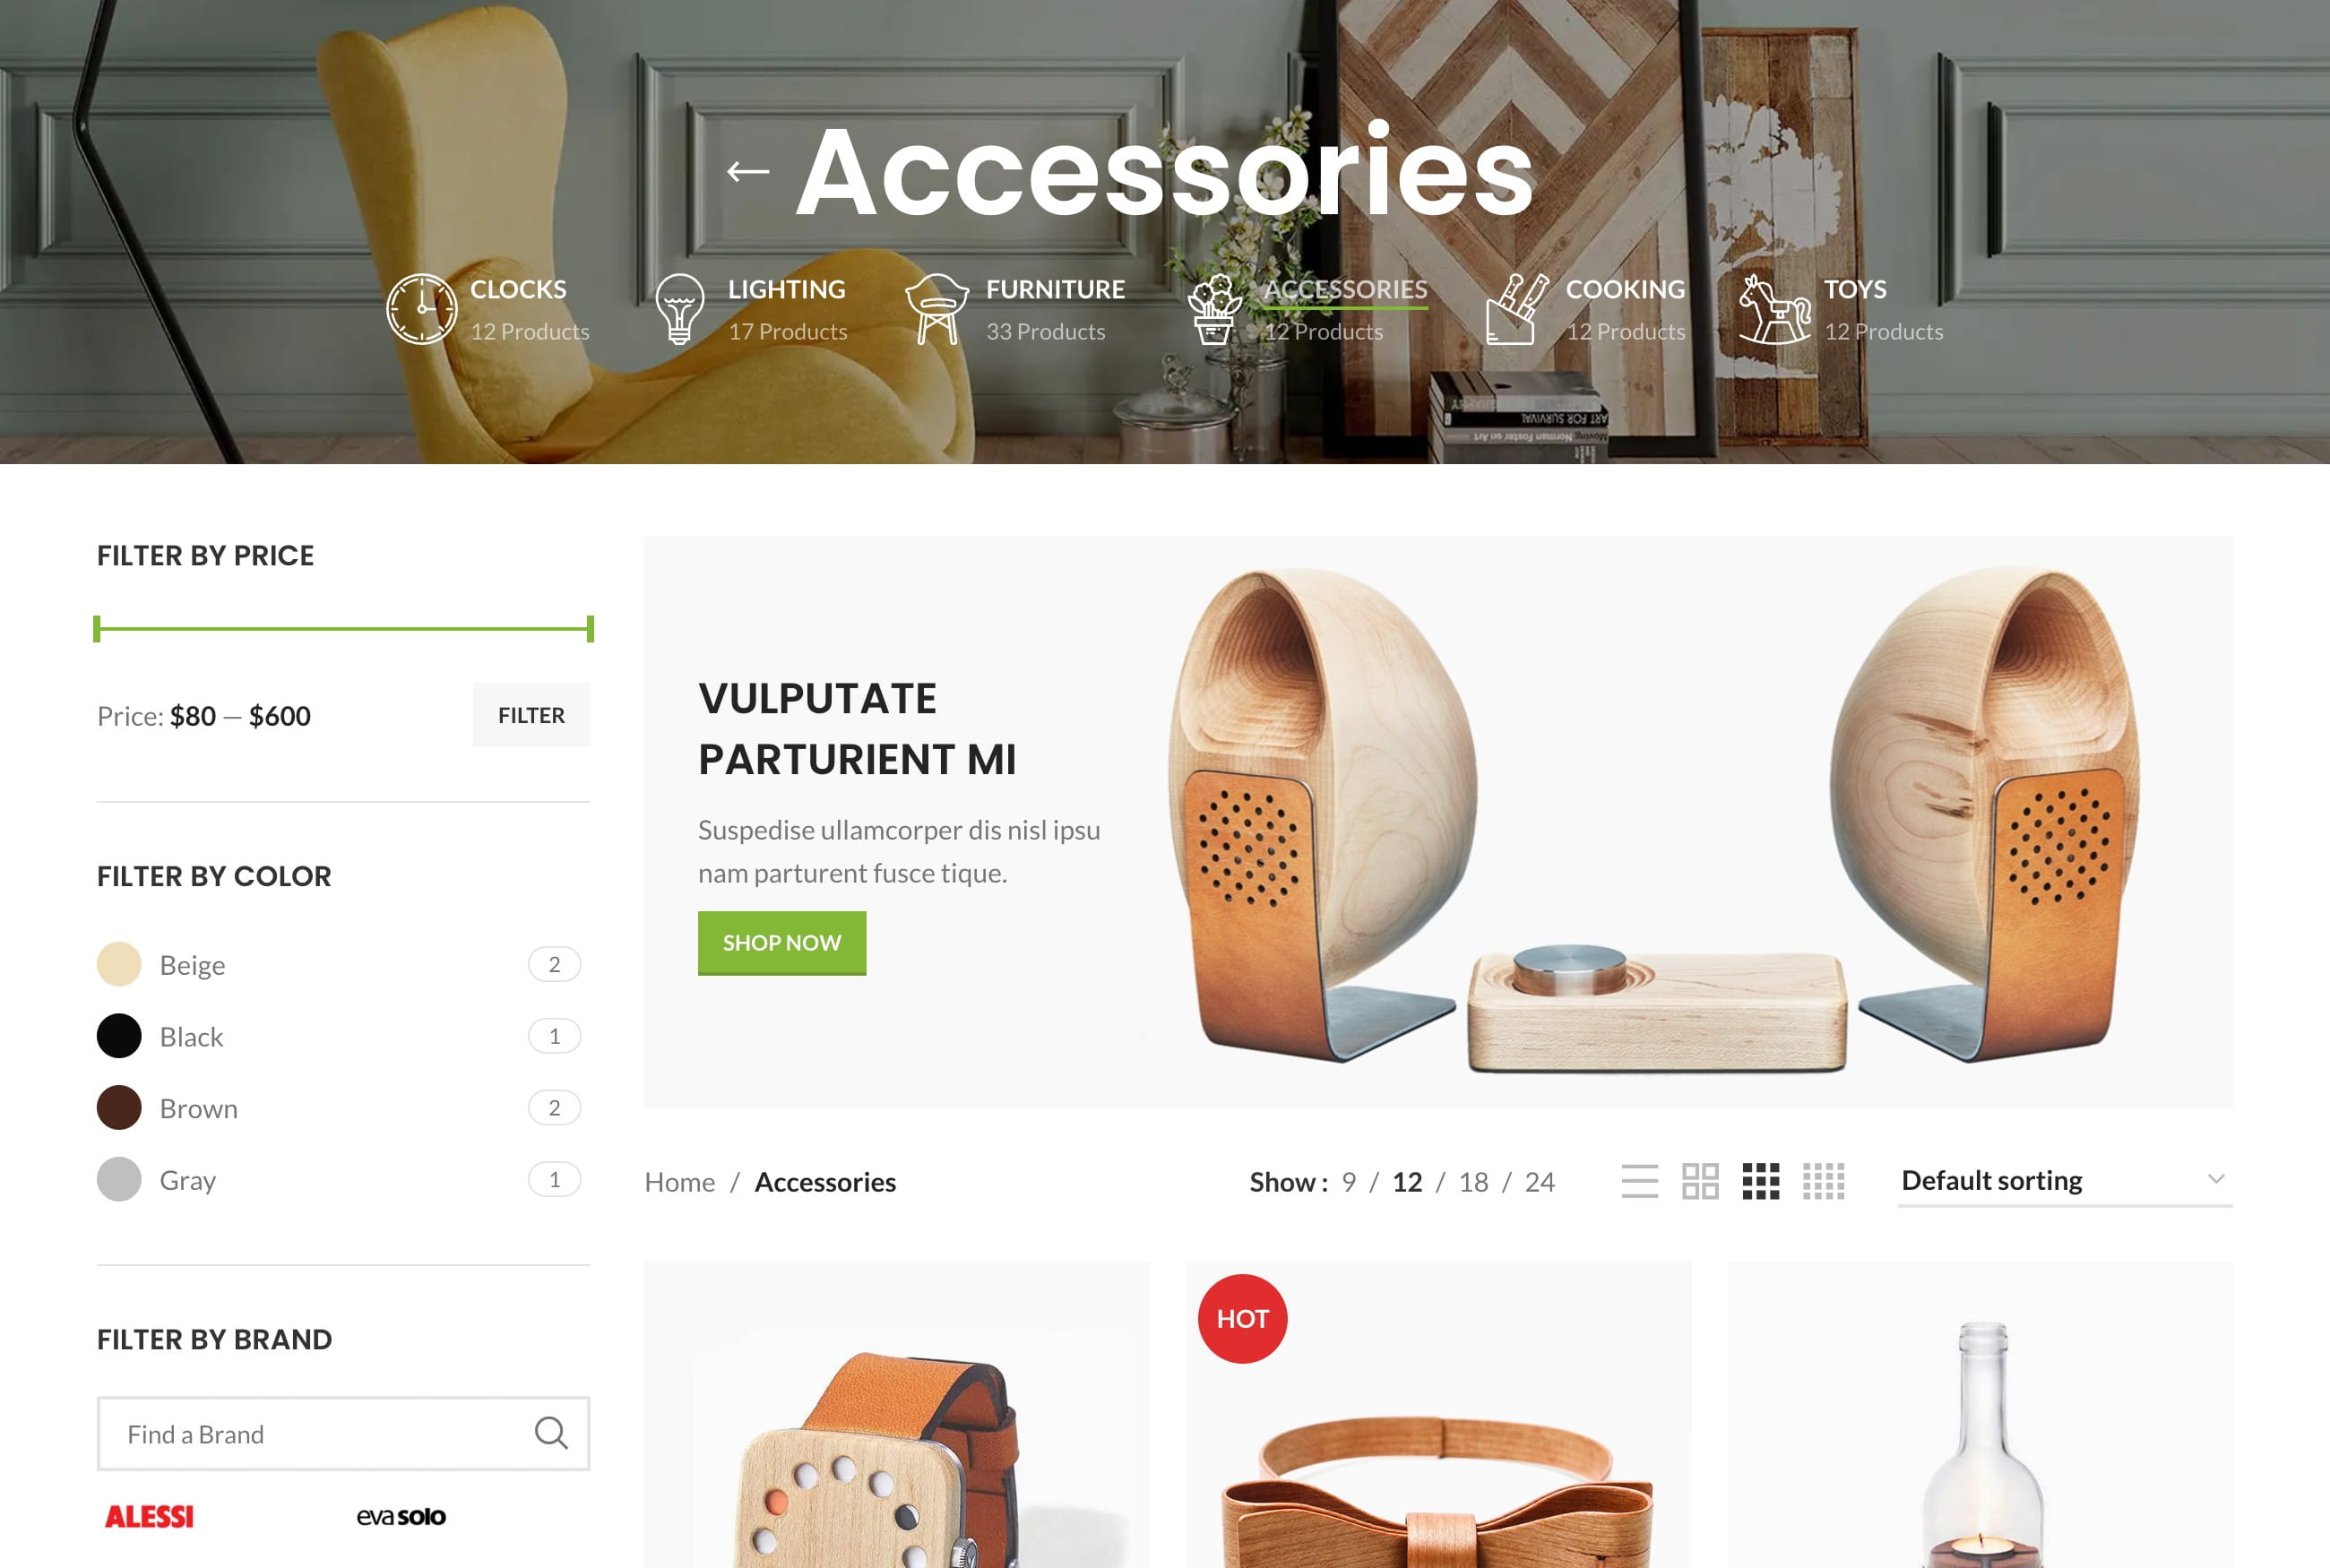
Add a banner through the category description
- Navigate to Dashboard -> HTML Blocks -> Add New.
- Create the banner with your active page builder, then publish the HTML Block.
- Return to Dashboard -> HTML Blocks and copy the block shortcode.
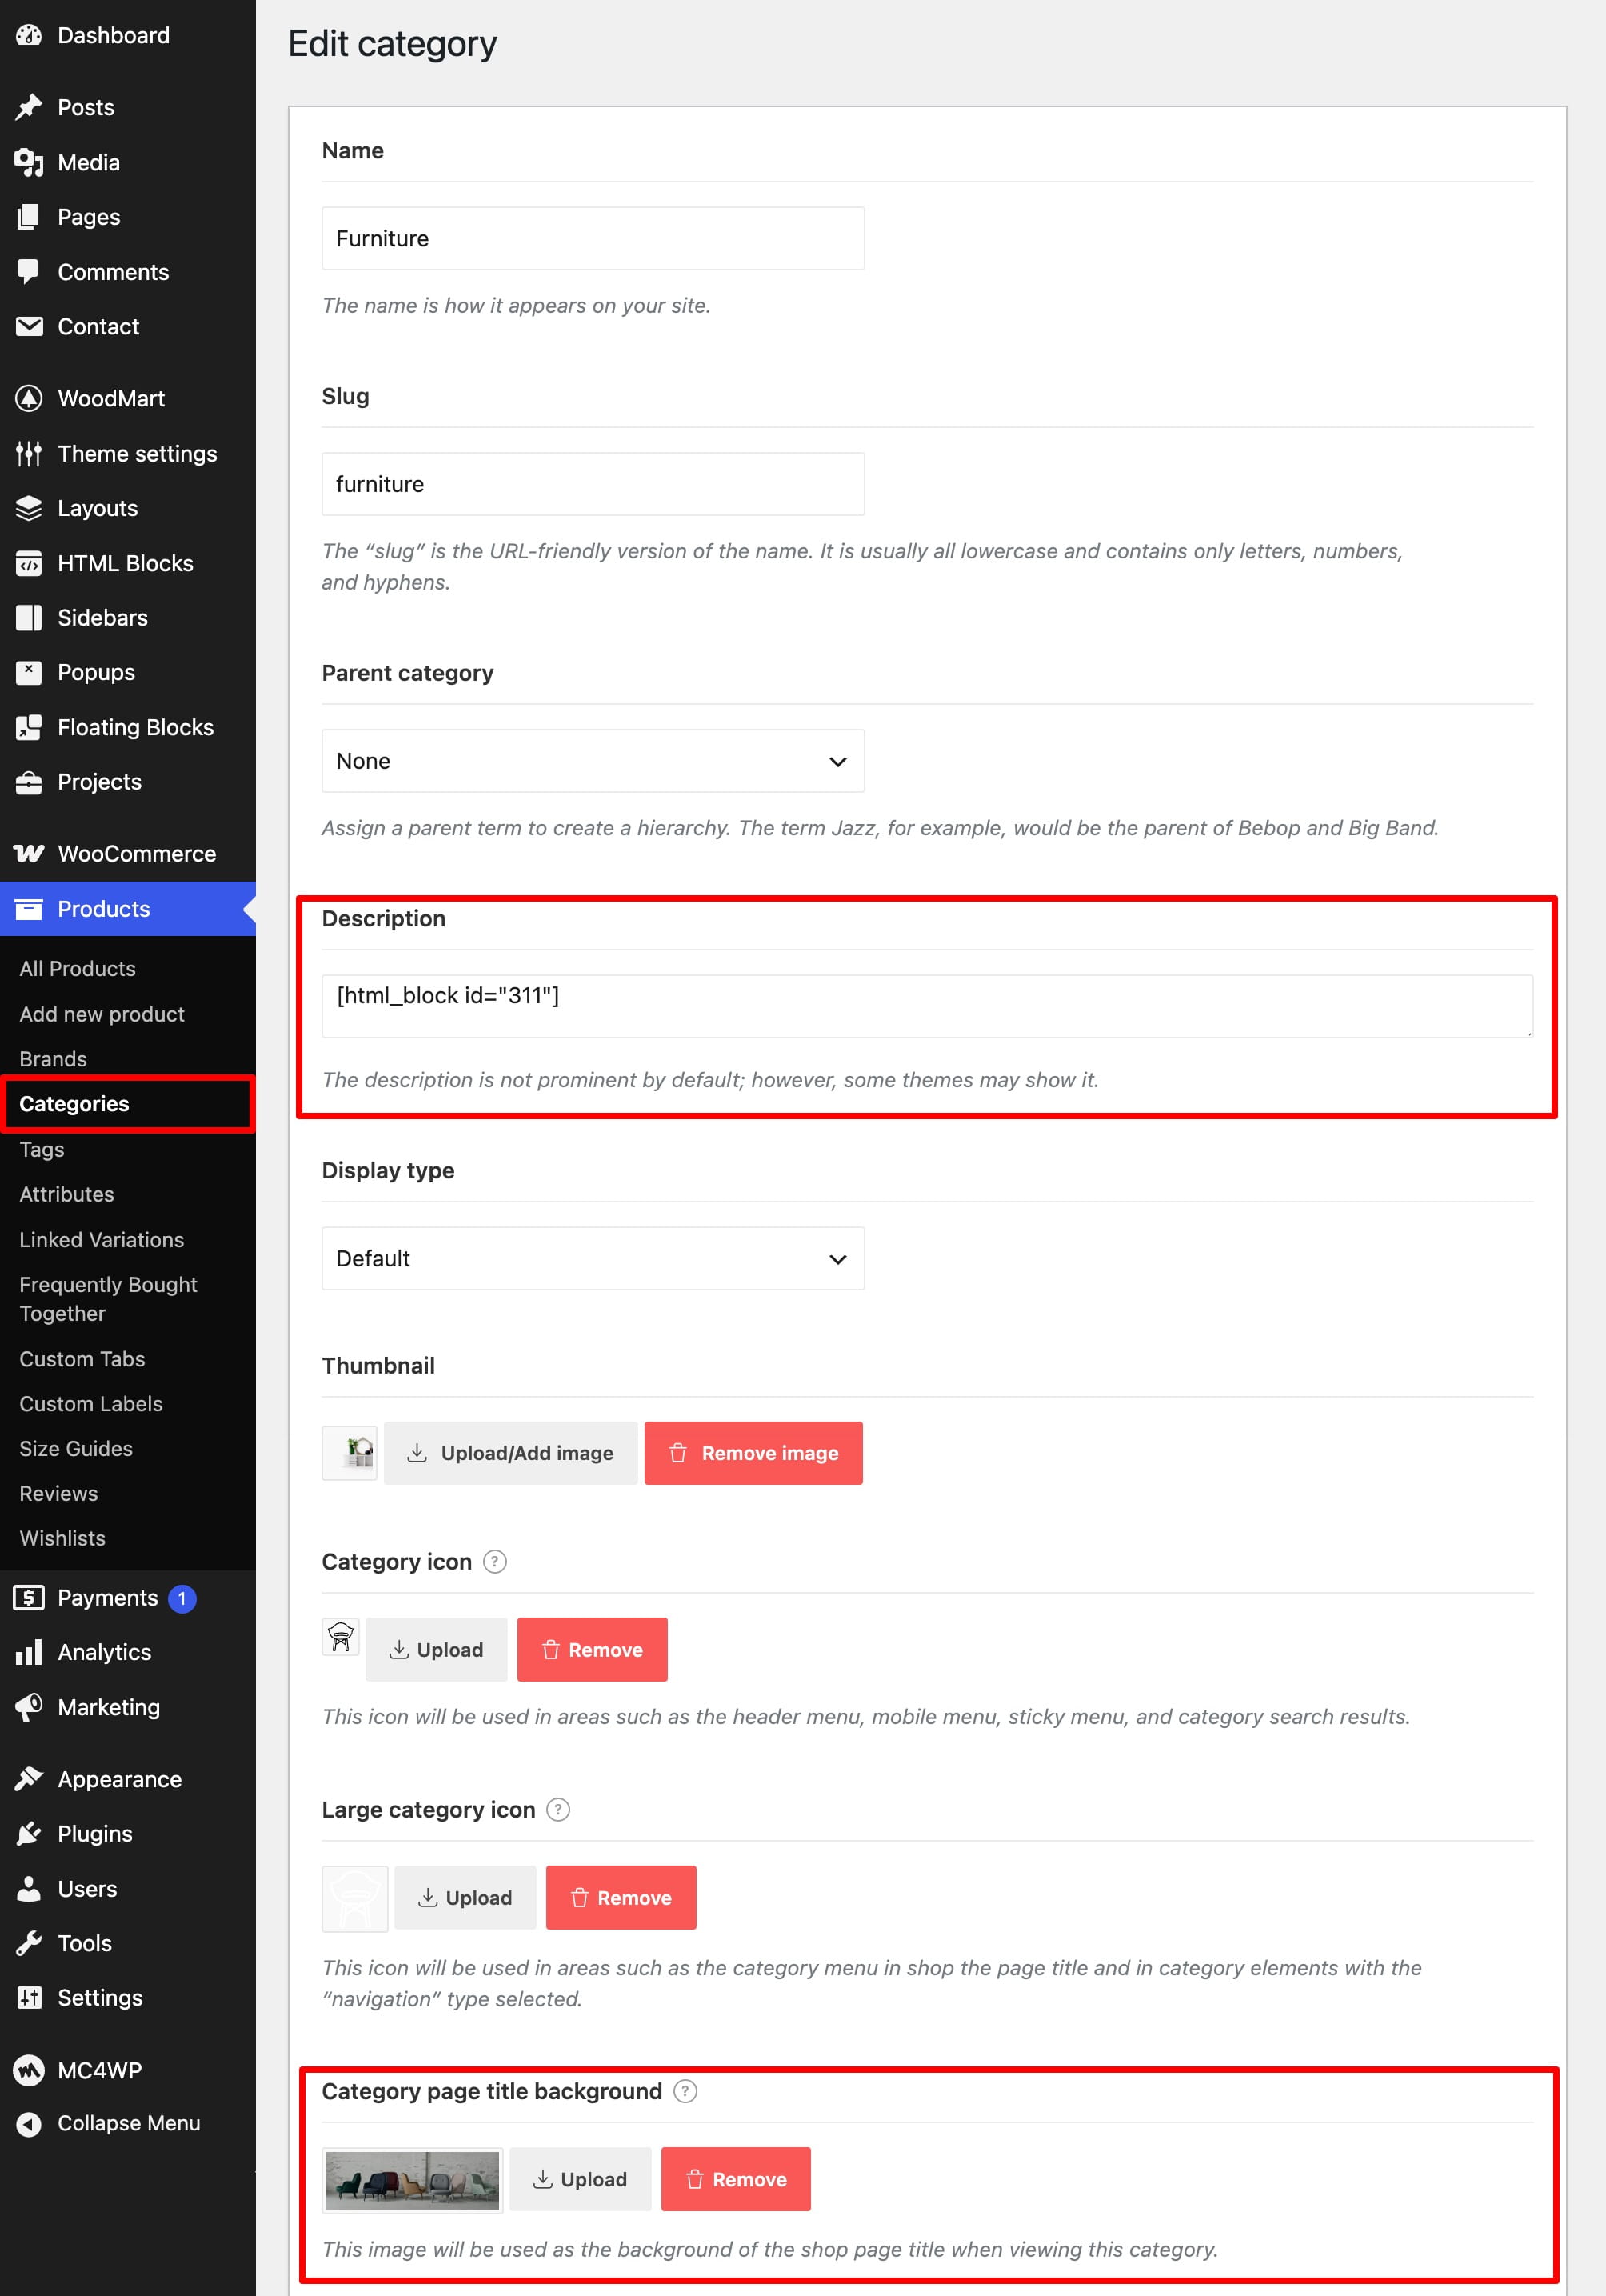
- Navigate to Dashboard -> Products -> Categories and edit the required category.
- Paste the HTML Block shortcode into the Description field.
- Click Update to save the category.
Choose the description position
By default, the category description appears above the product grid. To change its position, navigate to Dashboard -> Theme Settings -> Product archive -> Product archive and configure Category description position:
- Before product grid — displays the description and banner above the products.
- After product grid — displays them below the products.
Add separate content after the products
If you want to keep the standard category description above the products and add a separate banner below them, edit the category and open Extra options from theme -> General. Set Extra description to HTML Block, select the required block, and update the category.
Set a category page title background
To use an image as the background of the category page title, edit the category and open Extra options from theme -> General. Upload the image in Category page title background, then update the category. This option changes the page title background; it does not add a content banner to the product grid.
Note: If the category uses a custom Products archive layout, add the Archive description or Extra description element to the layout where the corresponding category content should appear. Learn more in the WoodMart WooCommerce layout builder guide.
Don’t miss WoodMart updates
Receive feature updates, tutorials, and WoodMart news via email.
 Last updated: August 12, 2026