
WooCommerce Brands
WooCommerce Brands lets you organize products by manufacturer, label, or product line. Each brand can have its own name, description, image, and archive page. WoodMart provides additional options for displaying brands on product pages, product cards, custom layouts, and other areas of your website.
Create and manage brands
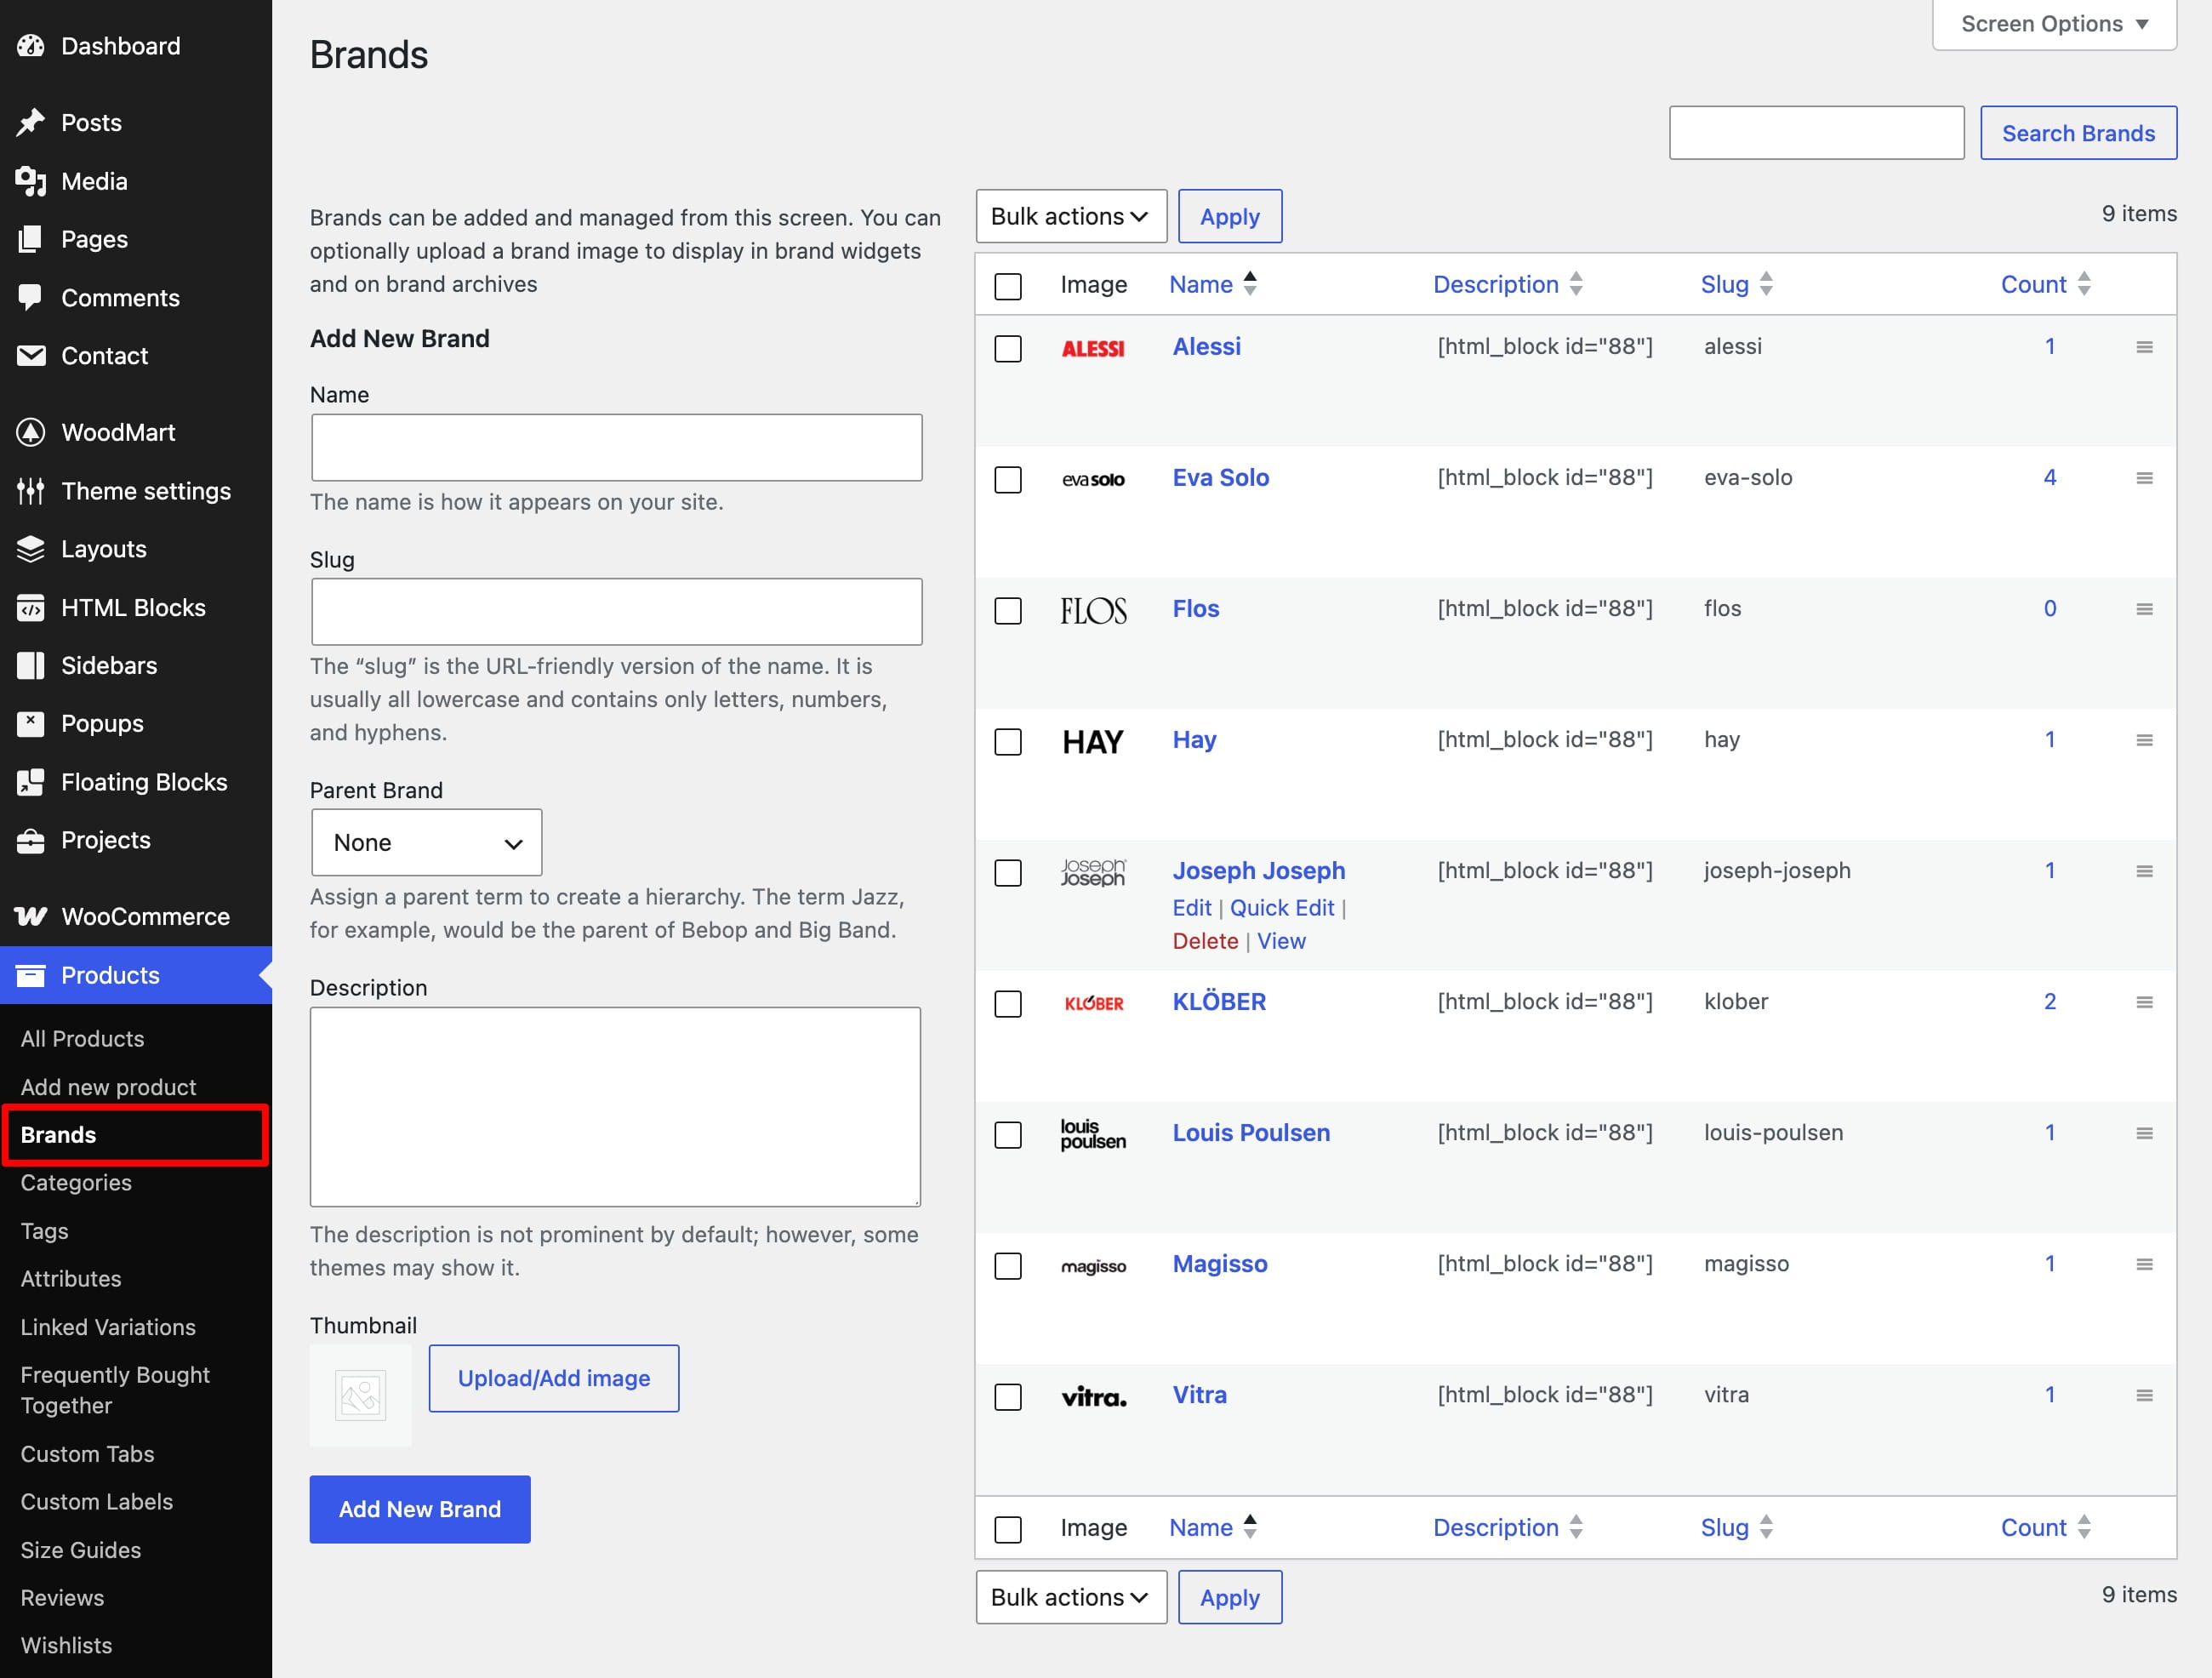
- Navigate to Dashboard -> Products -> Brands.
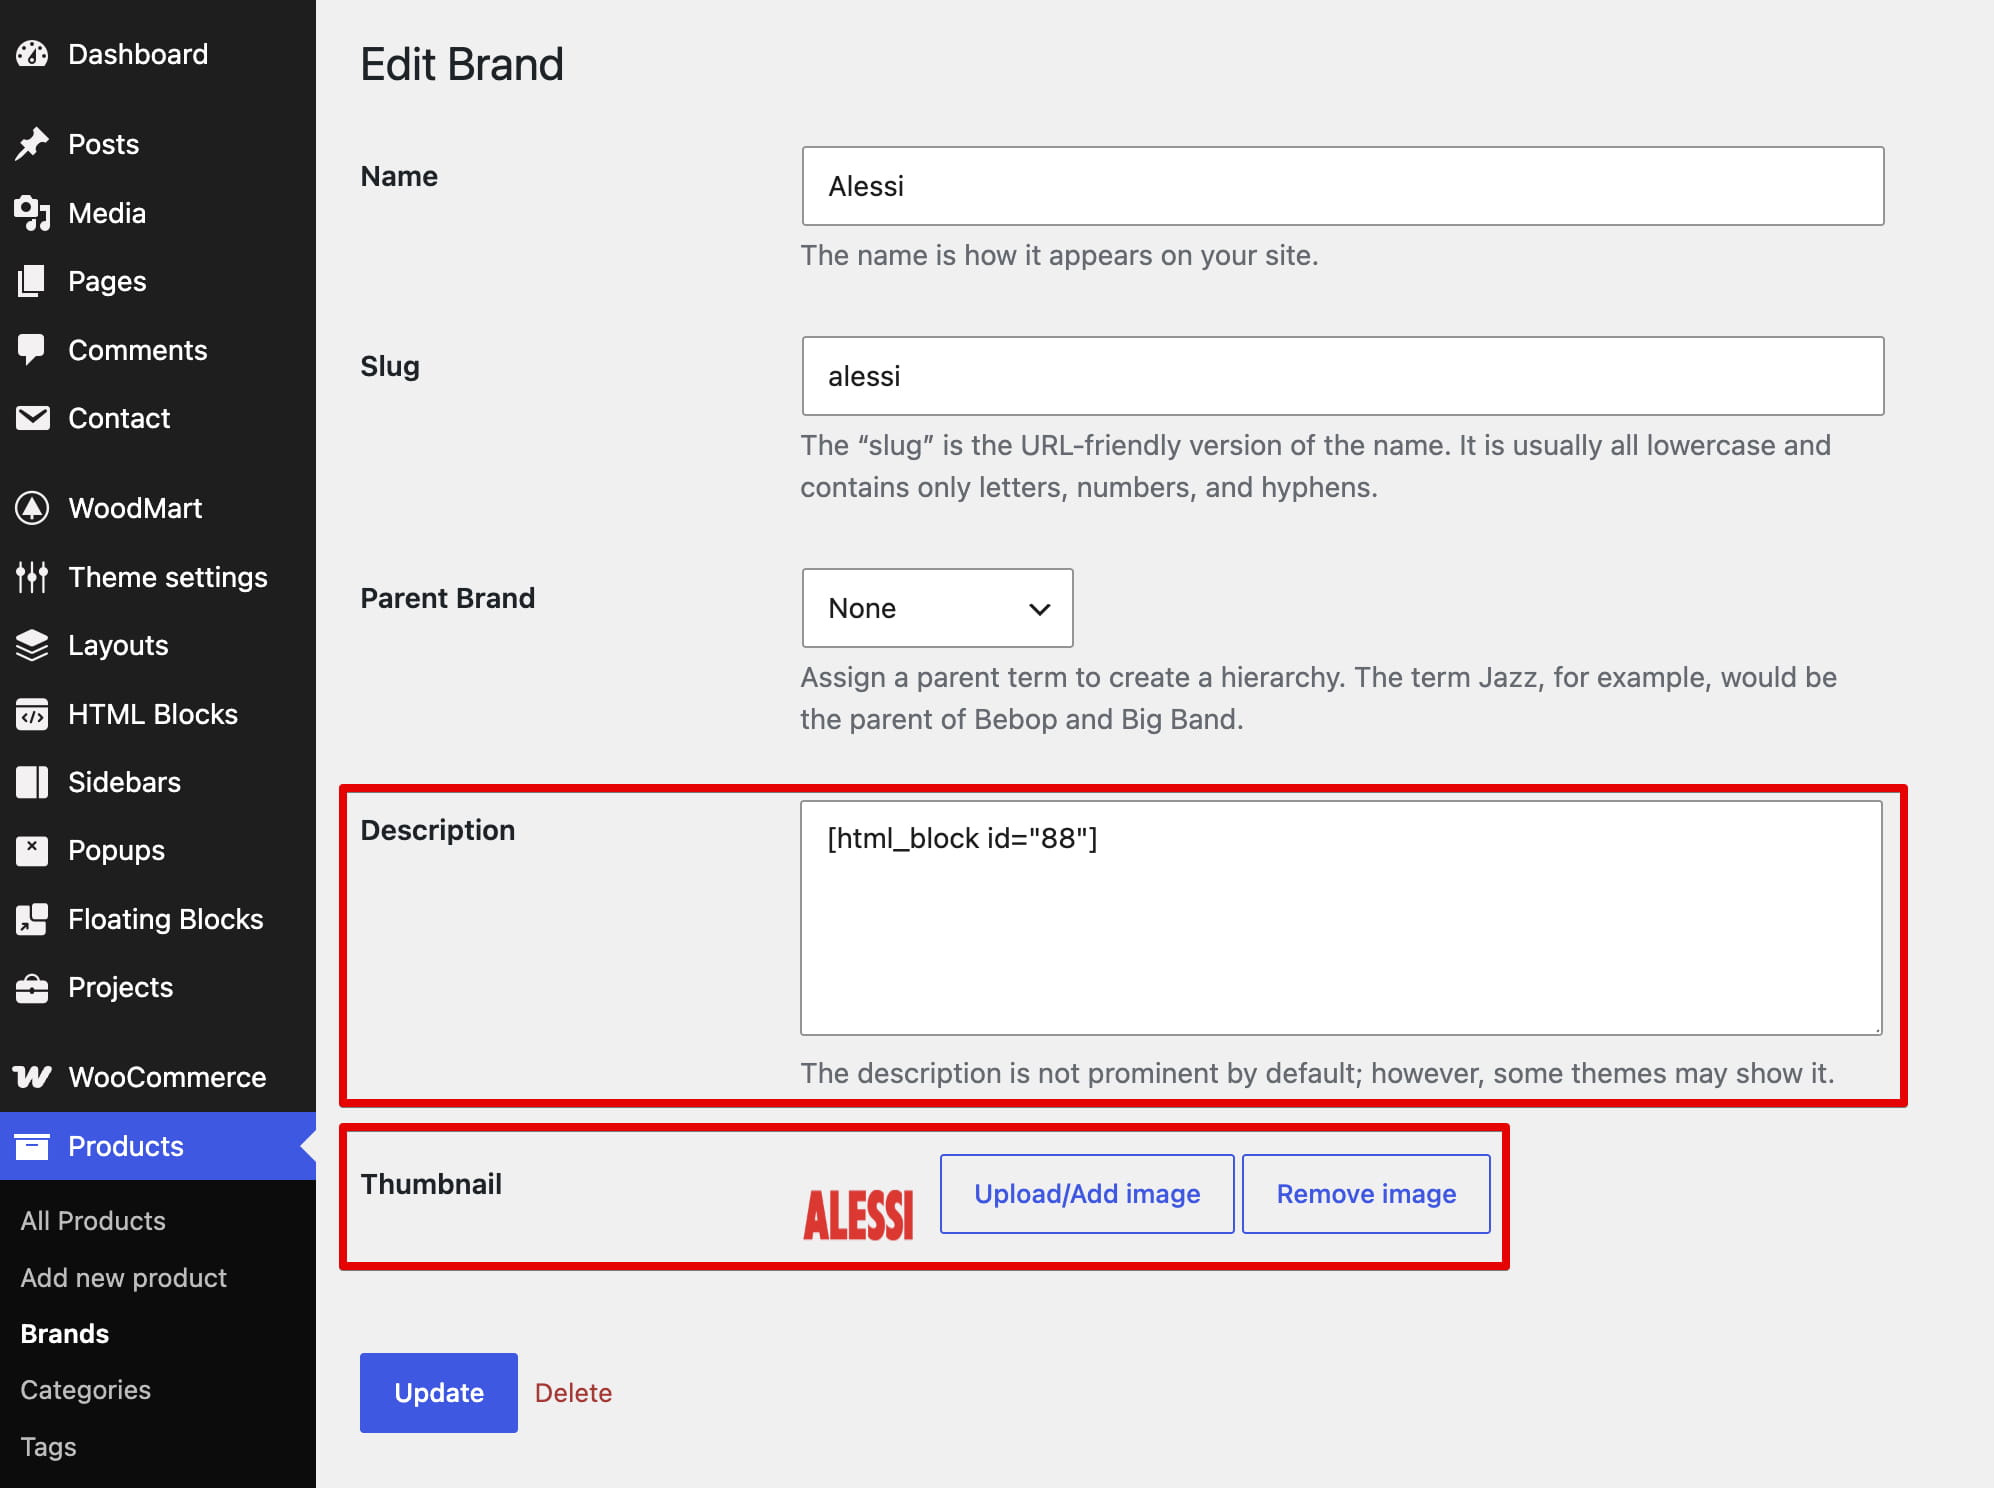
- Enter the brand name. You can also add a slug, parent brand, description, and image.
- Select Add New Brand.
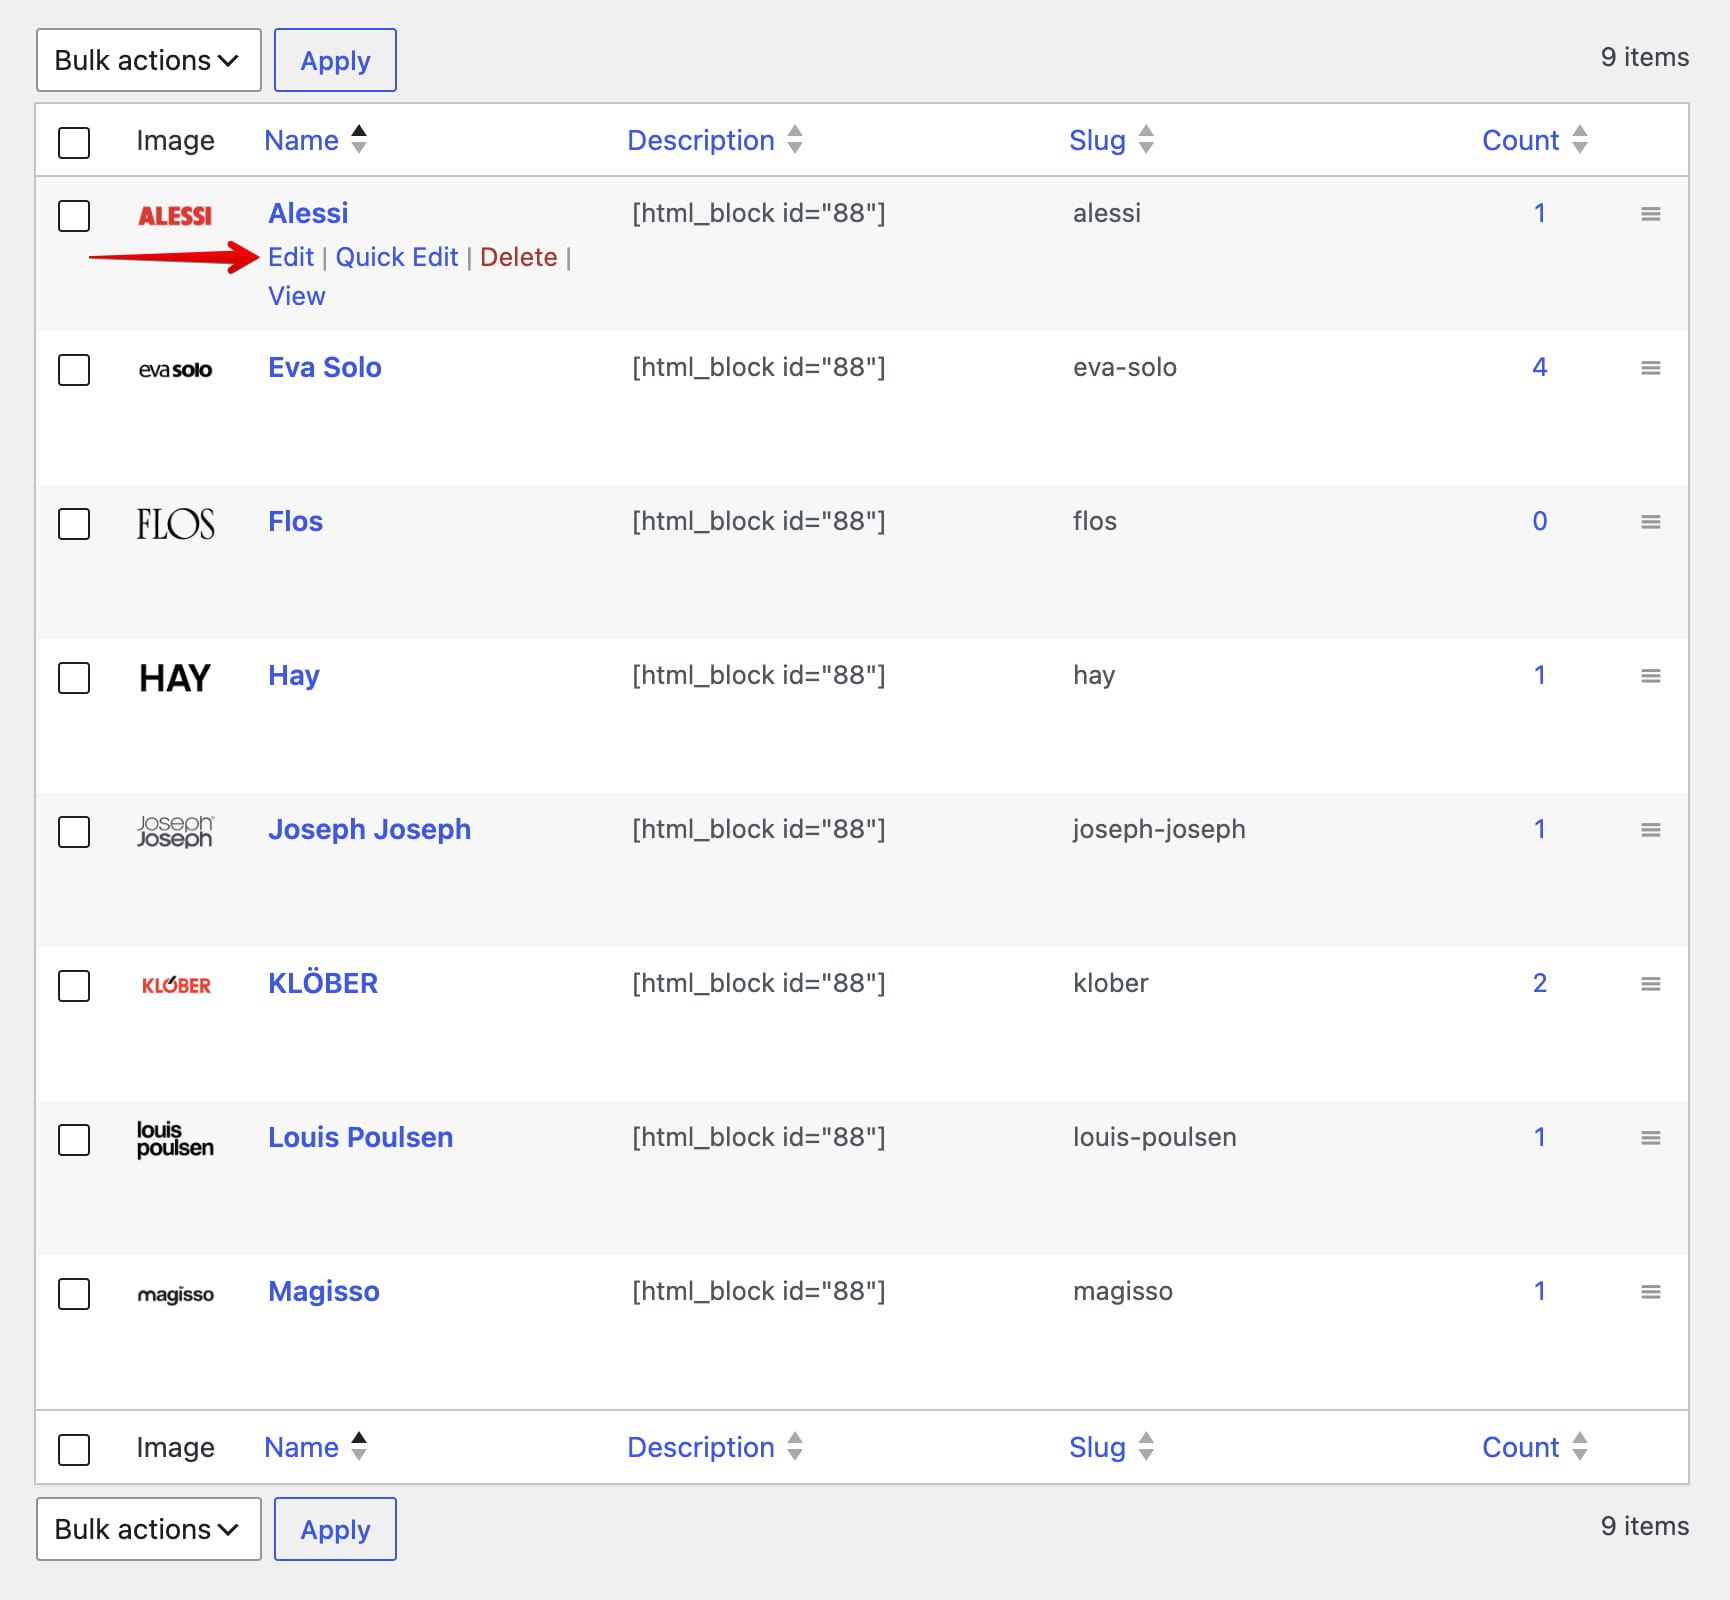
To modify an existing brand, hover over its name and select Edit. You can also delete brands or reorder them by dragging and dropping.
Assign brands to products
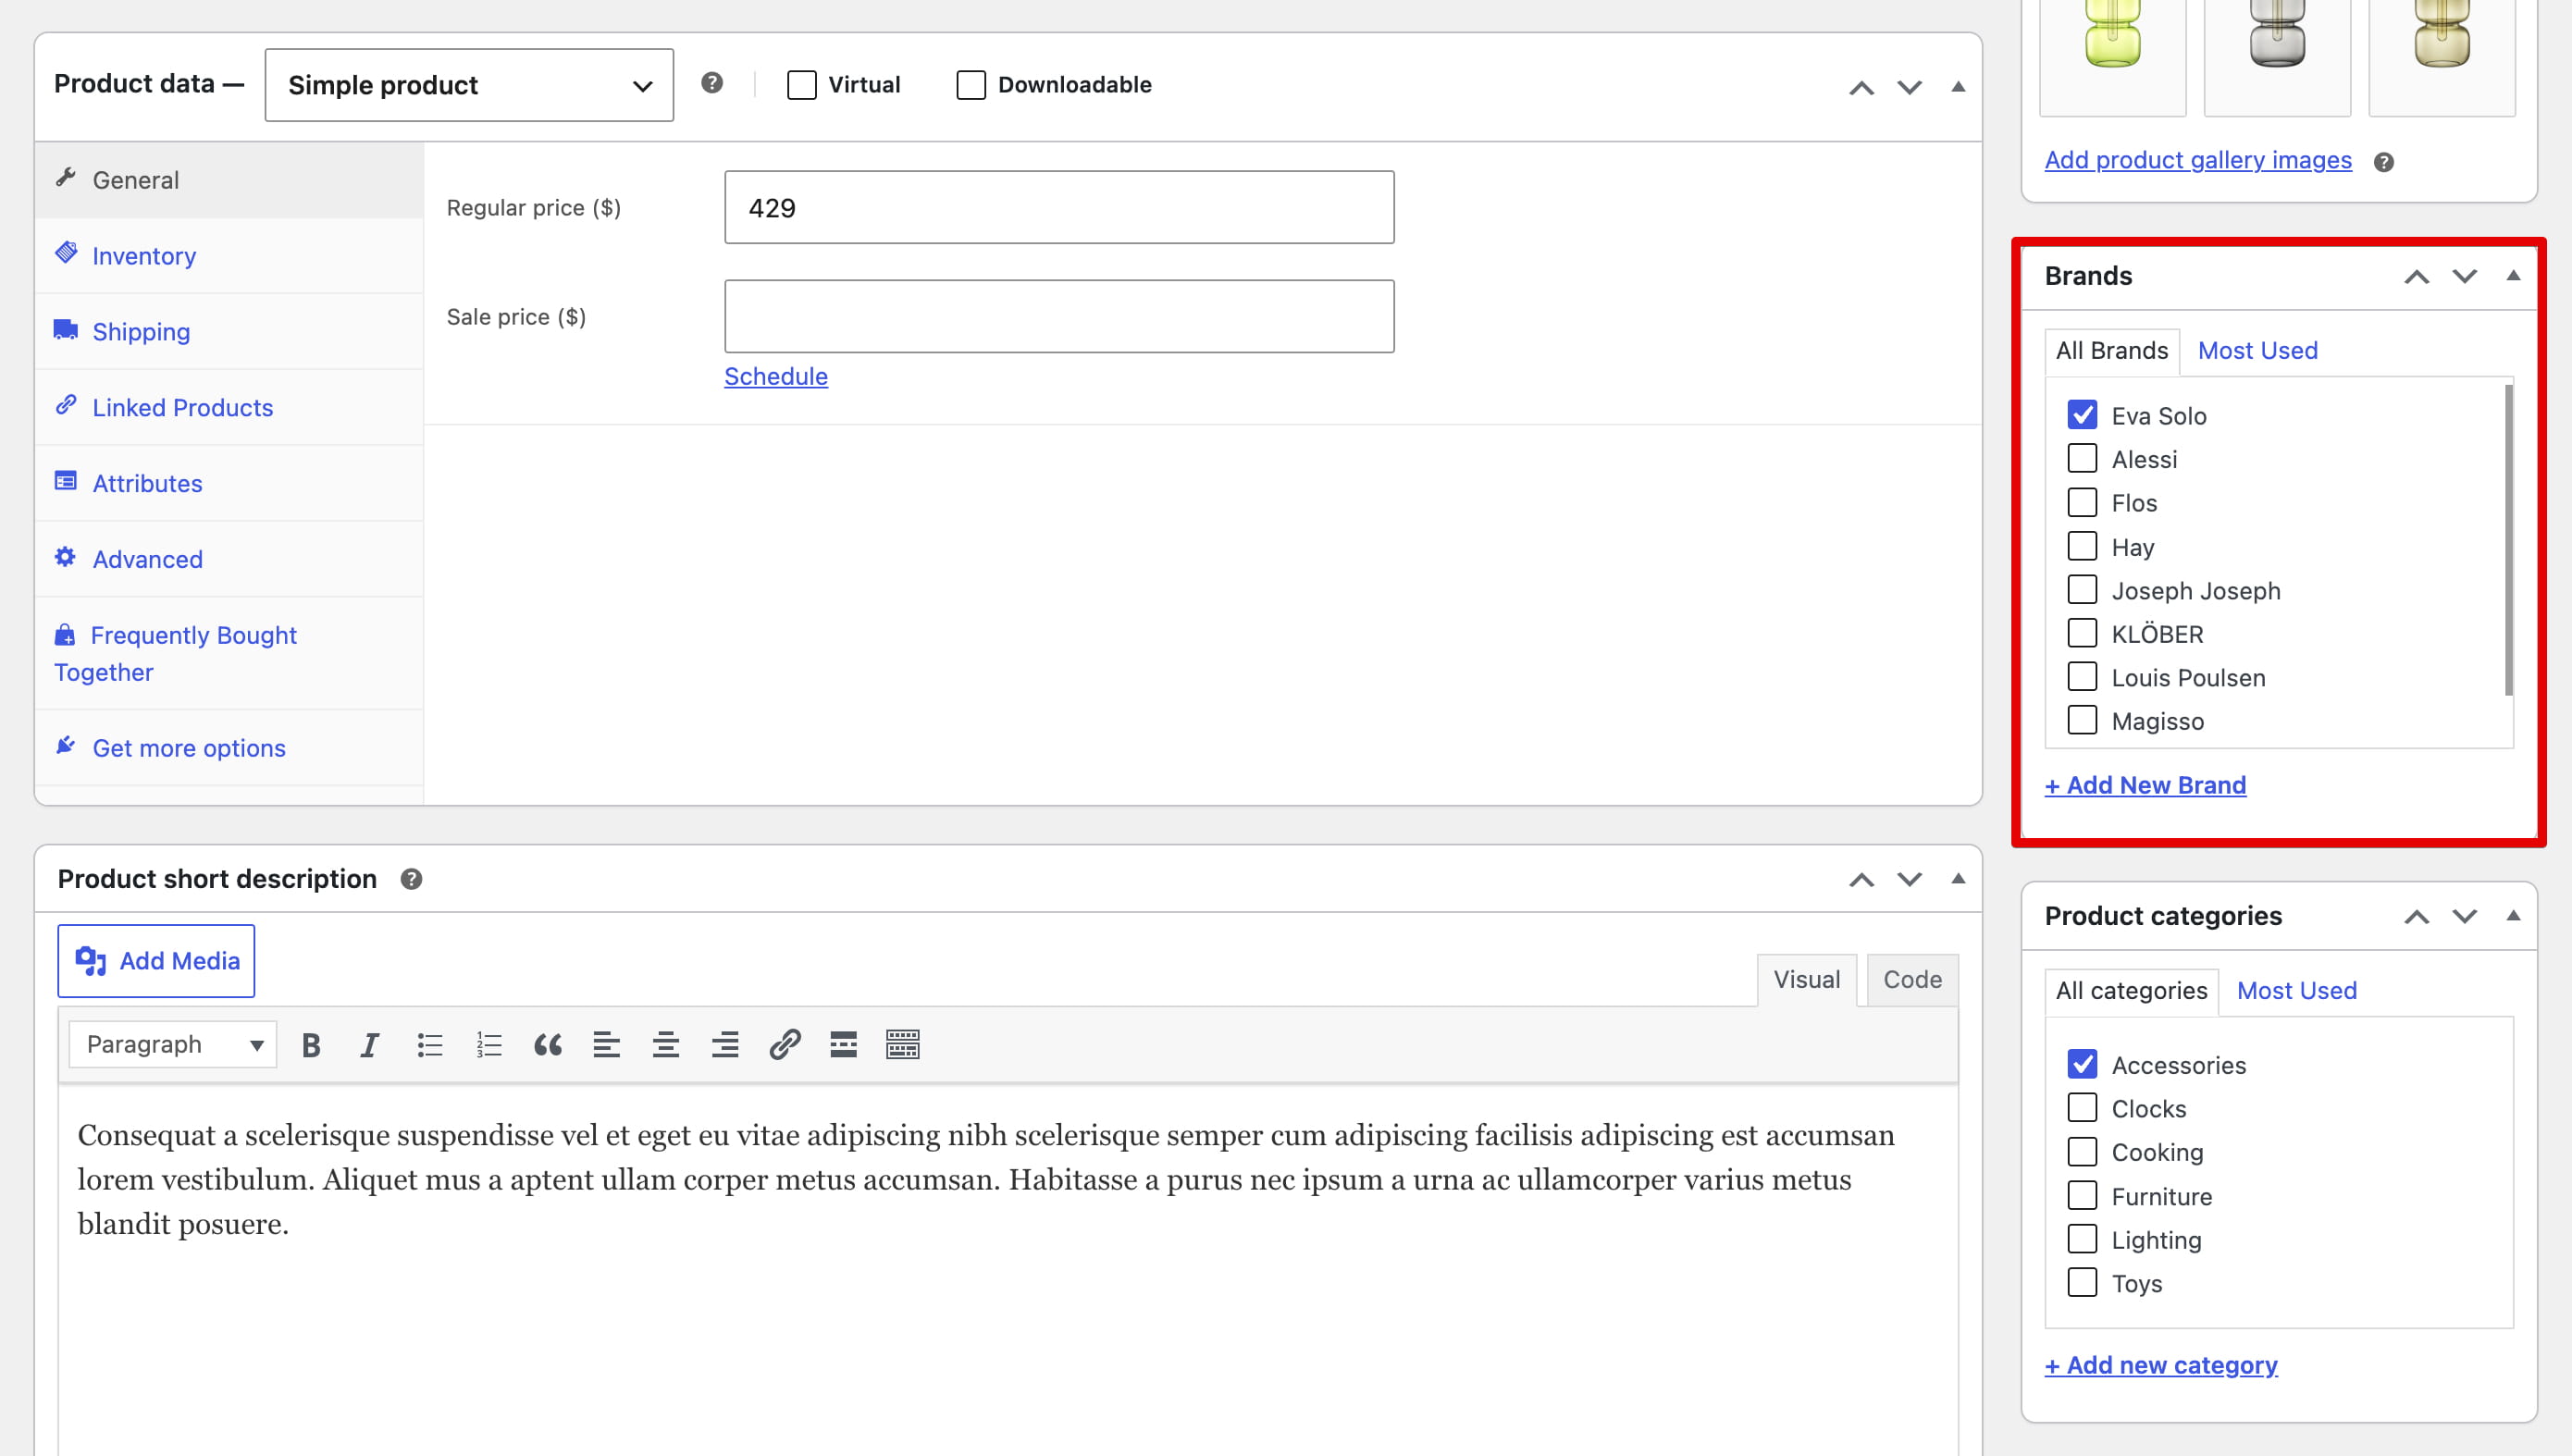
- Navigate to Dashboard -> Products and edit the required product.
- Find the Brands panel and select one or more brands.
- Update or publish the product.
Display a list of brands
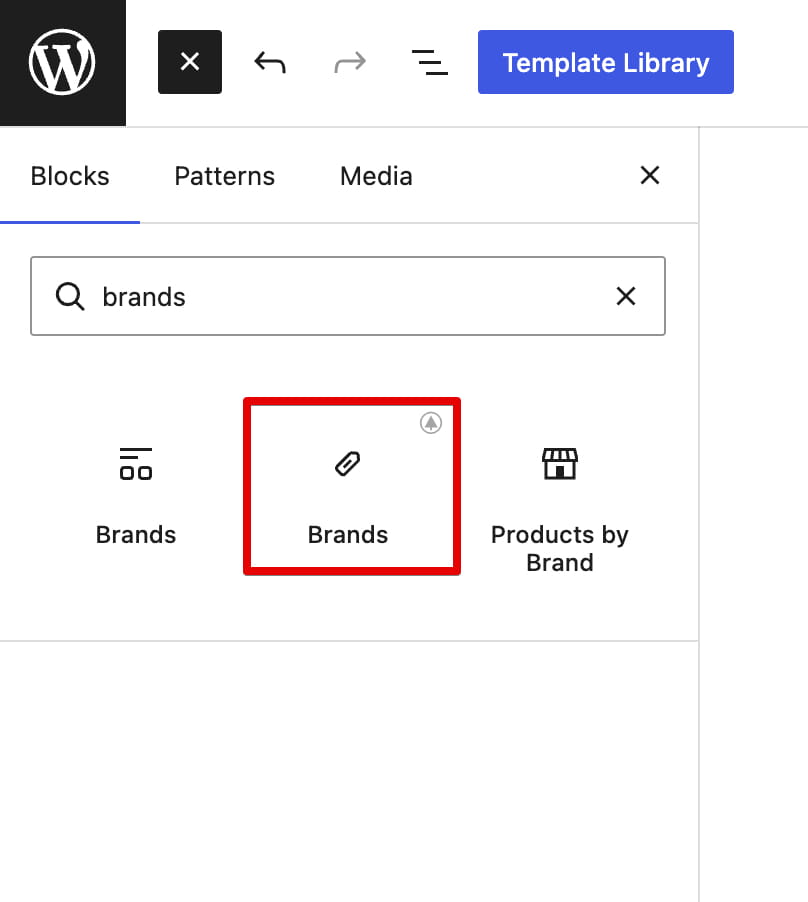
Add the WoodMart Brands block or element to display selected brands—or all available brands—in a grid, carousel, or list. Each brand also has its own product archive page.
Configure brands in WoodMart
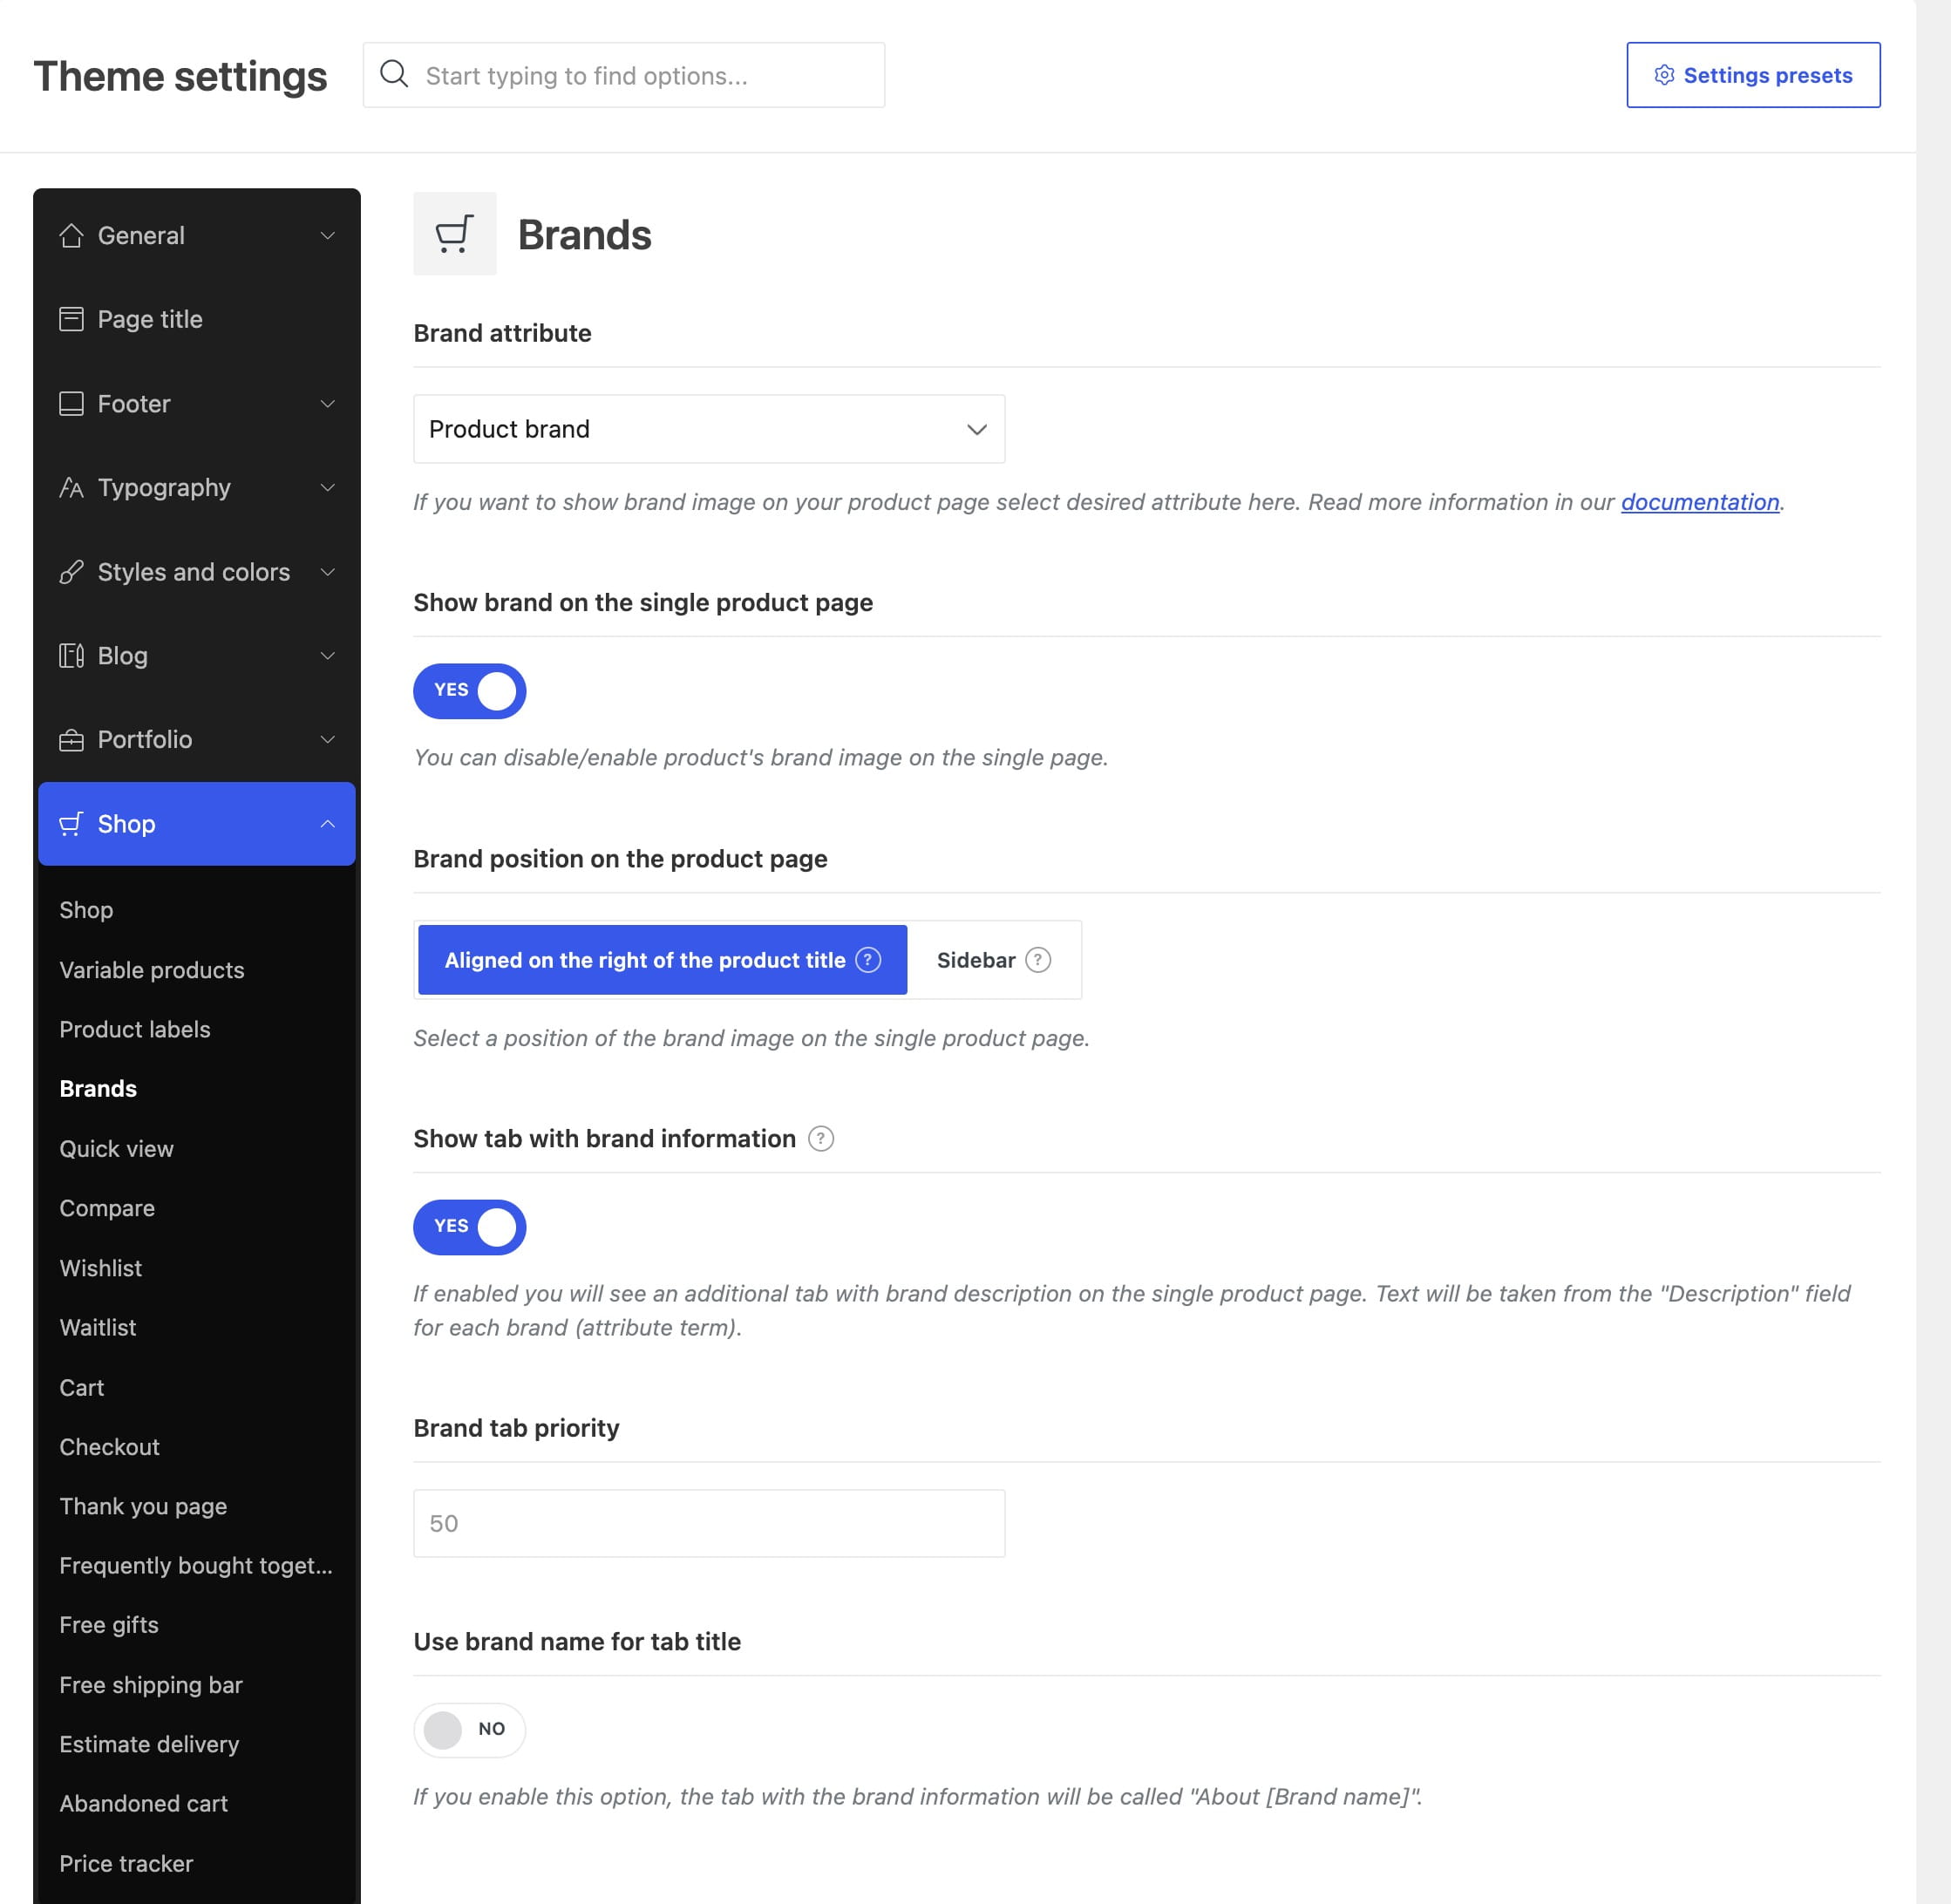
Navigate to Theme Settings -> Shop -> Brands. For WooCommerce core Brands, leave Brand attribute set to its default Product brand value.
- Show brand on the single product page — displays the assigned brand image.
- Brand position on the product page — places the image beside the product title or in the sidebar.
- Show tab with brand information — adds a product tab using the brand description.
- Brand tab priority — controls the tab position.
- Use brand name for tab title — changes the tab title to “About [Brand name].”
Edit a brand to upload its image and add a description. The description is displayed in the brand information tab when that option is enabled.
Display brands in product layouts
To display brand names in the standard single product metadata, enable Show product brands in Theme Settings -> Single product -> Elements. For standard product cards, use Theme Settings -> Product archive -> Products loop -> Show product brands.
In a custom single product layout, use the Product brands element or block for assigned brands and Brand information for the brand description.
Add brand filters
Use the WoodMart Product Filters element or block and select the Product brand taxonomy. For a widget area such as the shop sidebar, add the WooCommerce Brand Layered Nav widget.
Existing stores using a Brand attribute
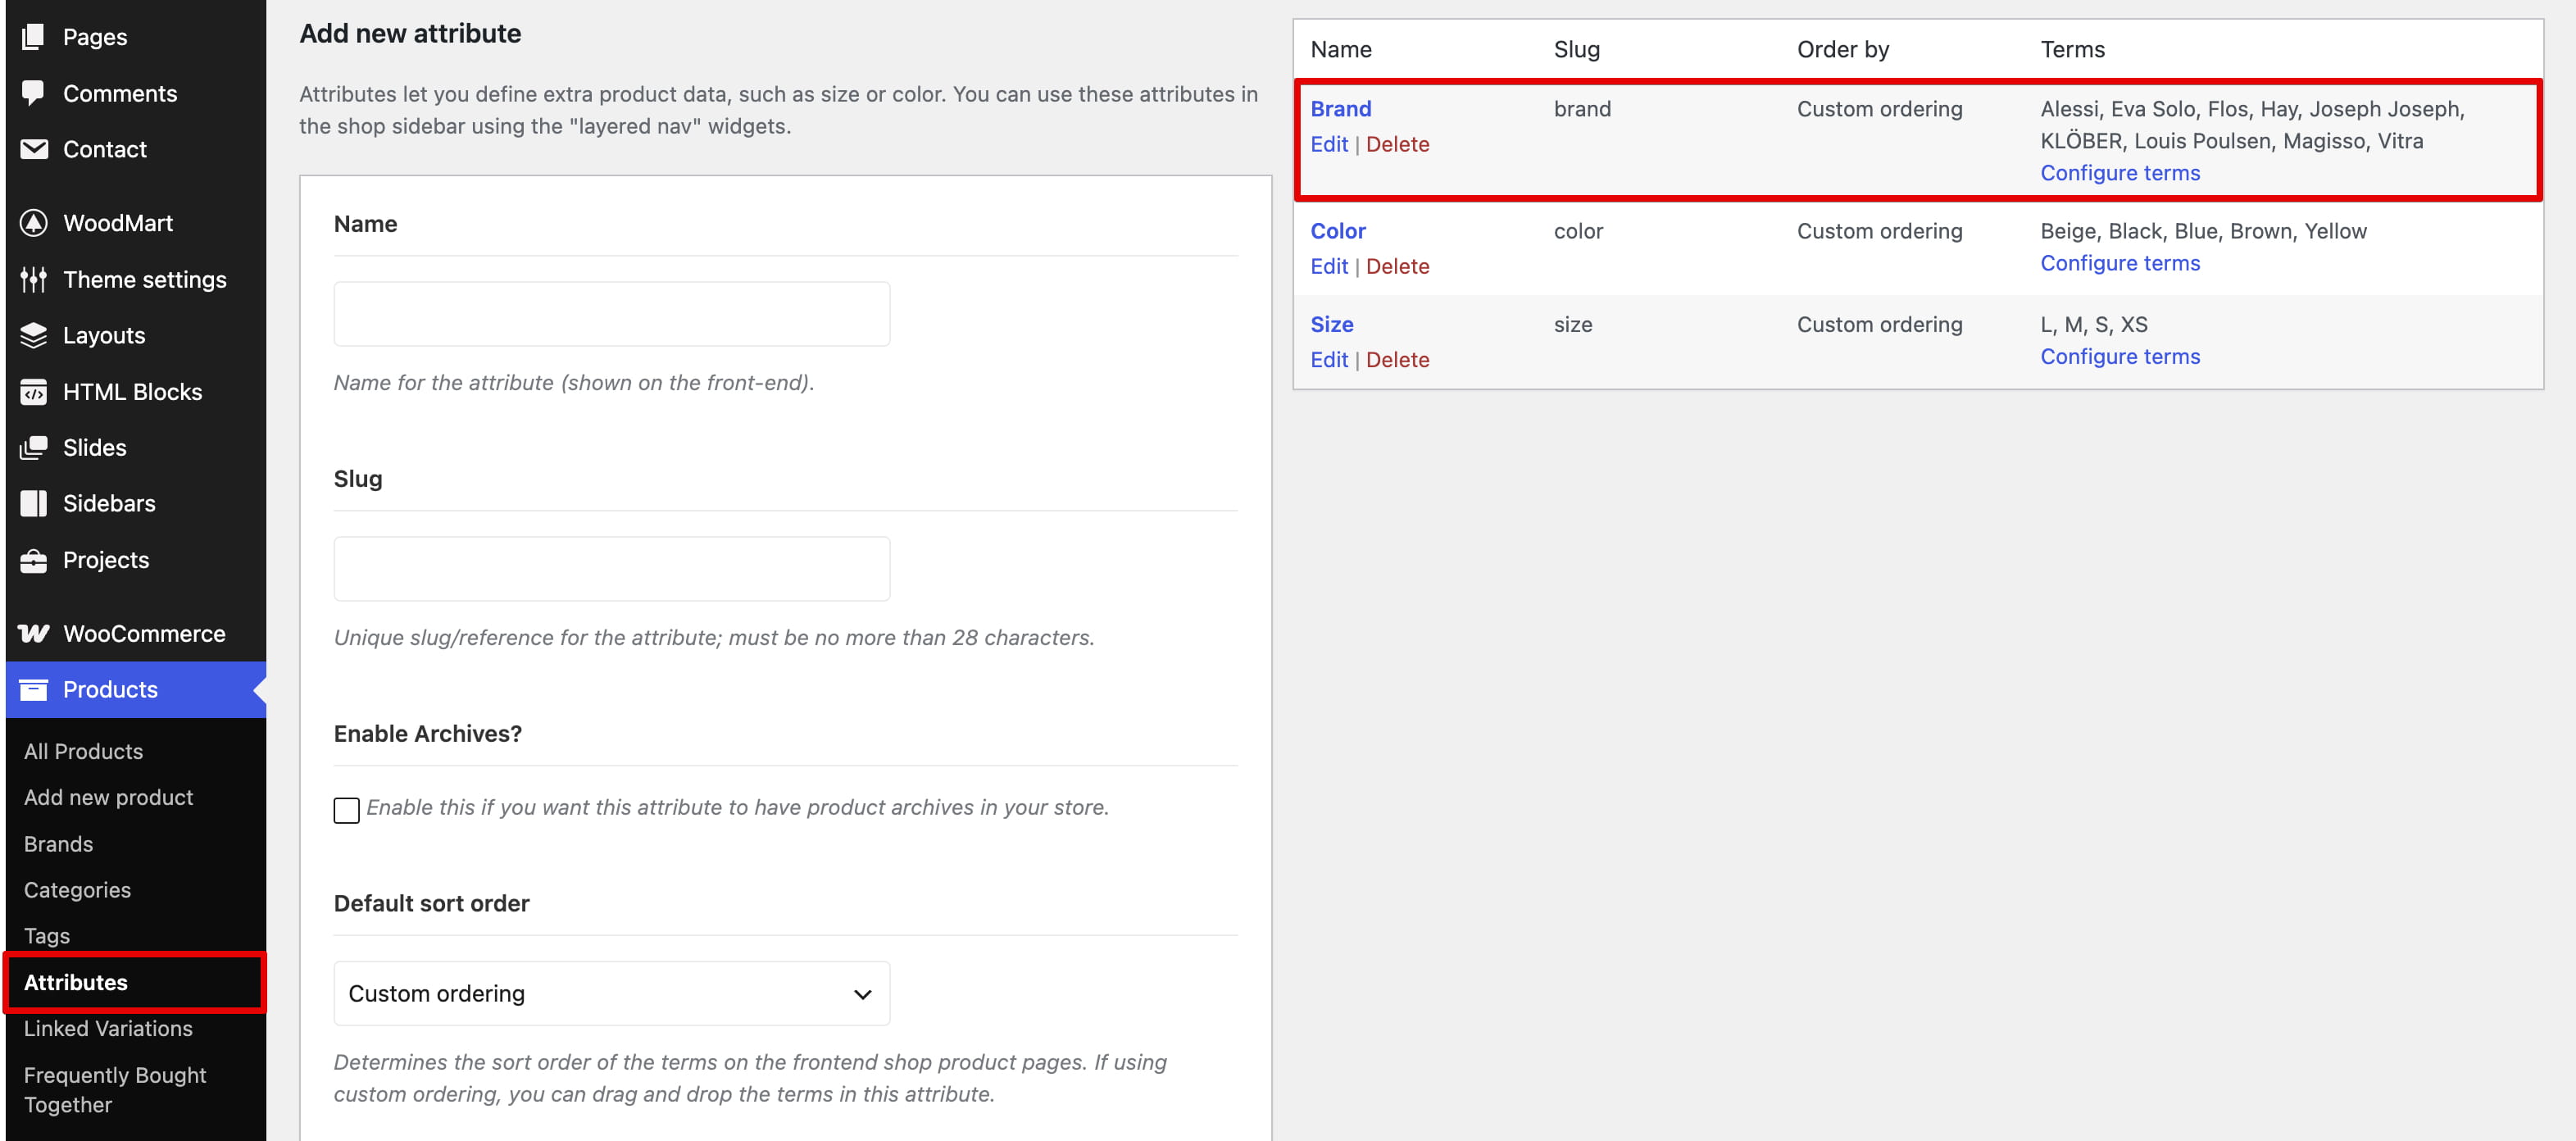
WoodMart continues to support stores that created brands as a global WooCommerce attribute before core Brands became available. Select that existing attribute in Theme Settings -> Shop -> Brands -> Brand attribute.
Do not create a separate Brand attribute for a new website. Changing the selected Brand attribute does not migrate brand terms, product assignments, descriptions, or images between the legacy attribute and WooCommerce Product Brands.
For additional information about the core taxonomy, see the official WooCommerce Product brands documentation.
Don’t miss WoodMart updates
Receive feature updates, tutorials, and WoodMart news via email.
 Last updated: August 11, 2026