
Create a product filters form
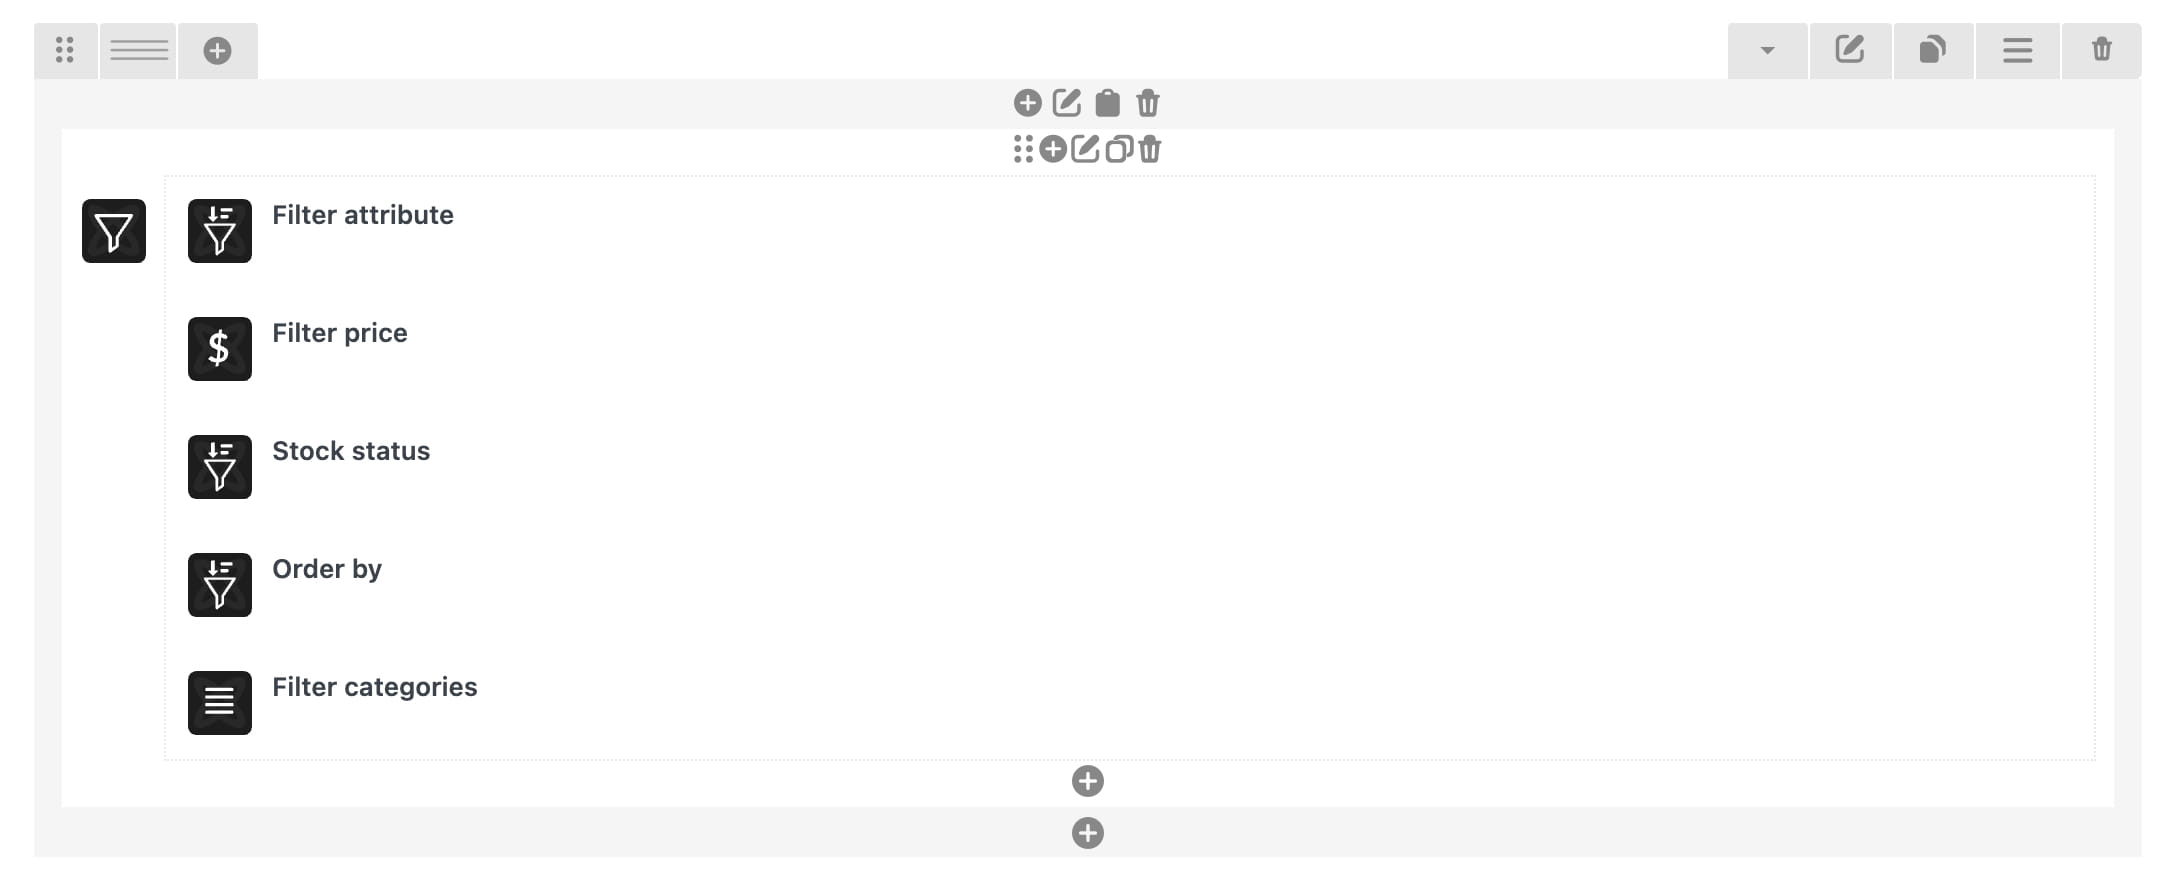
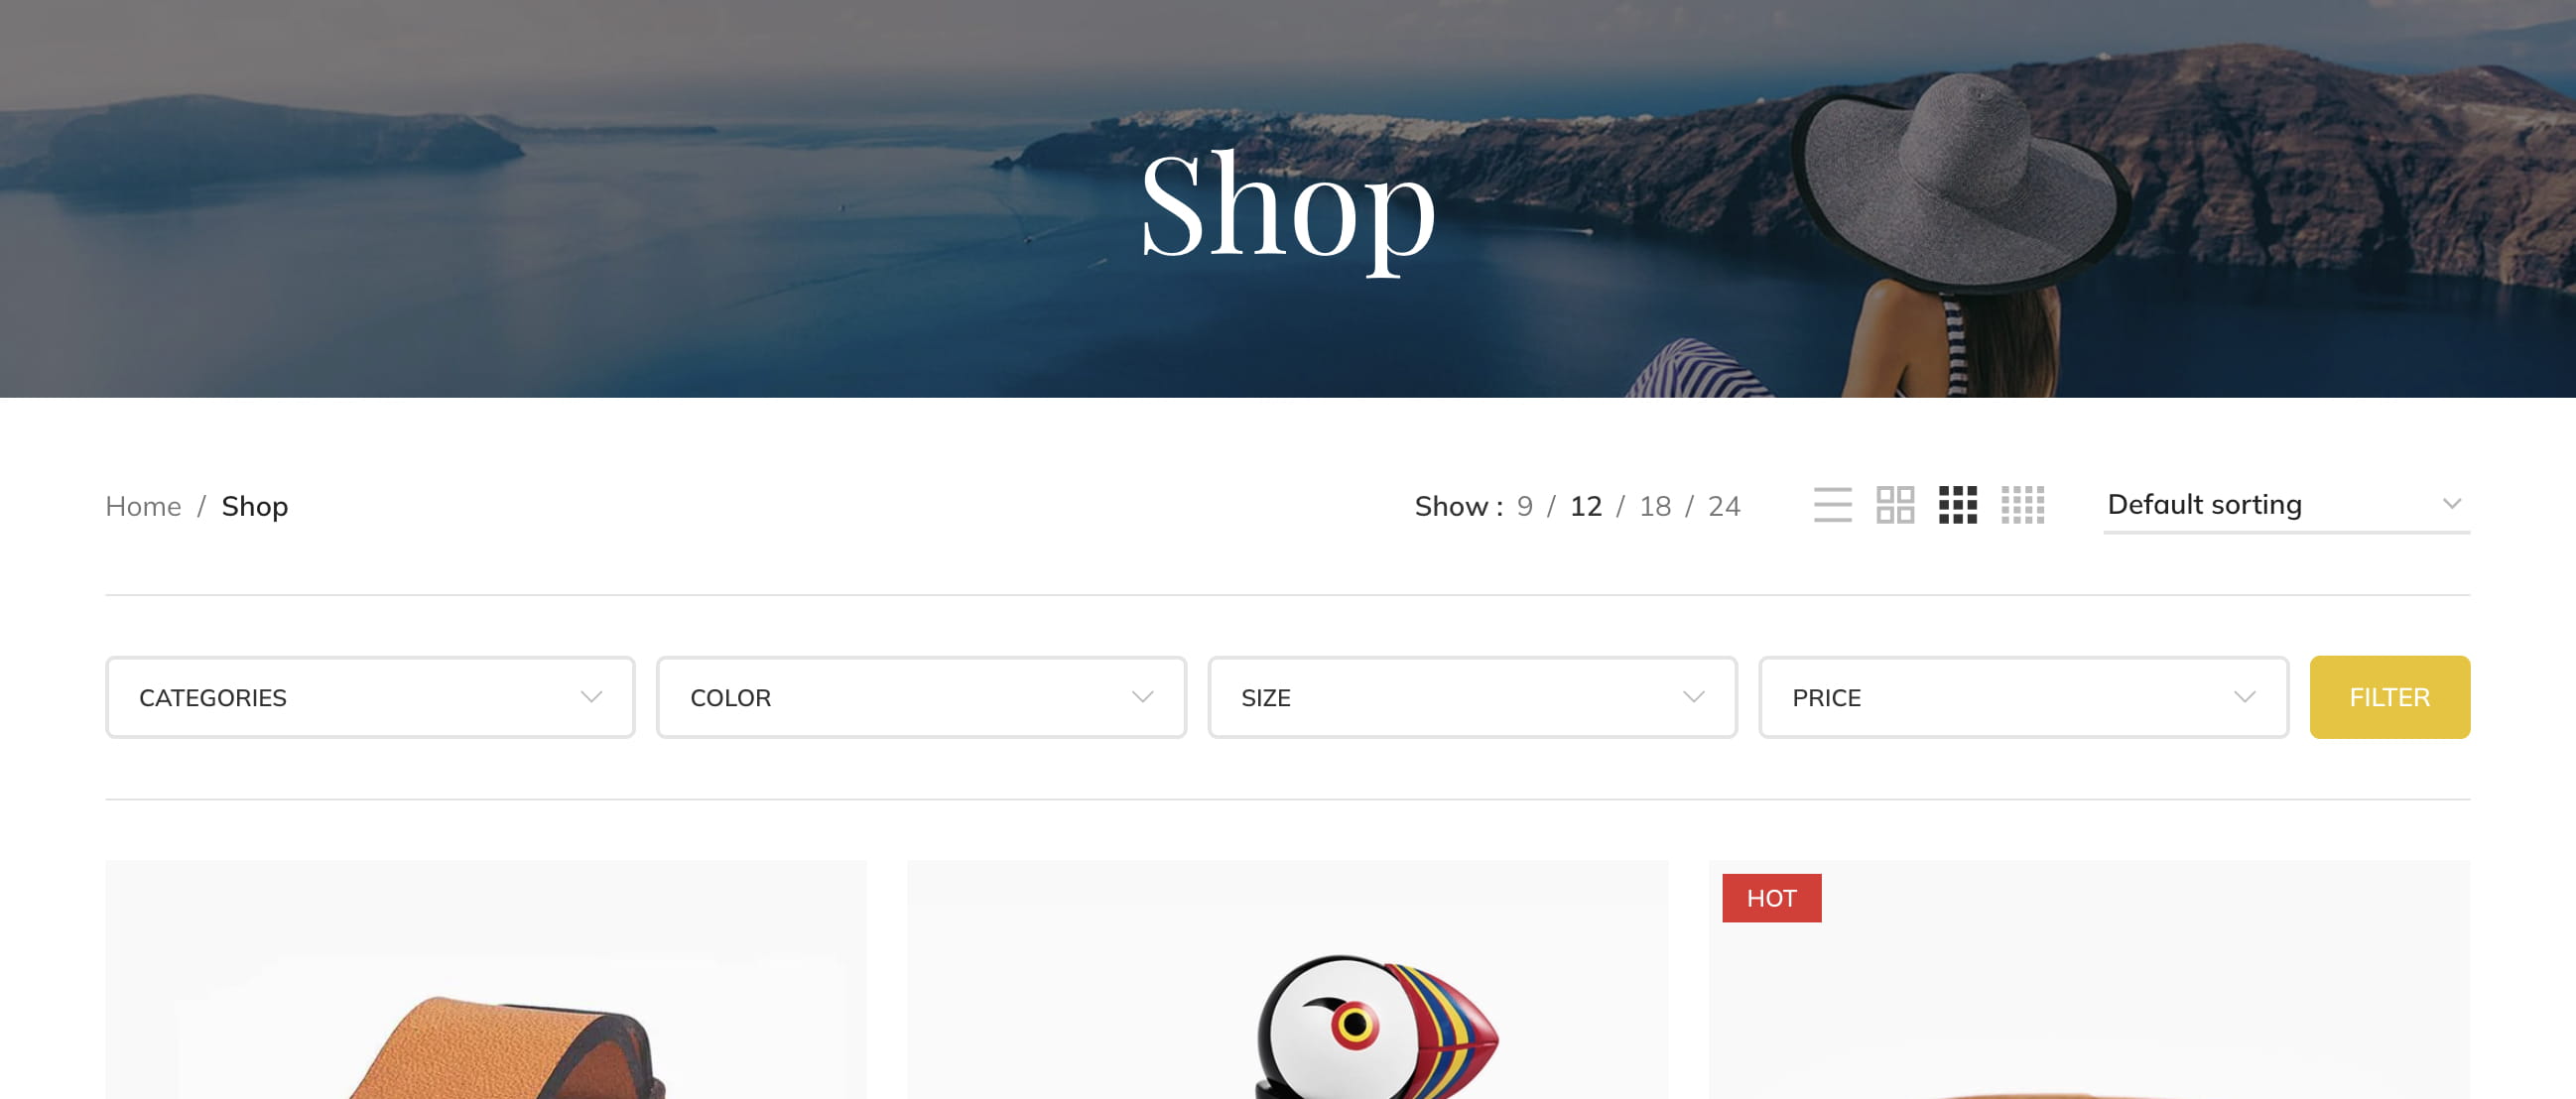
The Product filters element lets customers filter products by category, attribute, stock status, price, or sorting order. You can build the form with Gutenberg, Elementor, or WPBakery, display it above the shop product grid, or place it on another page. See the Travel demo for a frontend example.

Create the filters form
- Navigate to Dashboard -> HTML Blocks -> Add New.
- Add the Product filters element or block with your active page builder.
- Add and configure the required filter types.
- Configure the form layout, behavior, and style, then publish the HTML Block.
In Gutenberg and WPBakery, add the individual filter elements inside the Product filters container. In Elementor, add them as items in the widget’s Filters section.
Available filter types
- Categories — filters products by product category.
- Attributes — filters by a selected global WooCommerce attribute, such as Color or Size.
- Stock status — can include On sale, In stock, and On backorder options.
- Price — filters products by a selected price range.
- Order by — lets customers change the product sorting order.
Before using an Attributes filter, create the global attribute and its terms in Dashboard -> Products -> Attributes, then assign those terms to your products.
Configure form behavior
Use the Product filters settings to choose whether dropdowns open on click or hover and whether they display the selected values. Elementor and WPBakery also provide the Submit form on option:
- Button click — applies all selected filters when the customer clicks the Filter button.
- Dropdown select — applies the filters when a value is selected.
In Gutenberg, keep the Button block inside Product filters for manual submission, or remove it to apply filters after a selection.
Display the form above the shop products
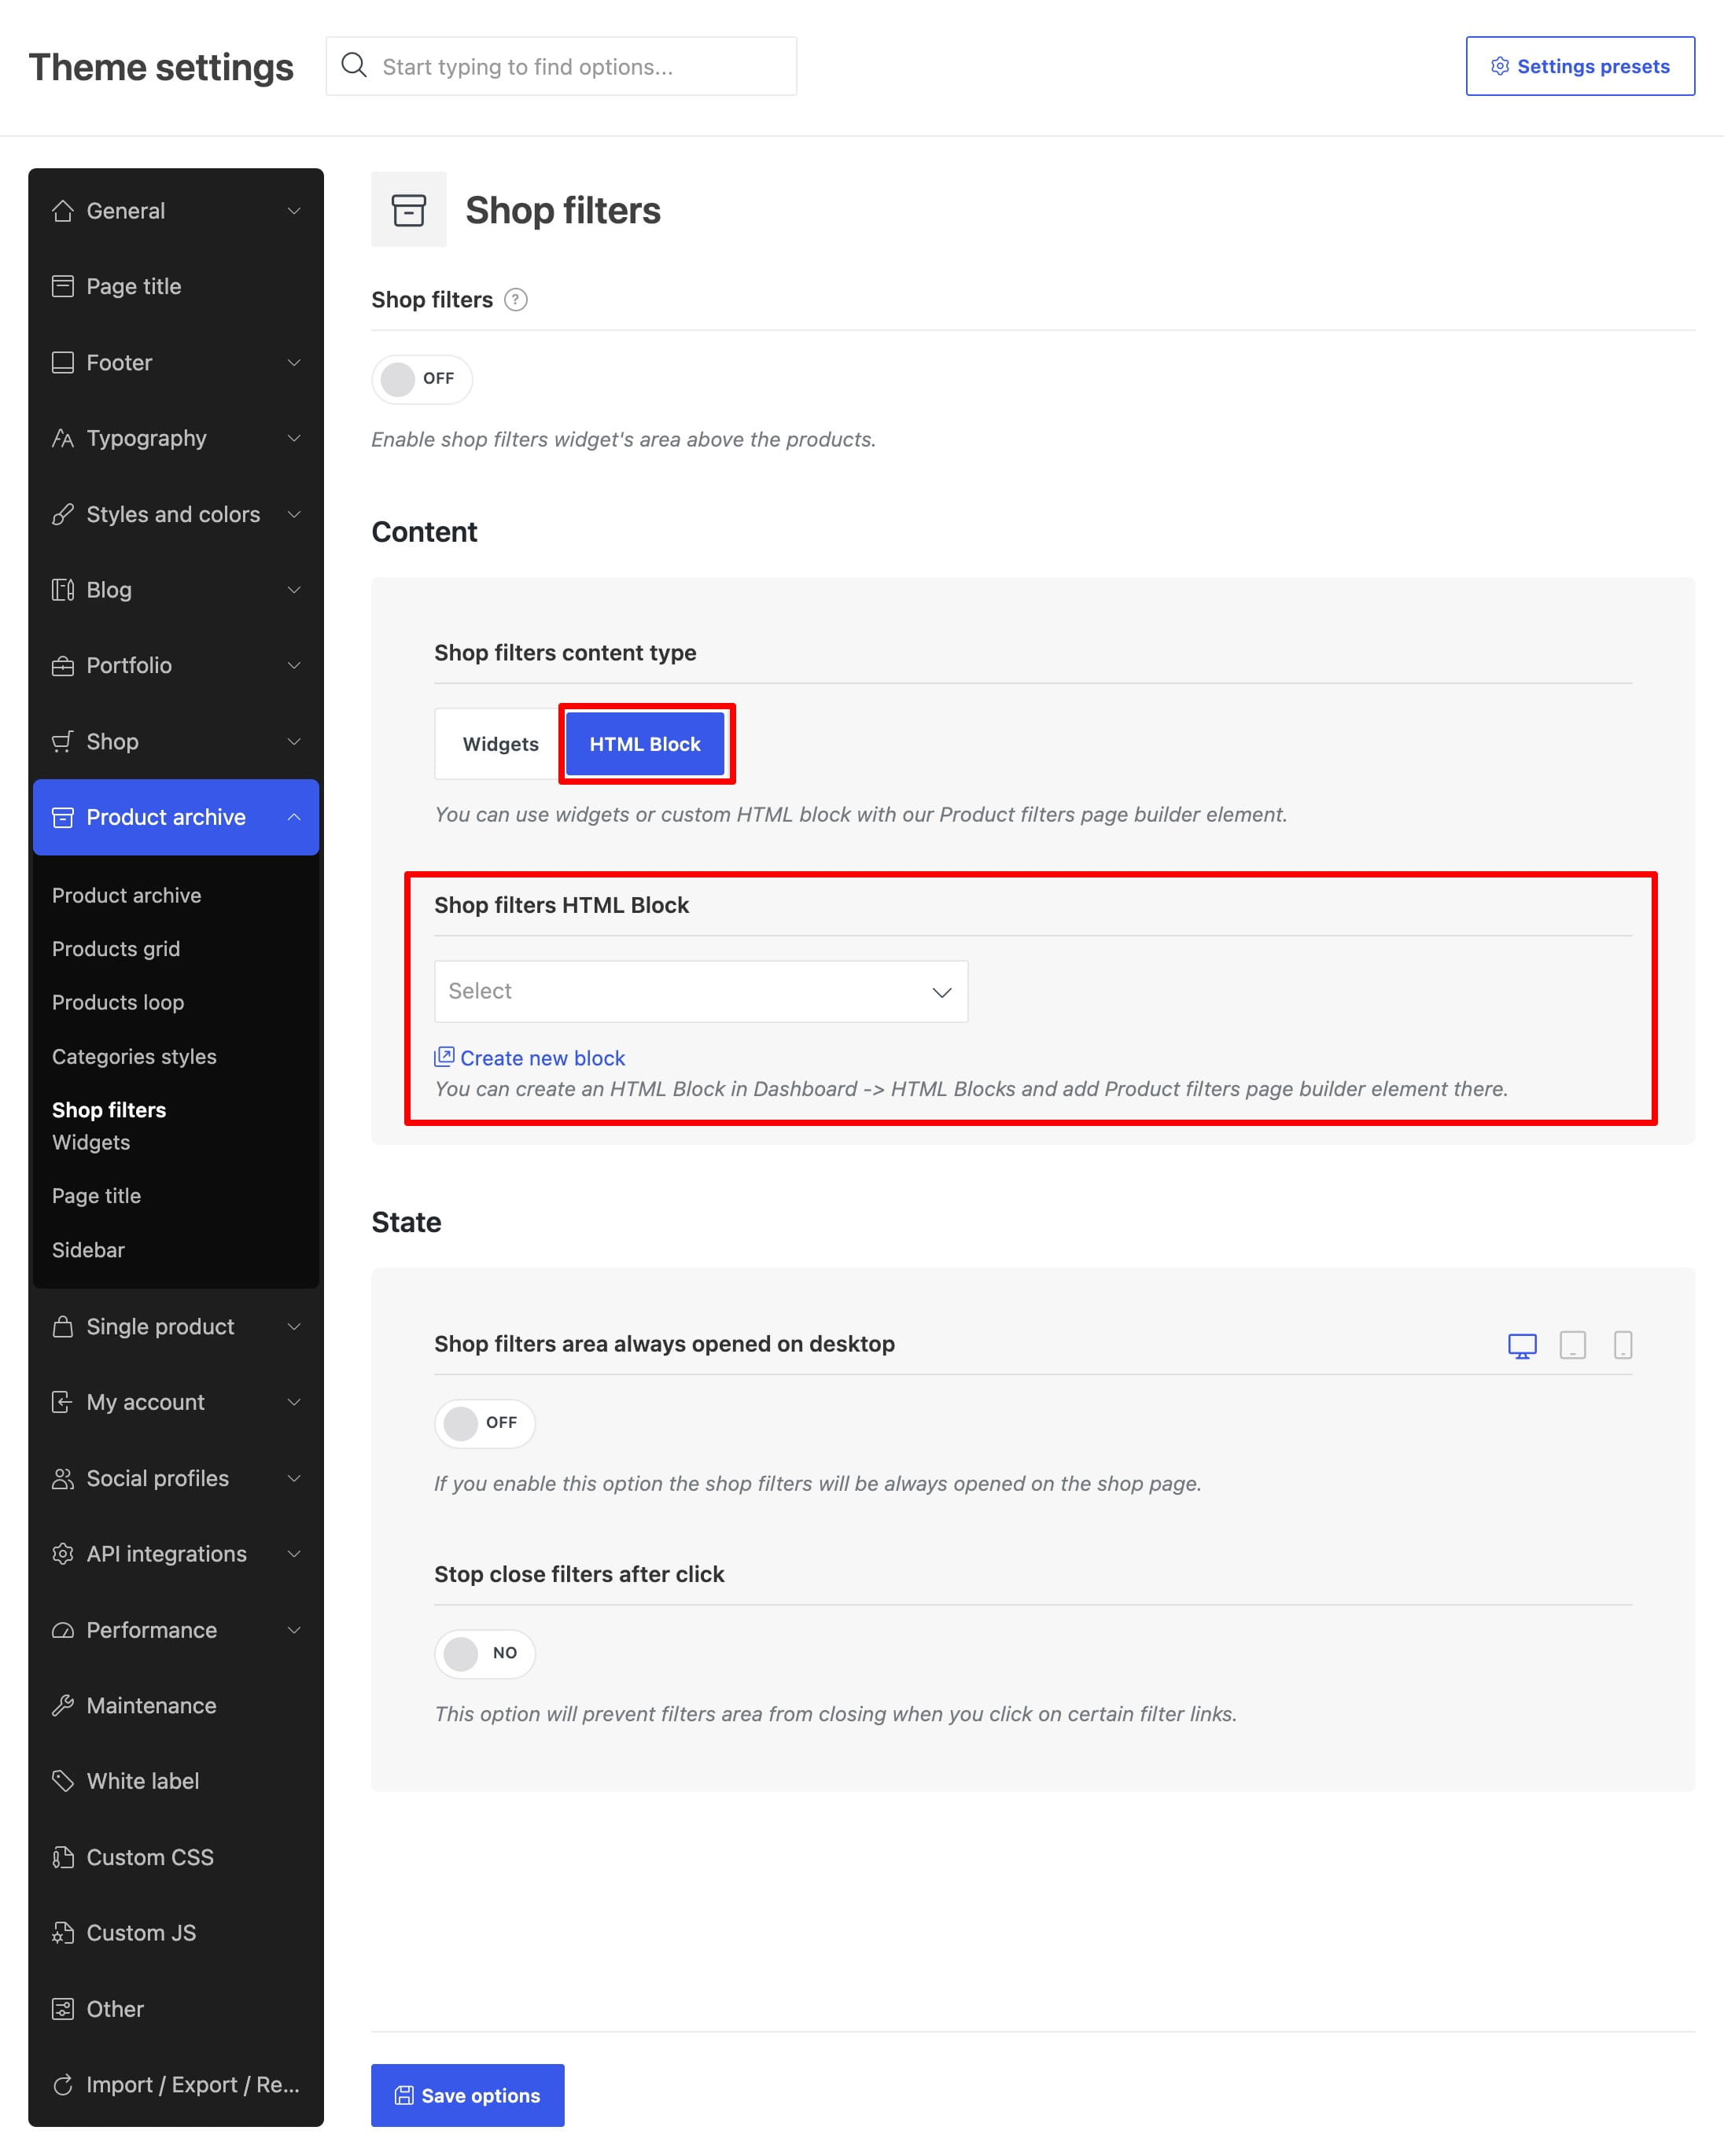
- Navigate to Dashboard -> Theme Settings -> Product archive -> Shop filters.
- Enable Shop filters.
- Set Shop filters content type to HTML Block.
- Select the form you created in Shop filters HTML Block.
- Save the Theme Settings.
Display the form on another page
Insert the published HTML Block wherever you want the filters form to appear. When the form is used outside a product archive, submitting it opens the WooCommerce Shop page with the selected filter parameters. On shop and product archive pages, the filters work with the current archive and support WoodMart AJAX filtering when AJAX shop is enabled.
Don’t miss WoodMart updates
Receive feature updates, tutorials, and WoodMart news via email.
 Last updated: August 13, 2026