
Checkout fields manager
Checkout fields manager lets you manage the billing and shipping fields registered in the classic WooCommerce checkout. You can reorder fields, change their width and position, make them required or optional, and hide fields that are not needed.
Enable Checkout fields manager
- Navigate to Dashboard -> Theme Settings -> Shop -> Checkout.
- Enable Checkout fields manager.
- Save the Theme Settings.

Open the fields manager
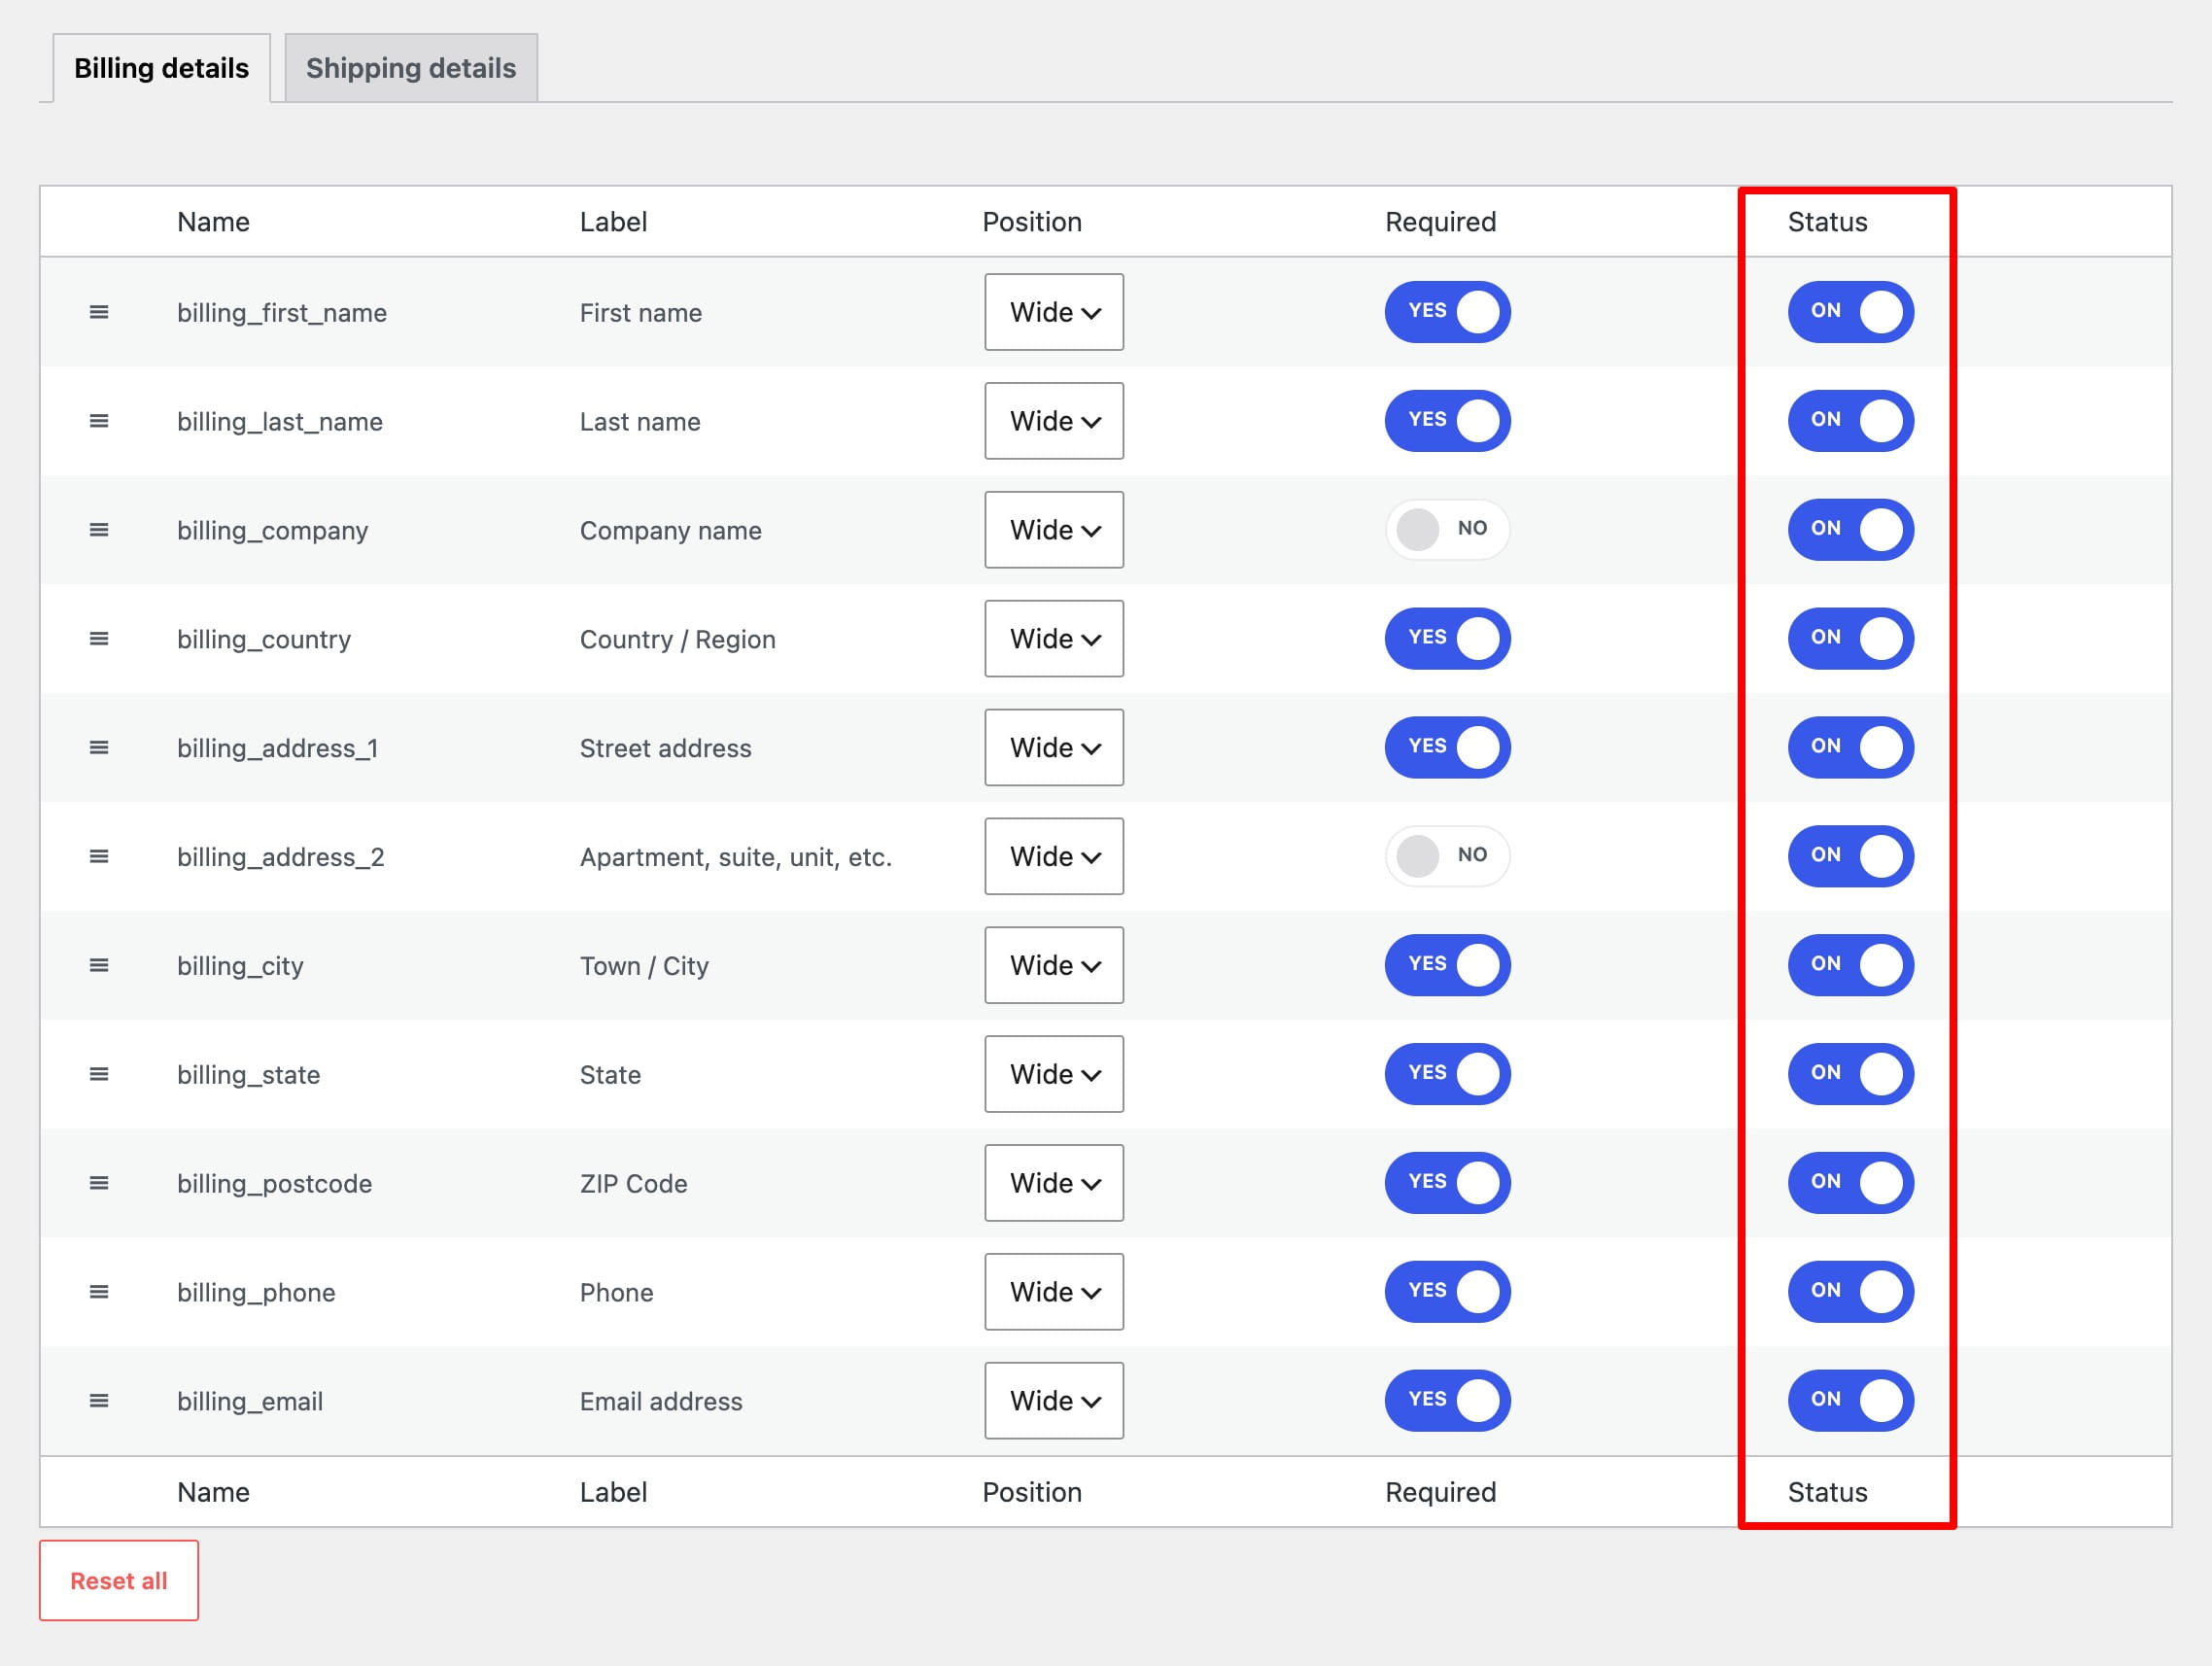
Navigate to Dashboard -> WooCommerce -> Checkout Fields. Use the Billing details and Shipping details tabs to manage the corresponding groups of checkout fields.
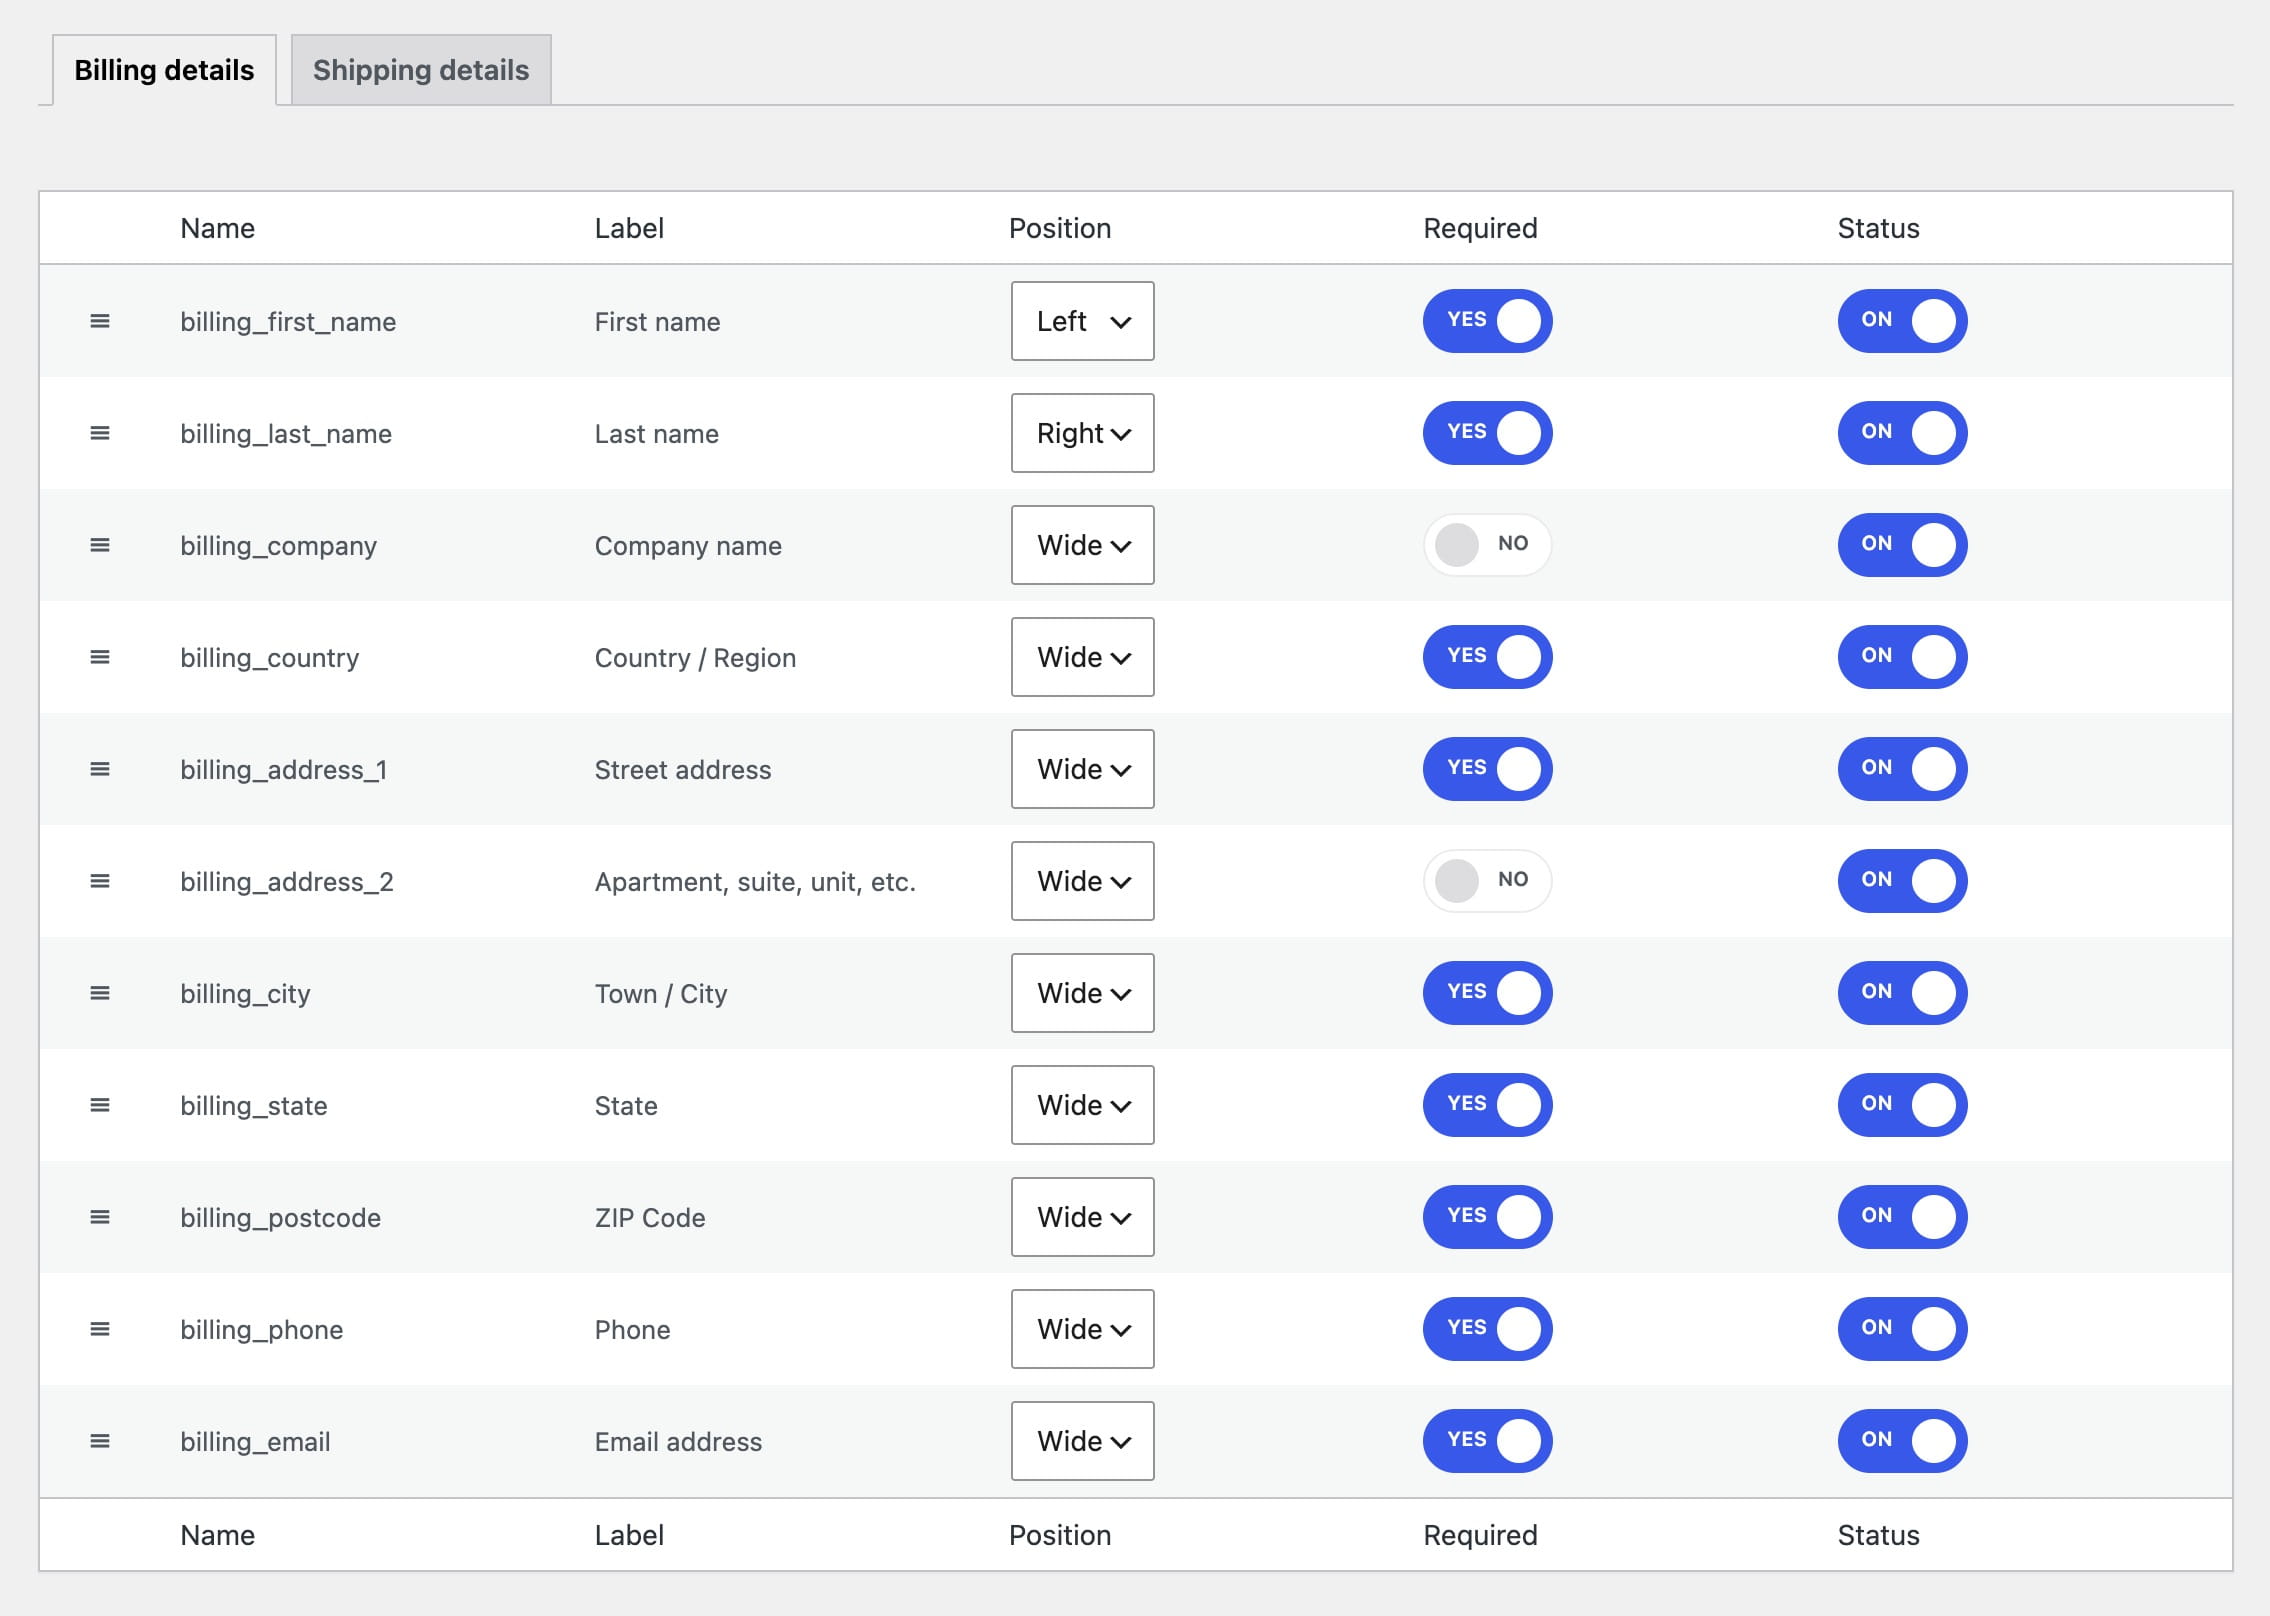
The table contains the following controls:
- Sort — drag the handle to change the field order.
- Name — displays the internal WooCommerce field name.
- Label — displays the current field label. The label cannot be edited in this manager.
- Position — controls the field width and horizontal placement.
- Required — makes the field required or optional.
- Status — shows or hides the field at checkout.
Changes are saved automatically. There is no separate Save button on this page.
Reorder checkout fields
Drag a row using the handle in the Sort column and place it in the required position. The new order is saved when you release the row.
Change field position
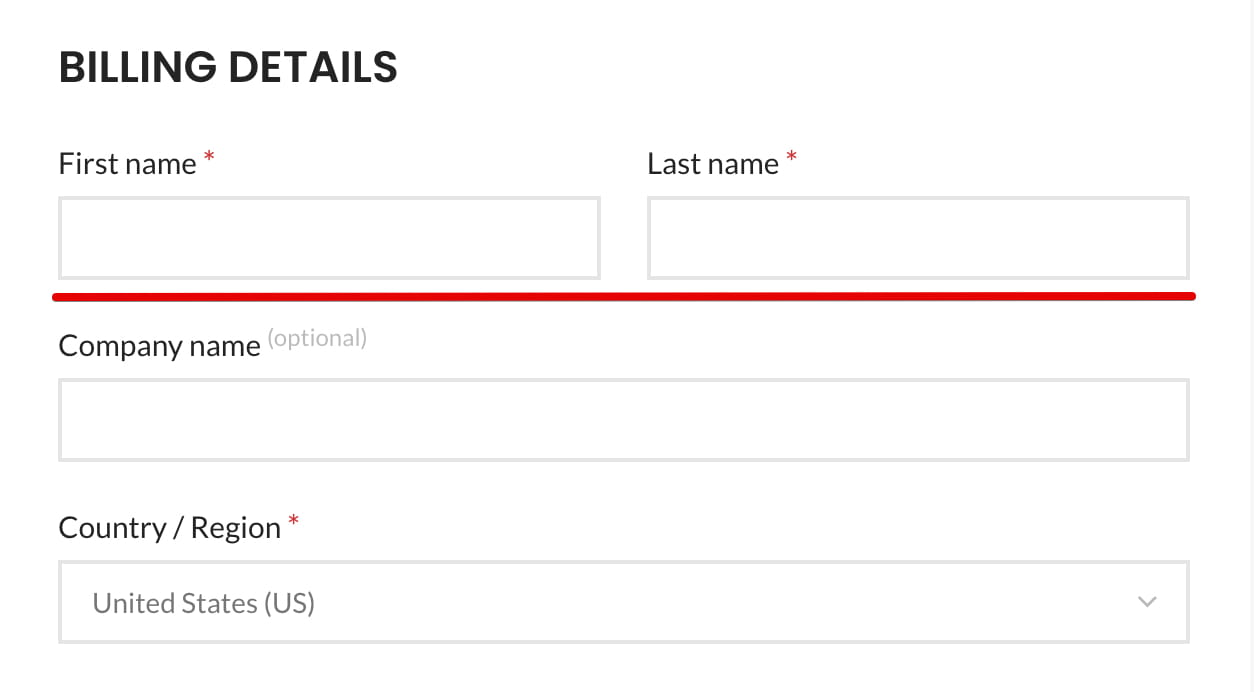
Position provides three layouts:
- Left — places the field in the left half of a row.
- Right — places the field in the right half of a row.
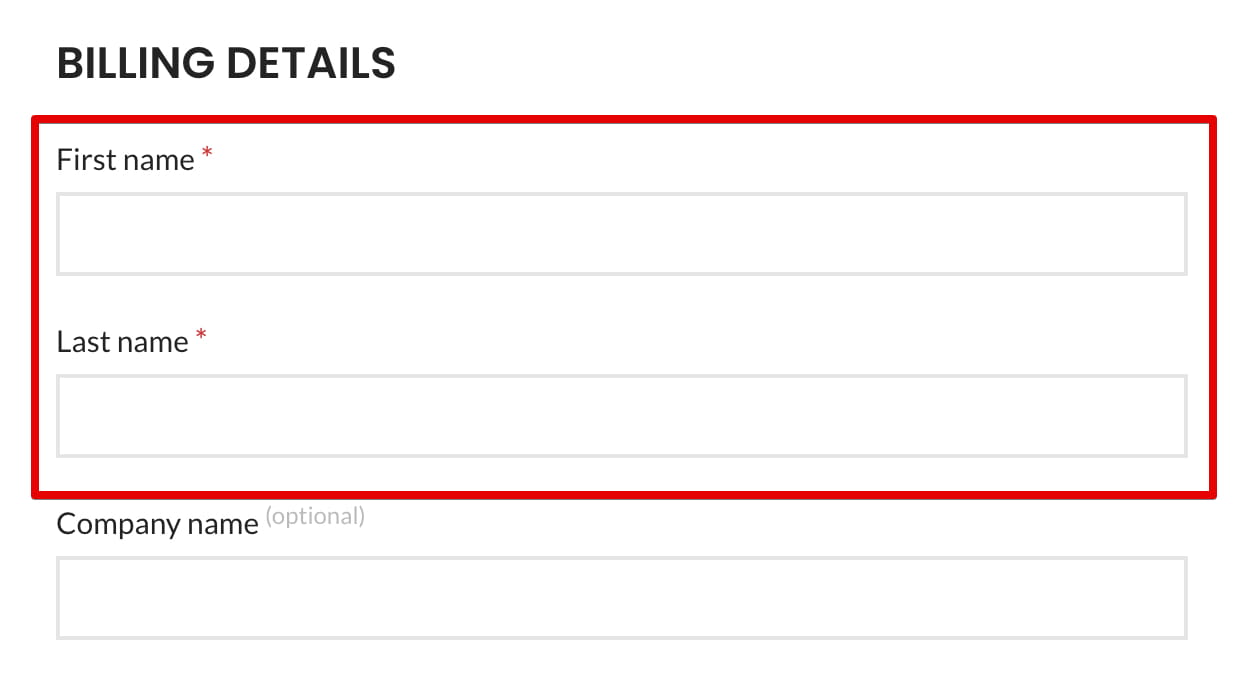
- Wide — makes the field occupy the full row width.
For example, the default Left and Right positions display the first name and last name fields in one row.
Setting both fields to Wide displays each one on a separate row.
Make a field required or optional
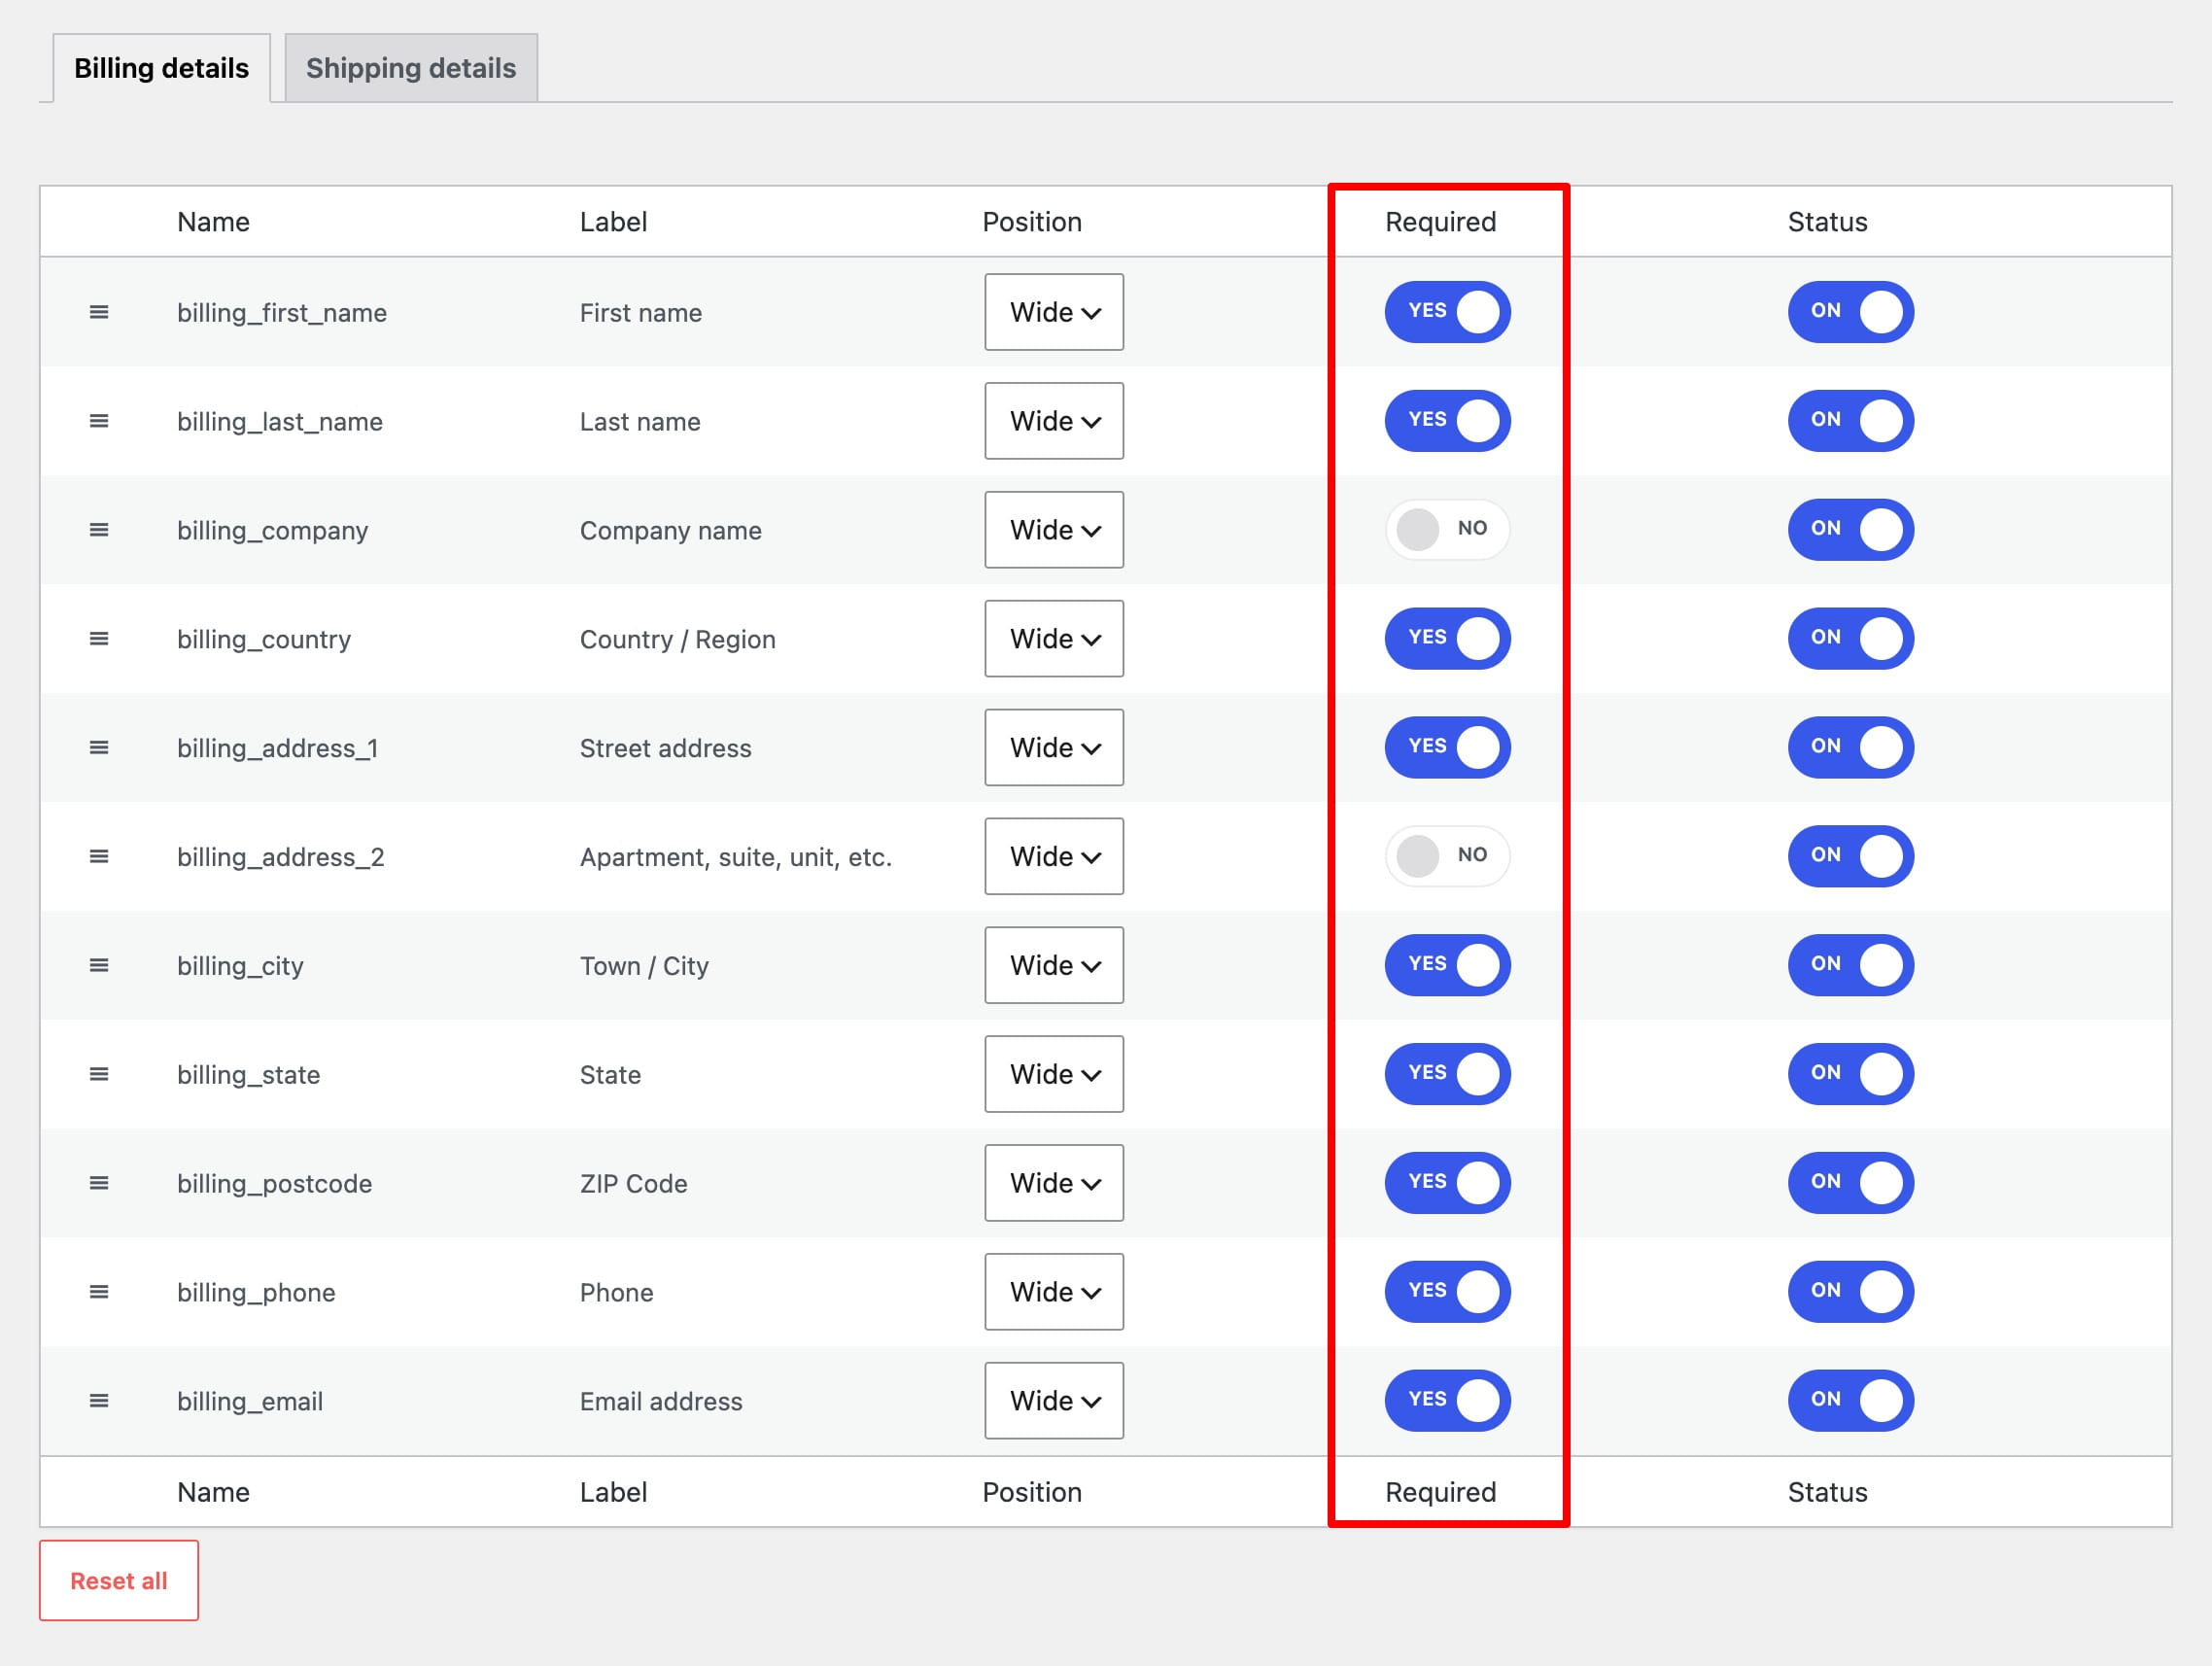
Use Required to determine whether customers must complete a field before placing an order. Select Yes for a required field or No for an optional field.
Show or hide a field
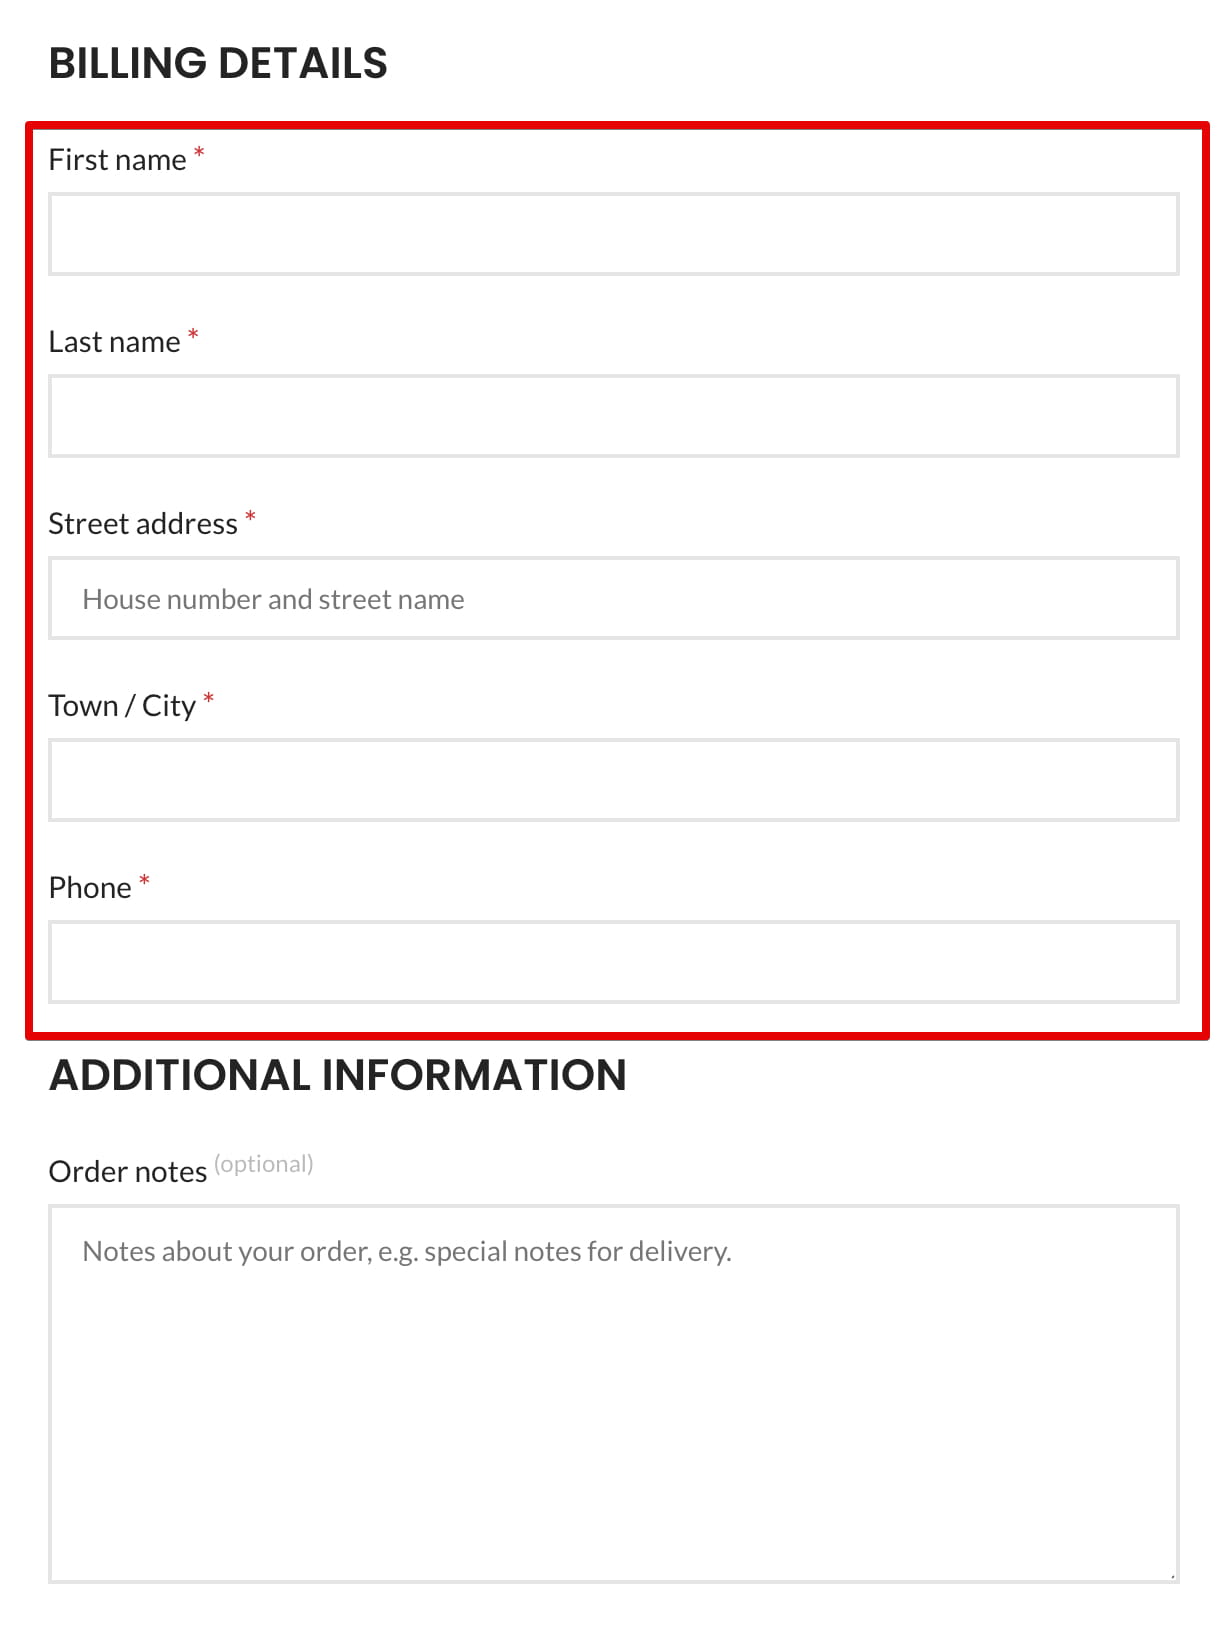
Use Status to enable or disable a checkout field. Disabling a field hides it from the checkout form without permanently deleting it.
Configure shipping fields
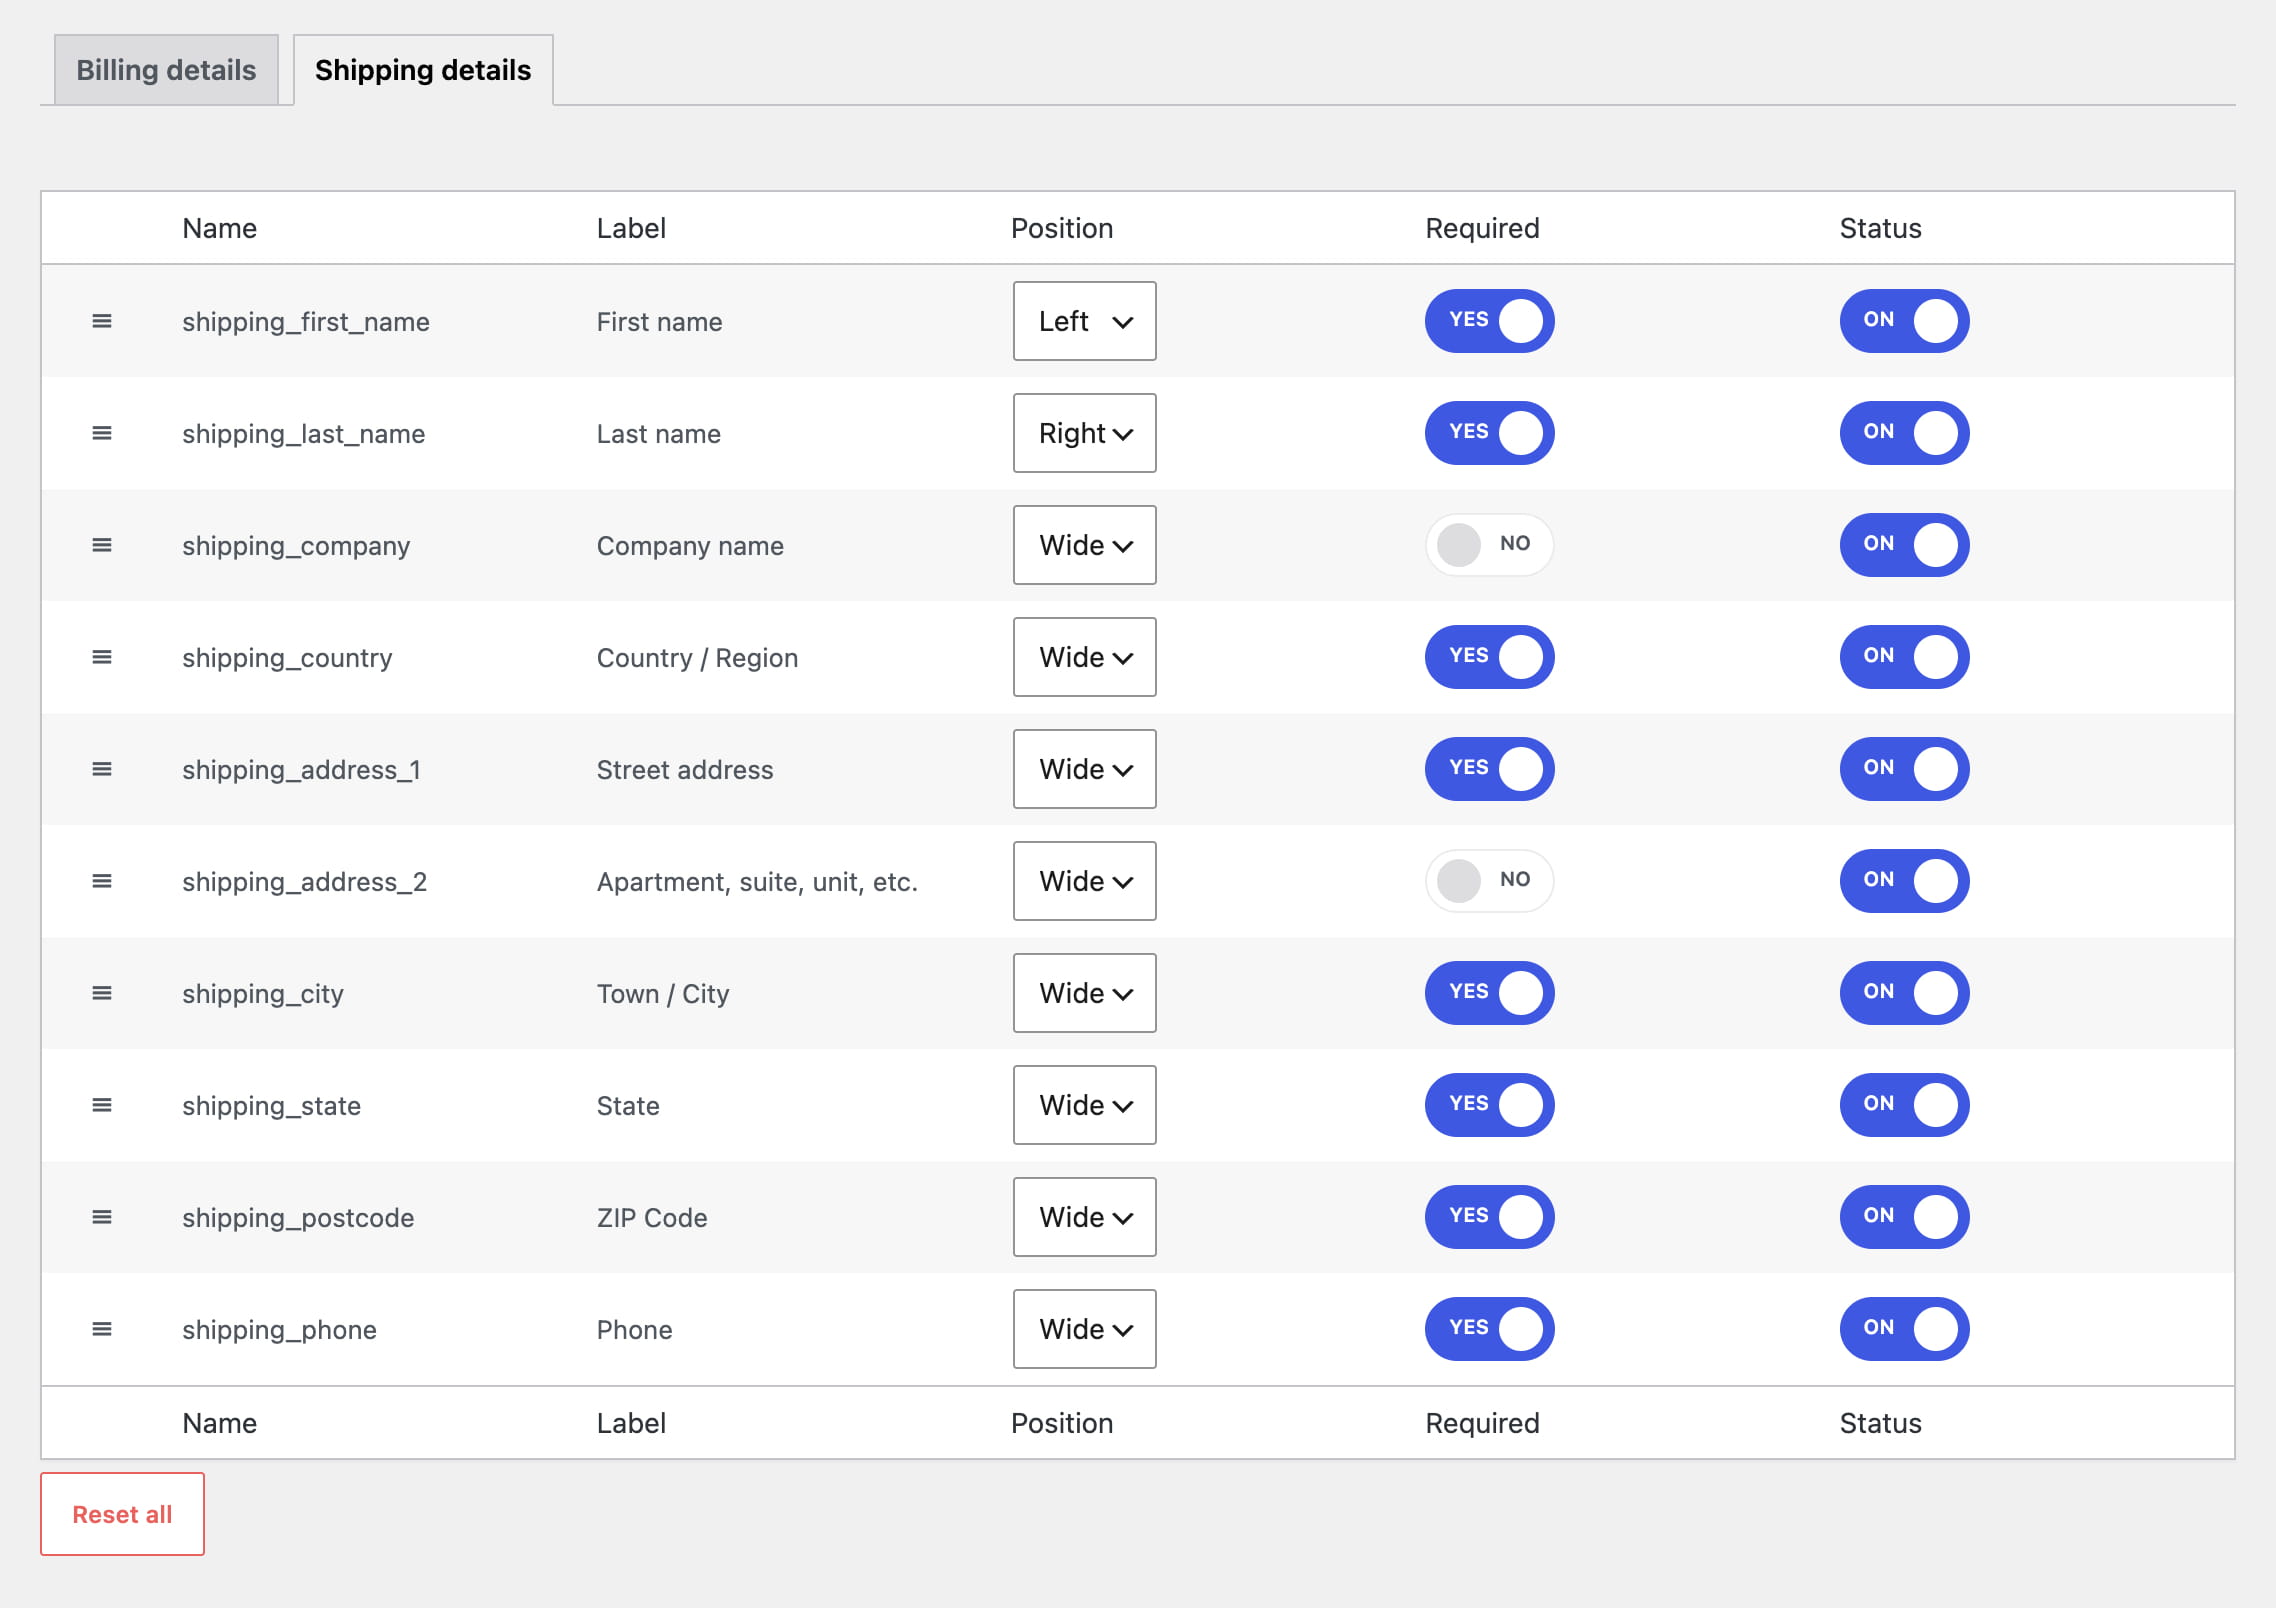
Open the Shipping details tab to reorder shipping fields and configure their Position, Required state, and Status in the same way as billing fields.
Reset all changes
Click Reset all at the bottom of the fields manager to discard the custom billing and shipping field settings and restore the default WooCommerce configuration.
[woocommerce_checkout].Don’t miss WoodMart updates
Receive feature updates, tutorials, and WoodMart news via email.
 Last updated: August 14, 2026