
Wishlist
The built-in wishlist allows customers to save products for later. Guests can use a standard wishlist unless access is restricted to logged-in customers, while registered customers can keep their saved products in their accounts and organize them into multiple wishlists.
Enable and configure the wishlist
Navigate to Dashboard -> Theme Settings -> Shop -> Wishlist, enable Enable wishlist, and save the Theme Settings.
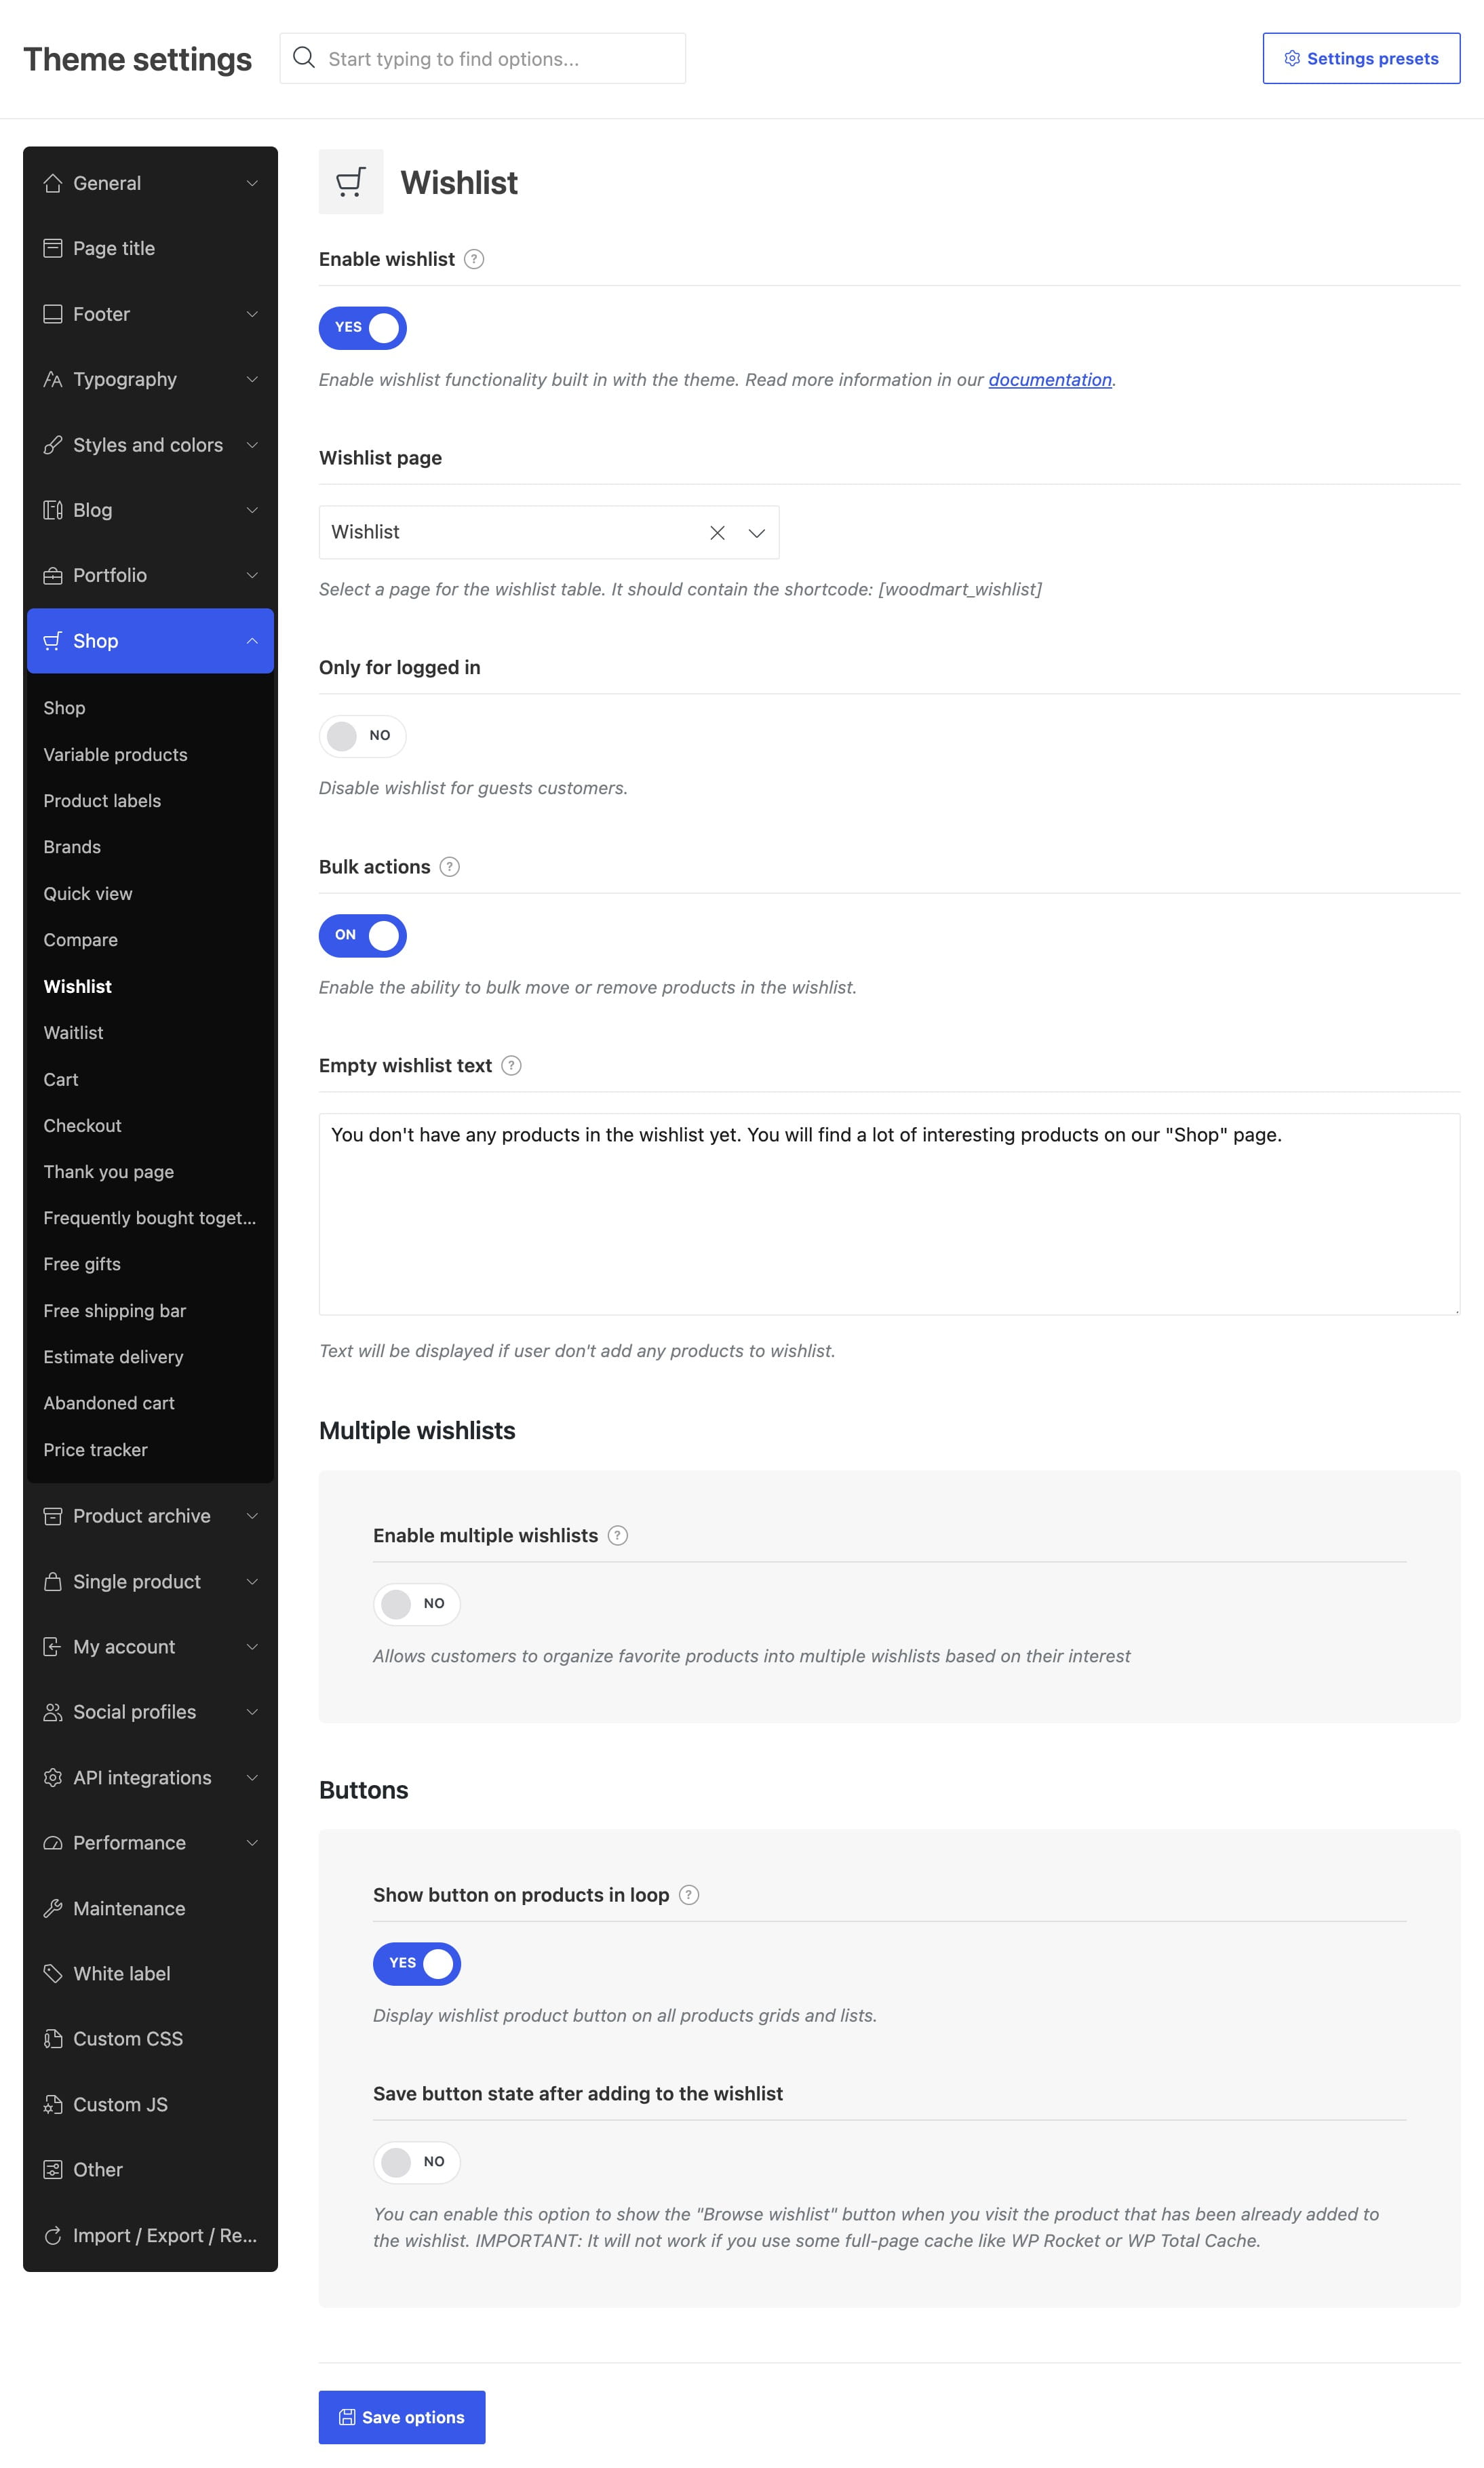
The section also includes the following options:
- Only for logged in — disables the wishlist for guest customers.
- Bulk actions — lets customers move or remove several products at once.
- Empty wishlist text — changes the message displayed when the wishlist has no products.
- Show button on products in loop — displays the wishlist button in product grids and lists.
- Save button state after adding to the wishlist — replaces the button with a Browse wishlist link for products that have already been saved. This option does not work with full-page caching.
Create the wishlist page
- Navigate to Dashboard -> Pages -> Add New and create a page for the wishlist.
- Add the wishlist content using the method available in your editor:
- Gutenberg: add a Shortcode block containing
[woodmart_wishlist] - Elementor: add the Wishlist content widget
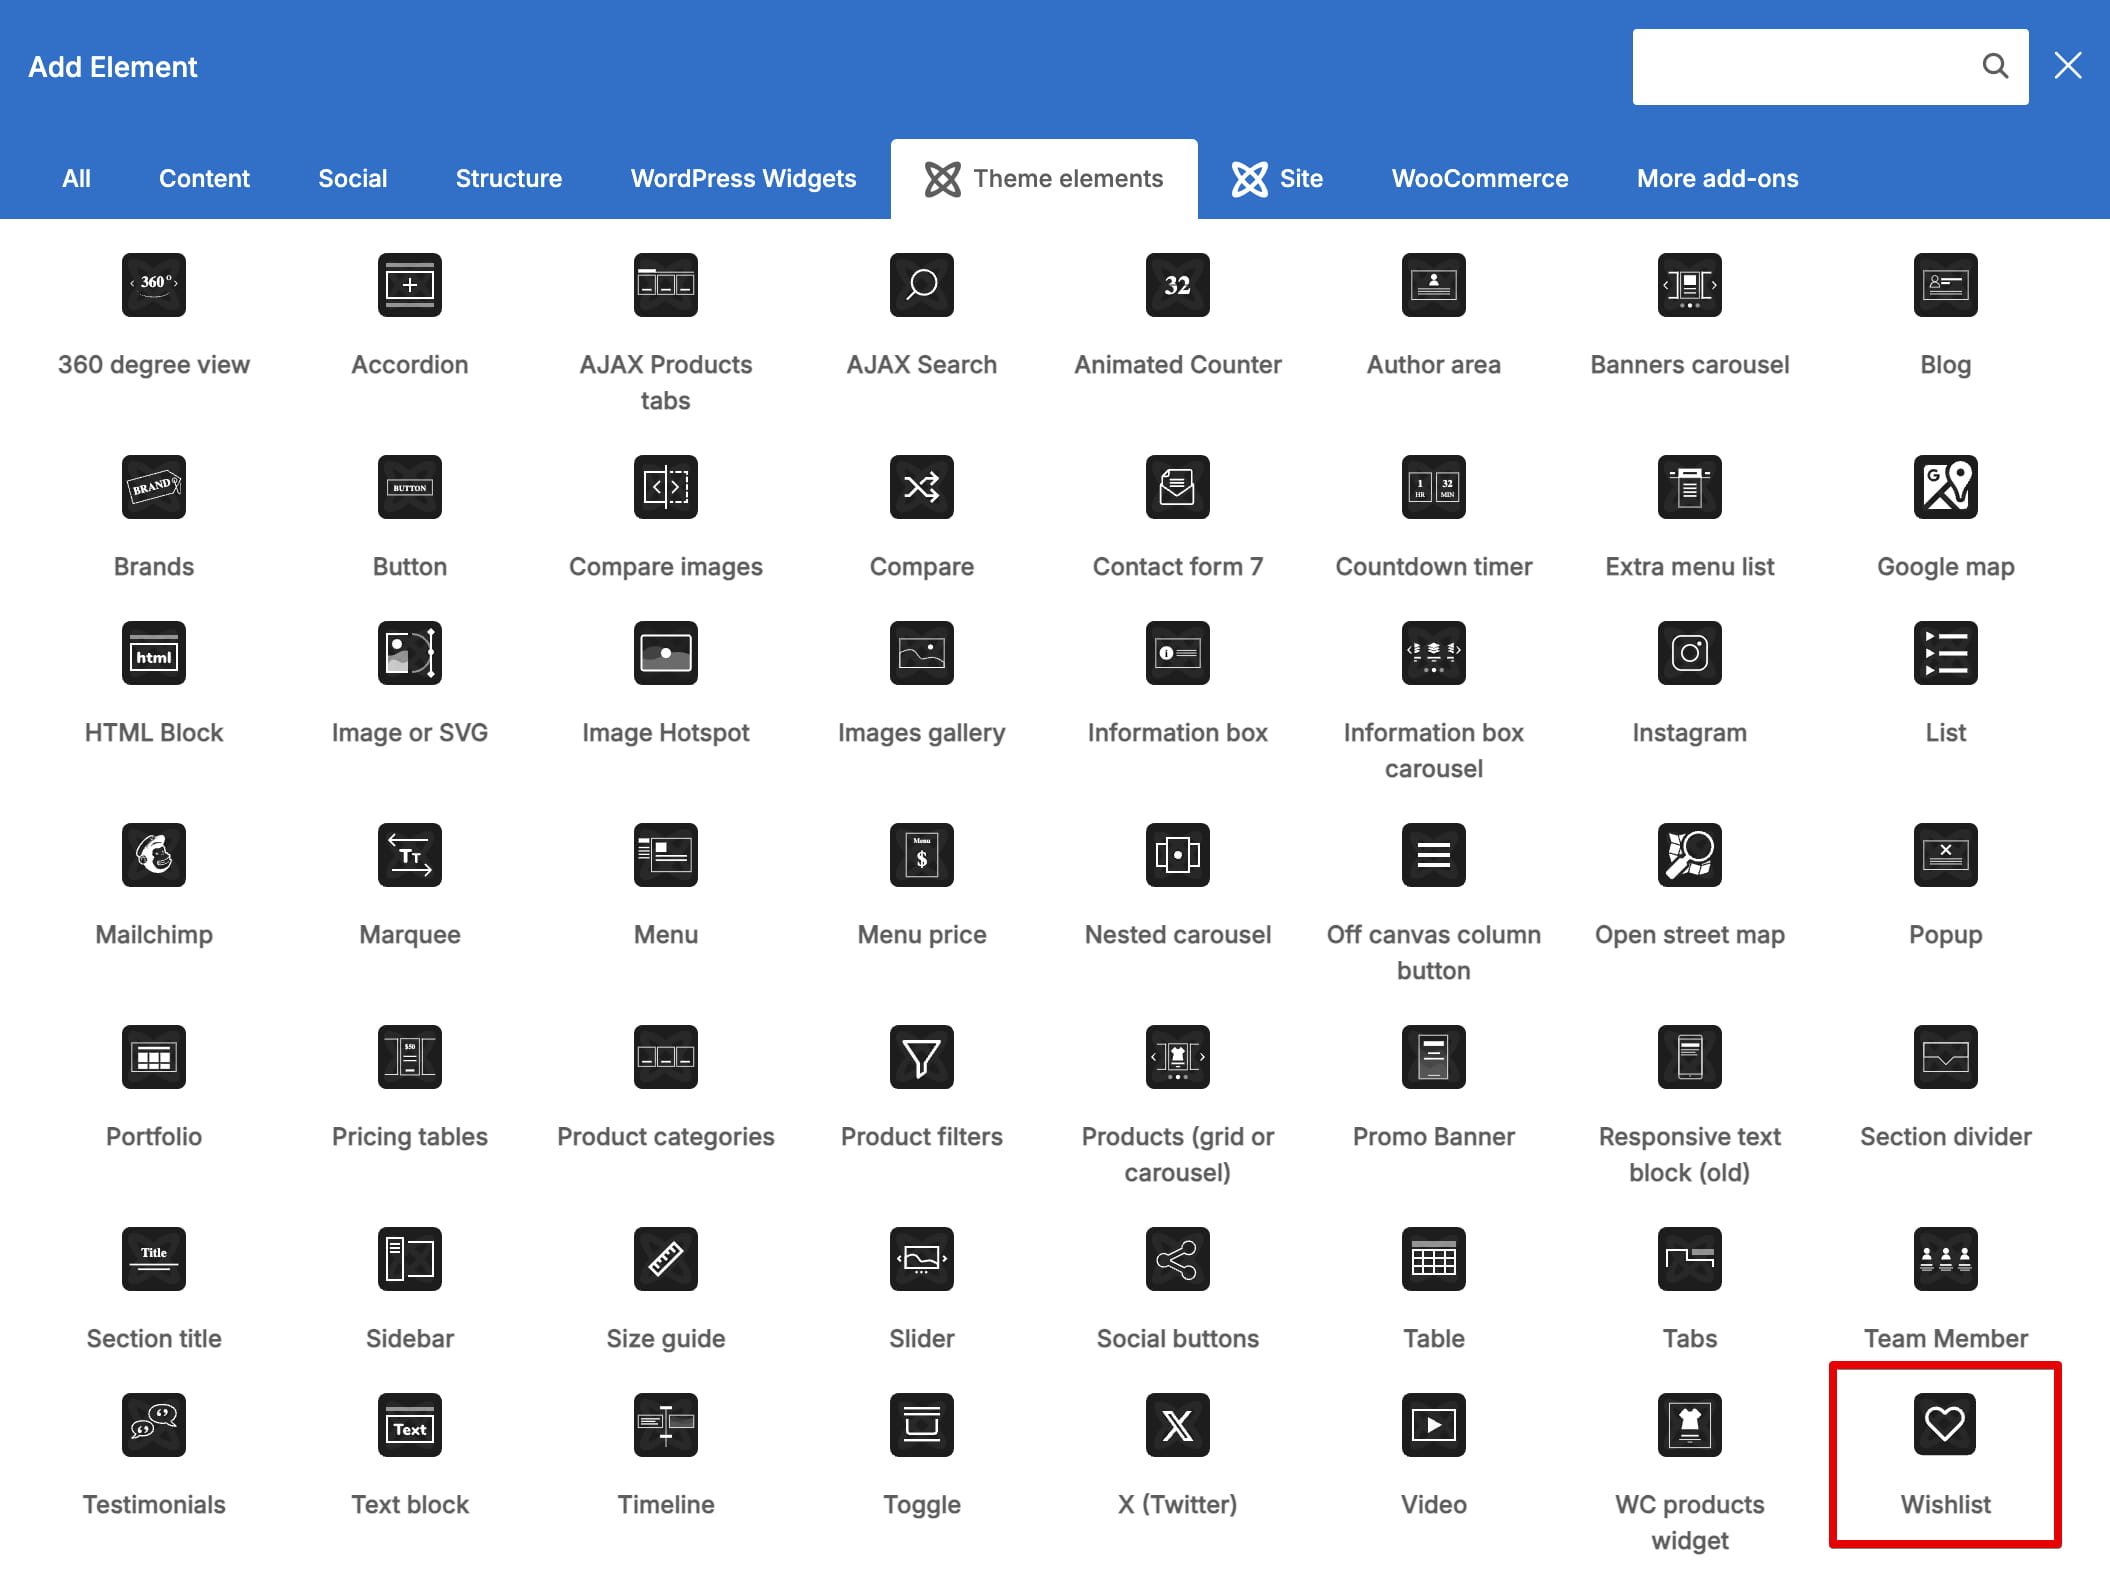
- WPBakery: add the Wishlist element.
- Gutenberg: add a Shortcode block containing
- Publish the page.
Return to Dashboard -> Theme Settings -> Shop -> Wishlist, select the published page under Wishlist page, and save the Theme Settings.
After assigning the page, navigate to Dashboard -> Settings -> Permalinks and click Save Changes once. This refreshes the URL rules used for individual wishlists.
Add the wishlist to the header
Navigate to Dashboard -> WoodMart -> Header Builder, edit the required header, and add the Wishlist element. Its settings let you choose whether the header displays an icon, text, or both.
If you use a custom single product layout, add the Add to wishlist button element to the layout. This element is available for Gutenberg, Elementor, and WPBakery layouts.
Multiple wishlists
Registered customers can create multiple wishlists and organize saved products into separate lists. This feature is available only to logged-in customers.
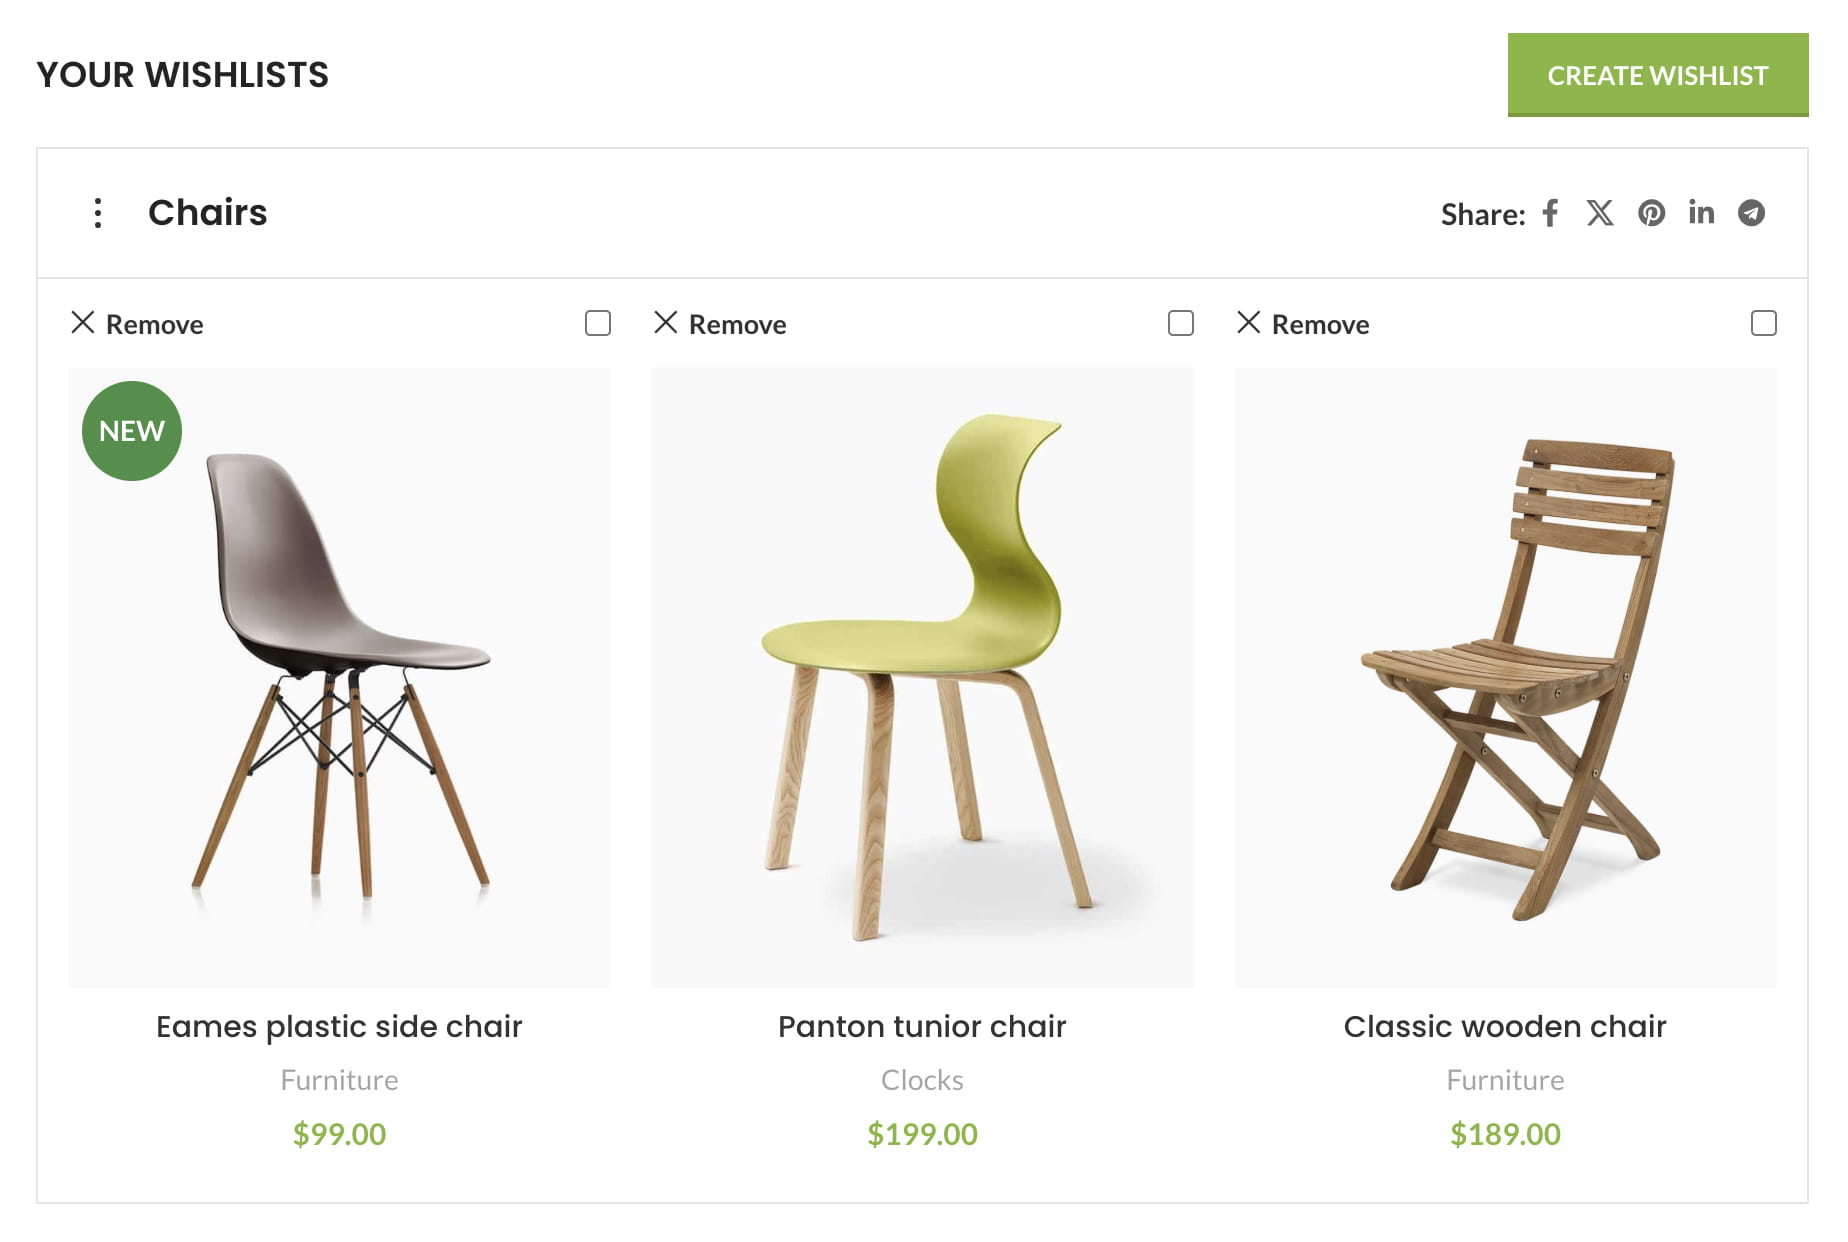
To enable the feature, navigate to Dashboard -> Theme Settings -> Shop -> Wishlist and enable Enable multiple wishlists.
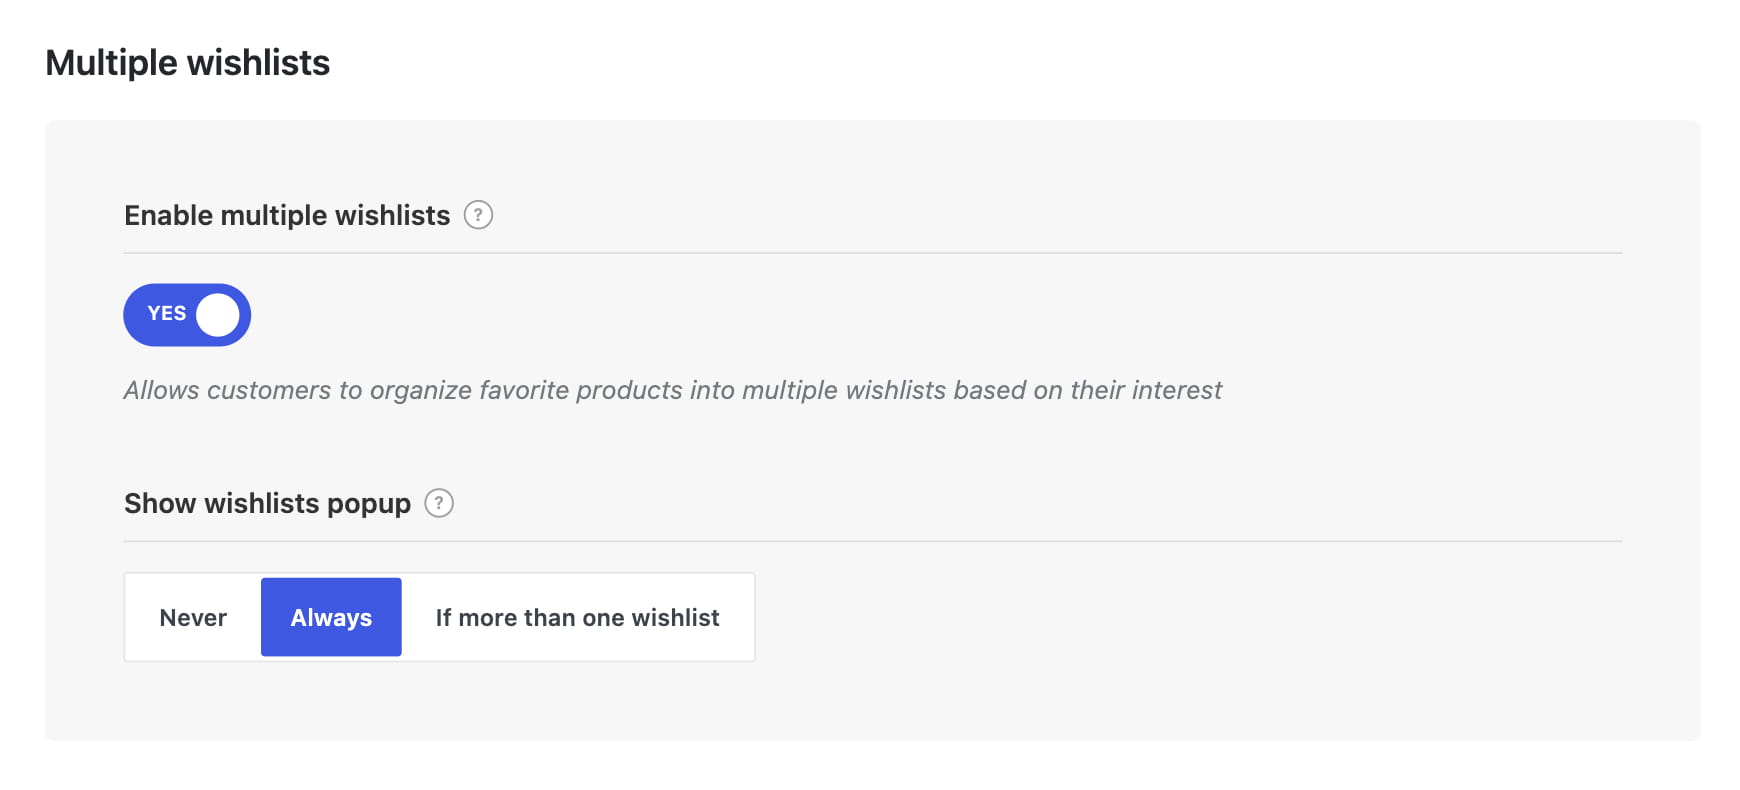
Use Show wishlists popup to control when customers choose the destination list:
- Never — does not open the selection popup.
- Always — opens it whenever a product is added.
- If more than one wishlist — opens it only when the customer has multiple lists.
Customers can also share their wishlists using the networks enabled under Dashboard -> Theme Settings -> Social profiles -> Share buttons.
View wishlist data
Navigate to Dashboard -> Products -> Wishlists to review wishlist activity.
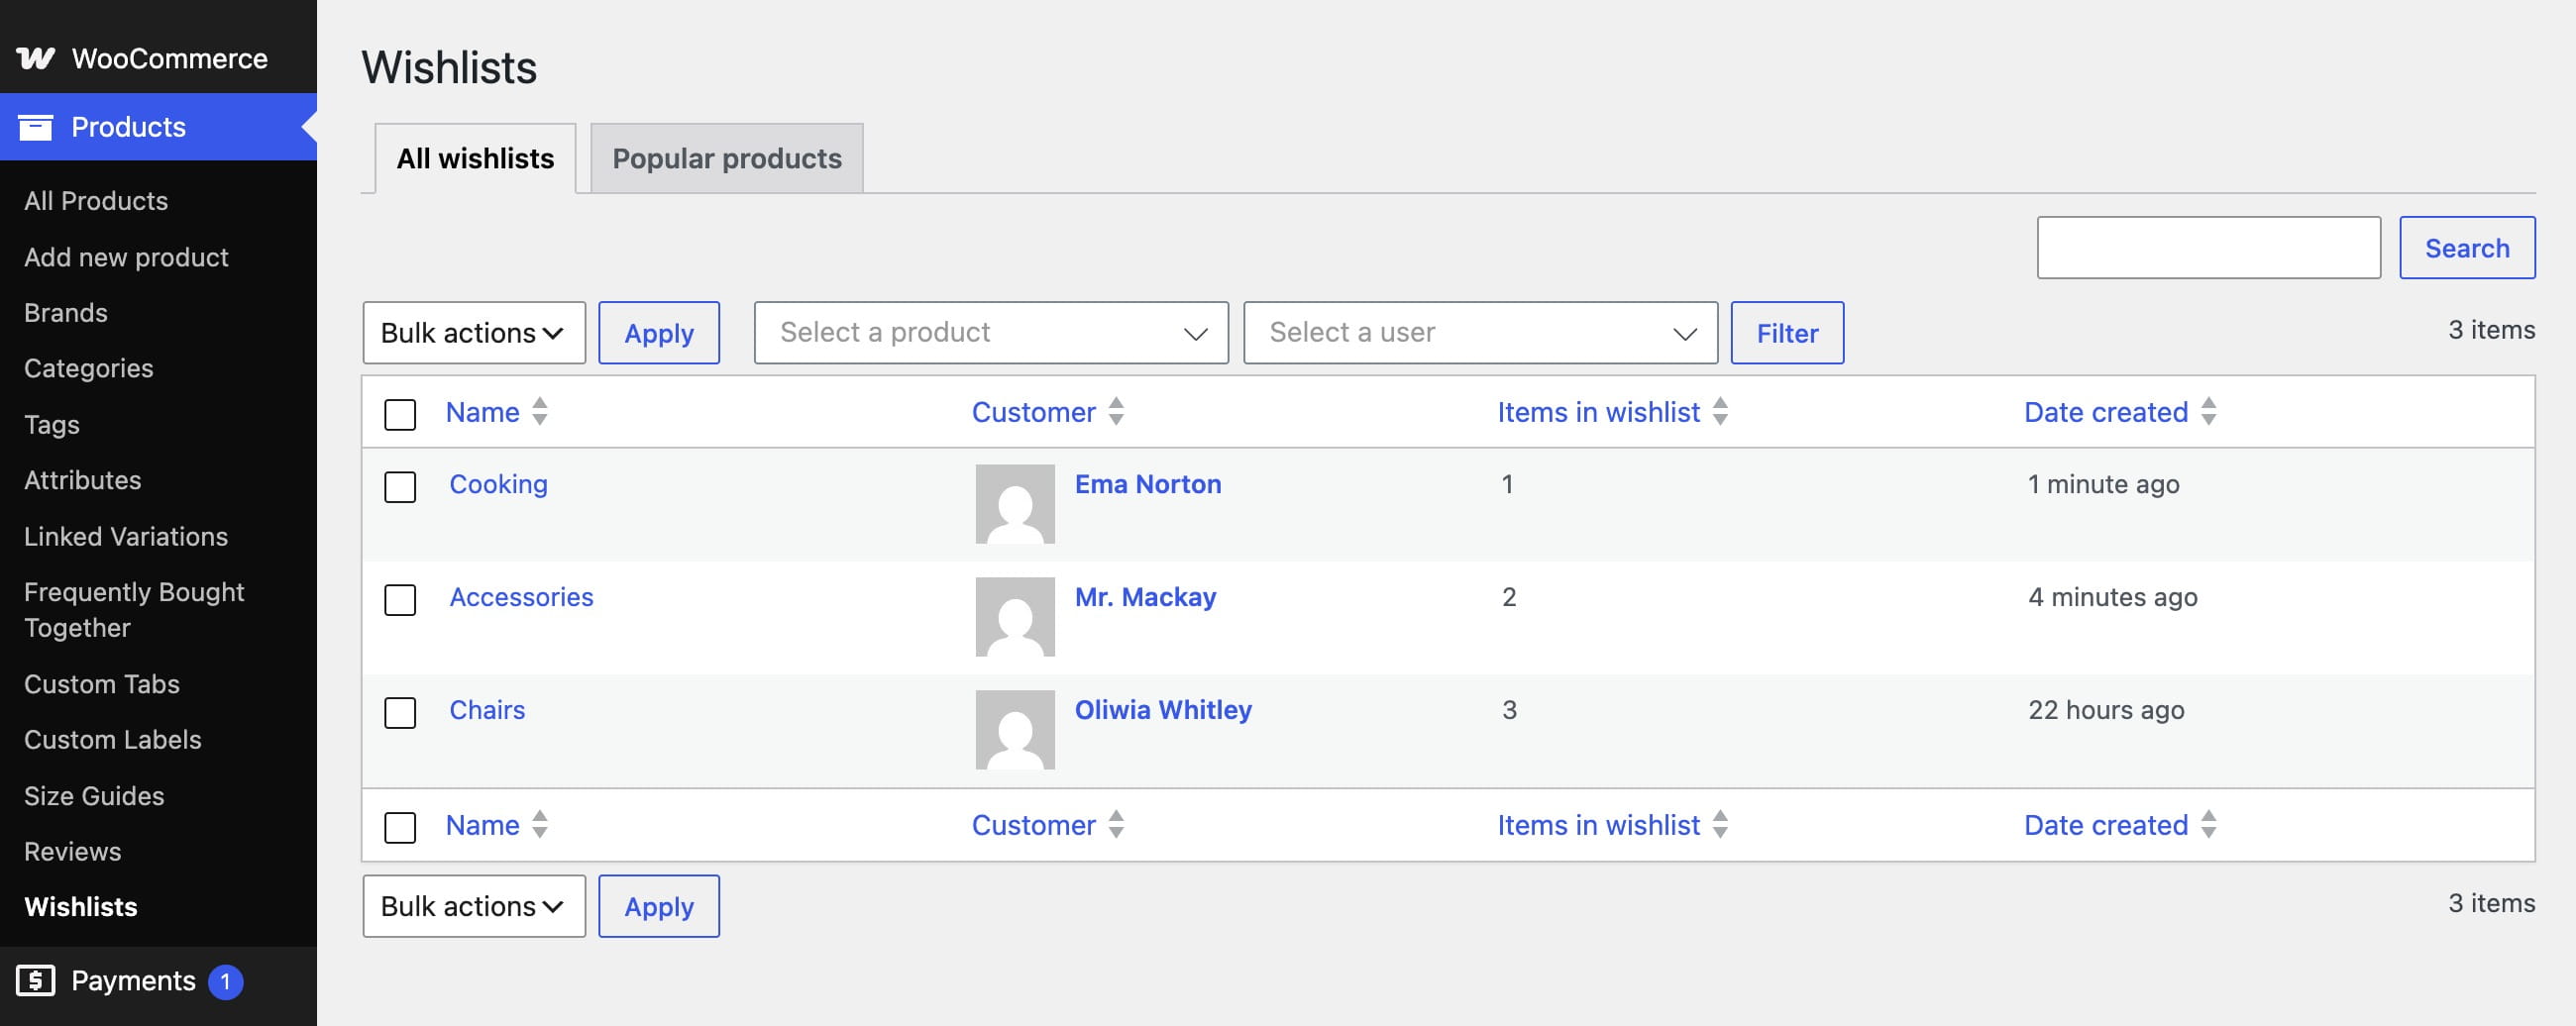
The All wishlists tab lists the wishlists created by customers. Open a wishlist to view its saved products.
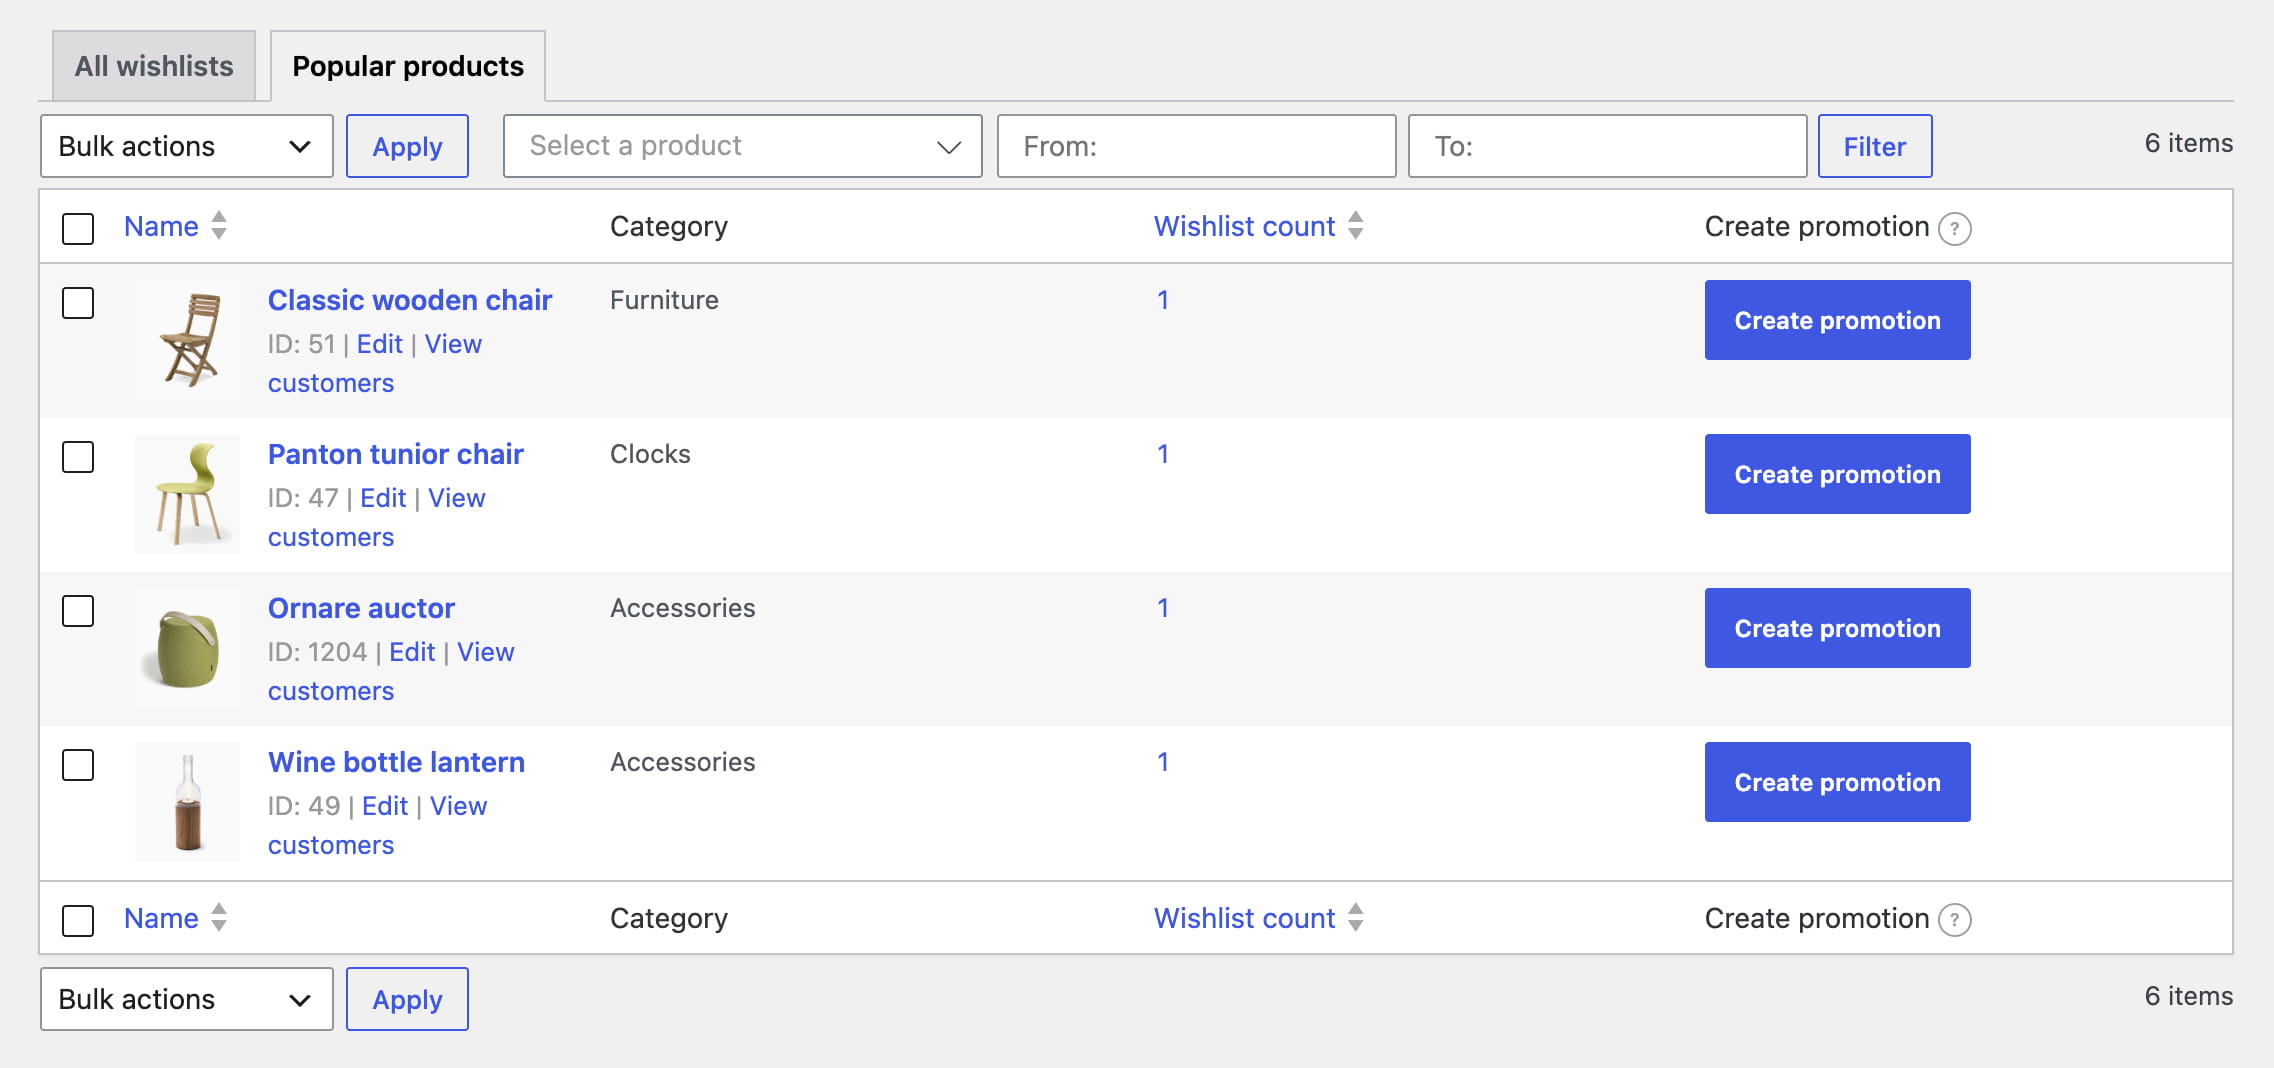
The Popular products tab shows which products customers add to their wishlists most frequently.
Don’t miss WoodMart updates
Receive feature updates, tutorials, and WoodMart news via email.
 Last updated: September 21, 2026