How to add slides to the slider
As soon as the slider has been created and configured, new slides can be created and assigned to the slider.
New slides are created in Dashboard -> Slides -> Add new. The new slide looks like a post with the option to create the content by means of the page builder used on the site.
There are the fields to specify the slide name, upload the featured image (used as the main image background of the slide), the option to assign the slide to a certain slider, set the order, and other additional slide settings.

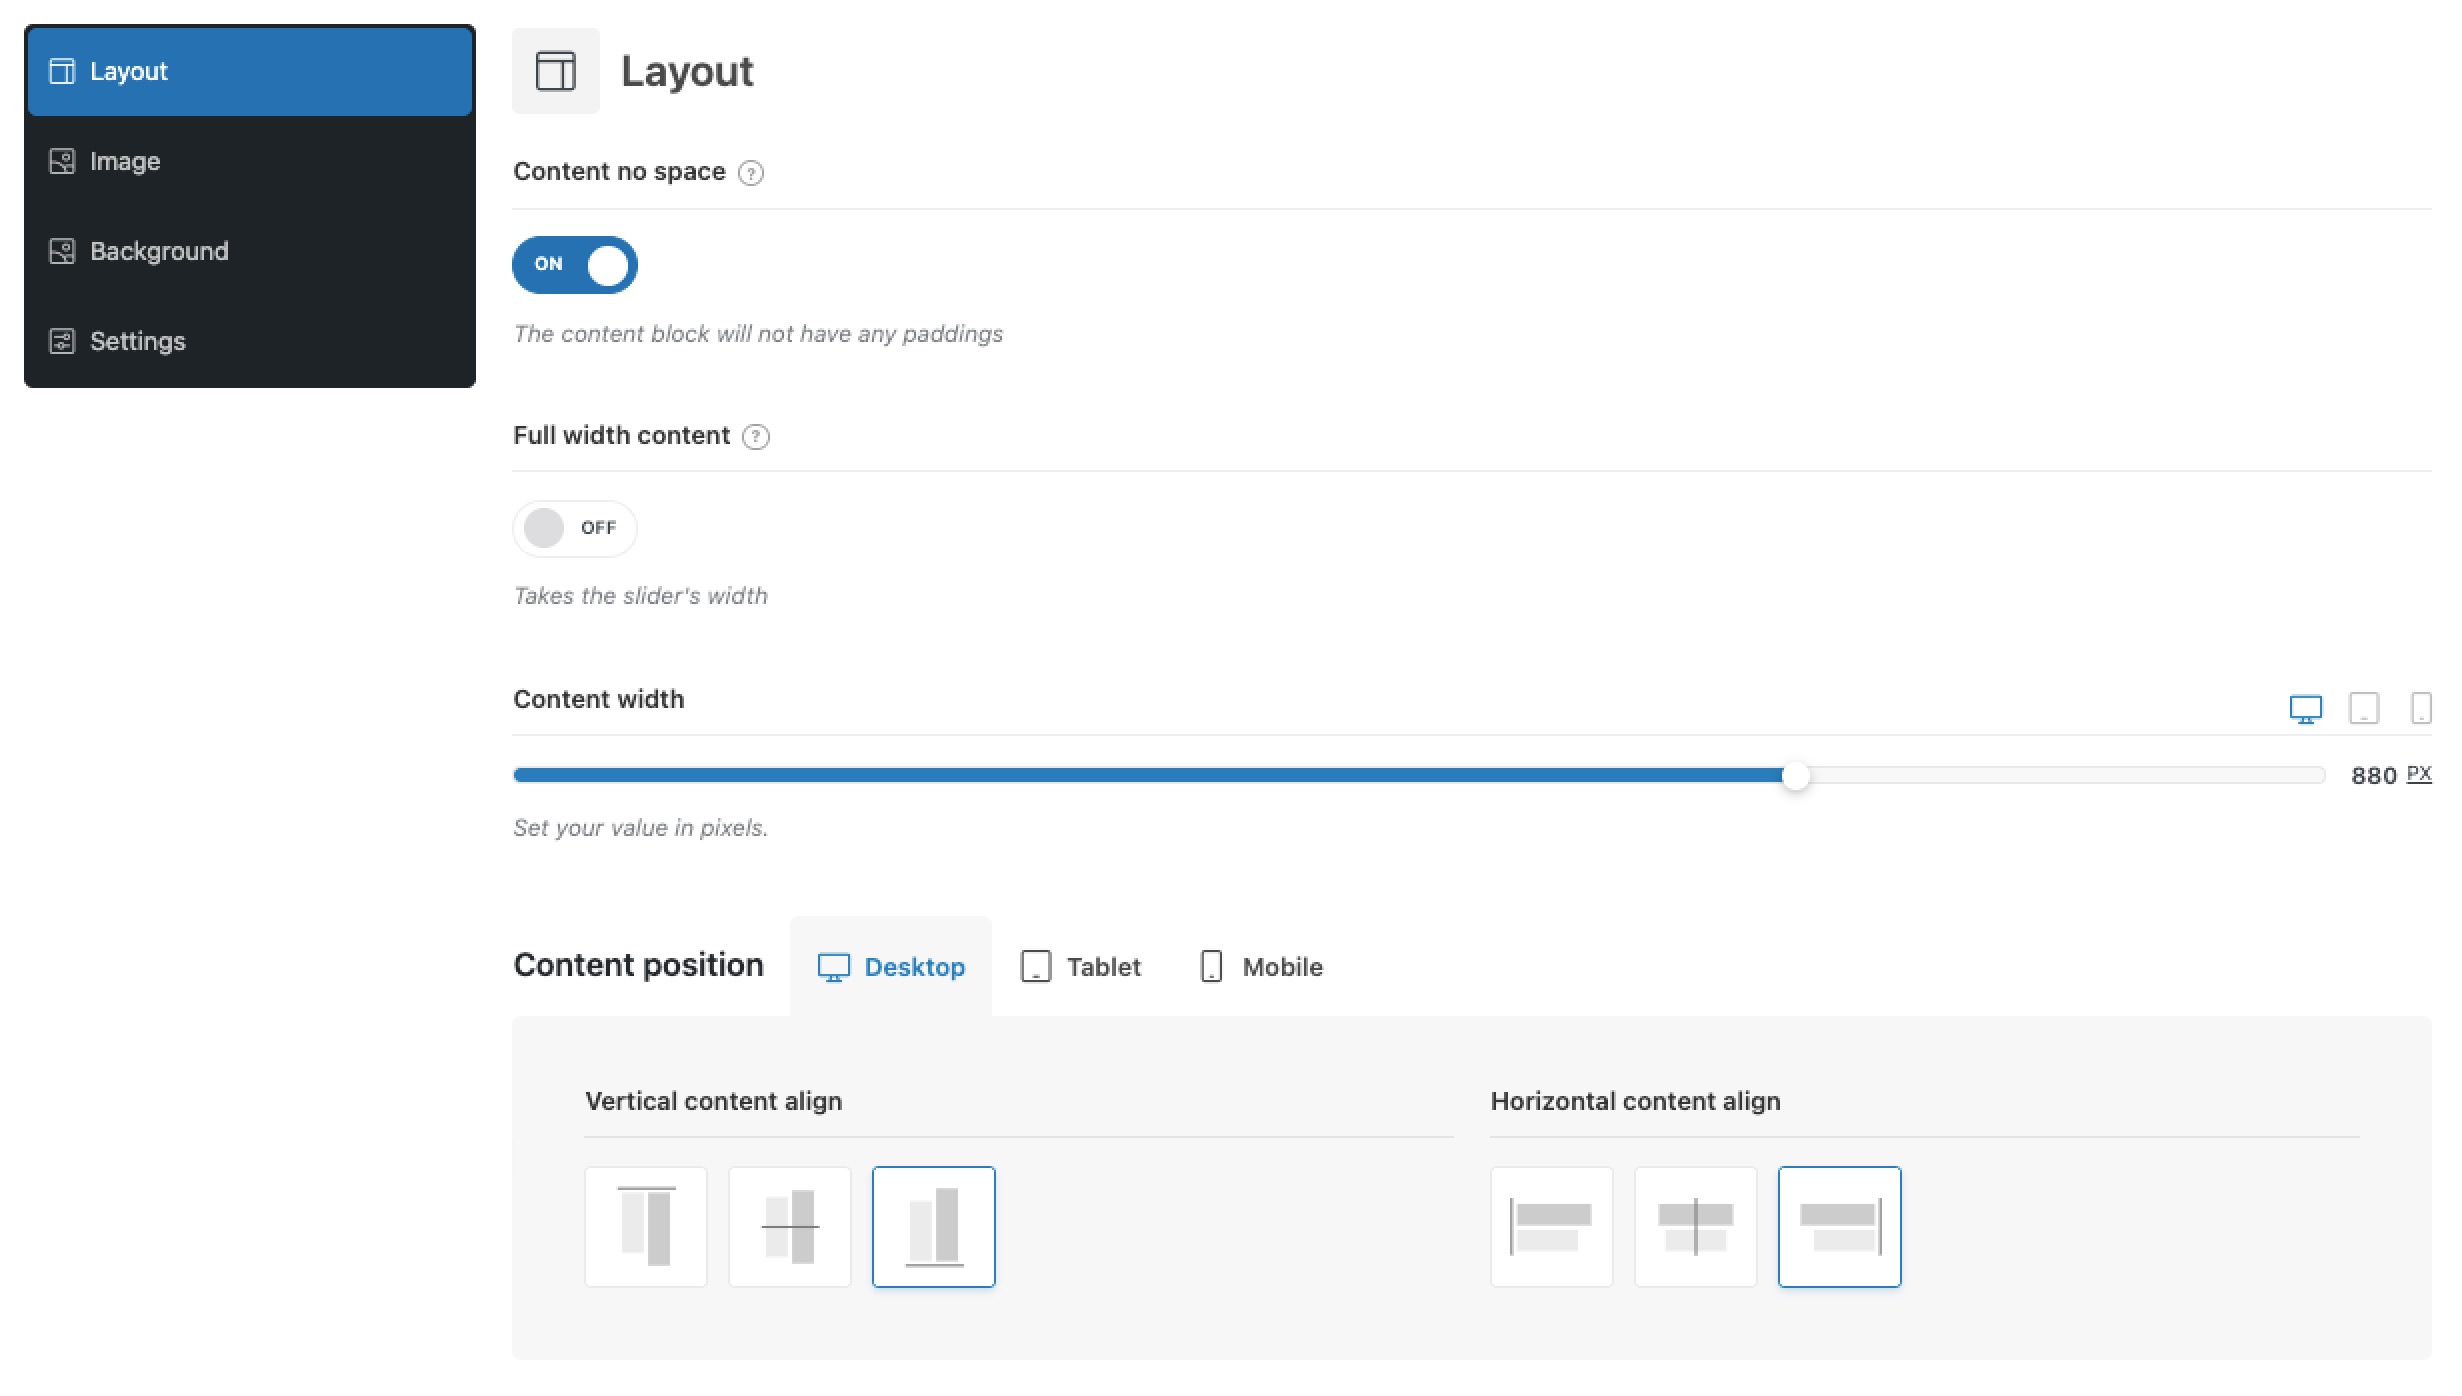
The Slider Settings include the following options:
- Full-width content – the content would take the slider’s width.
- Content no space – the content block will not have any padding.
- Animation – the option to select a content appearance animation.
- Image – allows setting the background image of the slide using IMG tag. Compared to a standard background image (via CSS) this approach allows the browser to prioritize the image for LCP (Largest Contentful Paint) and leverage the benefits of srcset, enabling it to select the most appropriate image size for the user’s device and screen resolution.
- Background image – allows setting the background image of the slide using CSS, including separate images for tablet and mobile devices. This option acts as a legacy option, for maximum performance and loading speed, we recommend using the Image option, which uses the “img” tag instead along with the performance advantages it offers.
- Background color – allows setting the background color of the slide.
- Vertical and Horizontal content align – the option to align the content vertically and horizontally.
Important! All the rows and sections of all the slides should be configured as “Default” in width, otherwise, the slider would not work correctly. In order to set a full-width slider, it is necessary to enable and configure “Stretch Slider” in the Slider settings Full-width content is configured by enabling the Full-width content provided in the settings under a slider main content
The slider tab contains all existing sliders on the site and allows assing the slide to any slider.

The page attributes box contains the order field that allows setting the order number of the slide.


 Last updated: October 14, 2025