Price tracker
Convert hesitant customers into buyers with the Price tracker feature. This powerful tool allows visitors to sign up for a notification when a product’s price changes. By automatically capturing leads from users who are waiting for a sale and re-engaging them with a direct email once the item’s price drops, you can help recover potentially lost sales and drive conversions.
In addition to standard notifications, the price tracker also adds the ability for users to set their desired price immediately in My Account area, where they can manage and edit the prices of the products they’ve subscribed to. For administrators, a statistics page is available where they can see the tracked products and the desired prices visitors are interested in. This valuable data, in turn, helps the store owner better plan his sales and marketing strategies.
How to enable the Price tracker
The Price Tracker option can be enabled under Theme Settings → Shop → Price Tracker. Additionally, in this section, you can configure other options such as enabling the privacy policy agreement checkbox, setting up the desired price submission form, or restricting the Price Tracker functionality to logged-in users, and more.
How to add a product to tracking
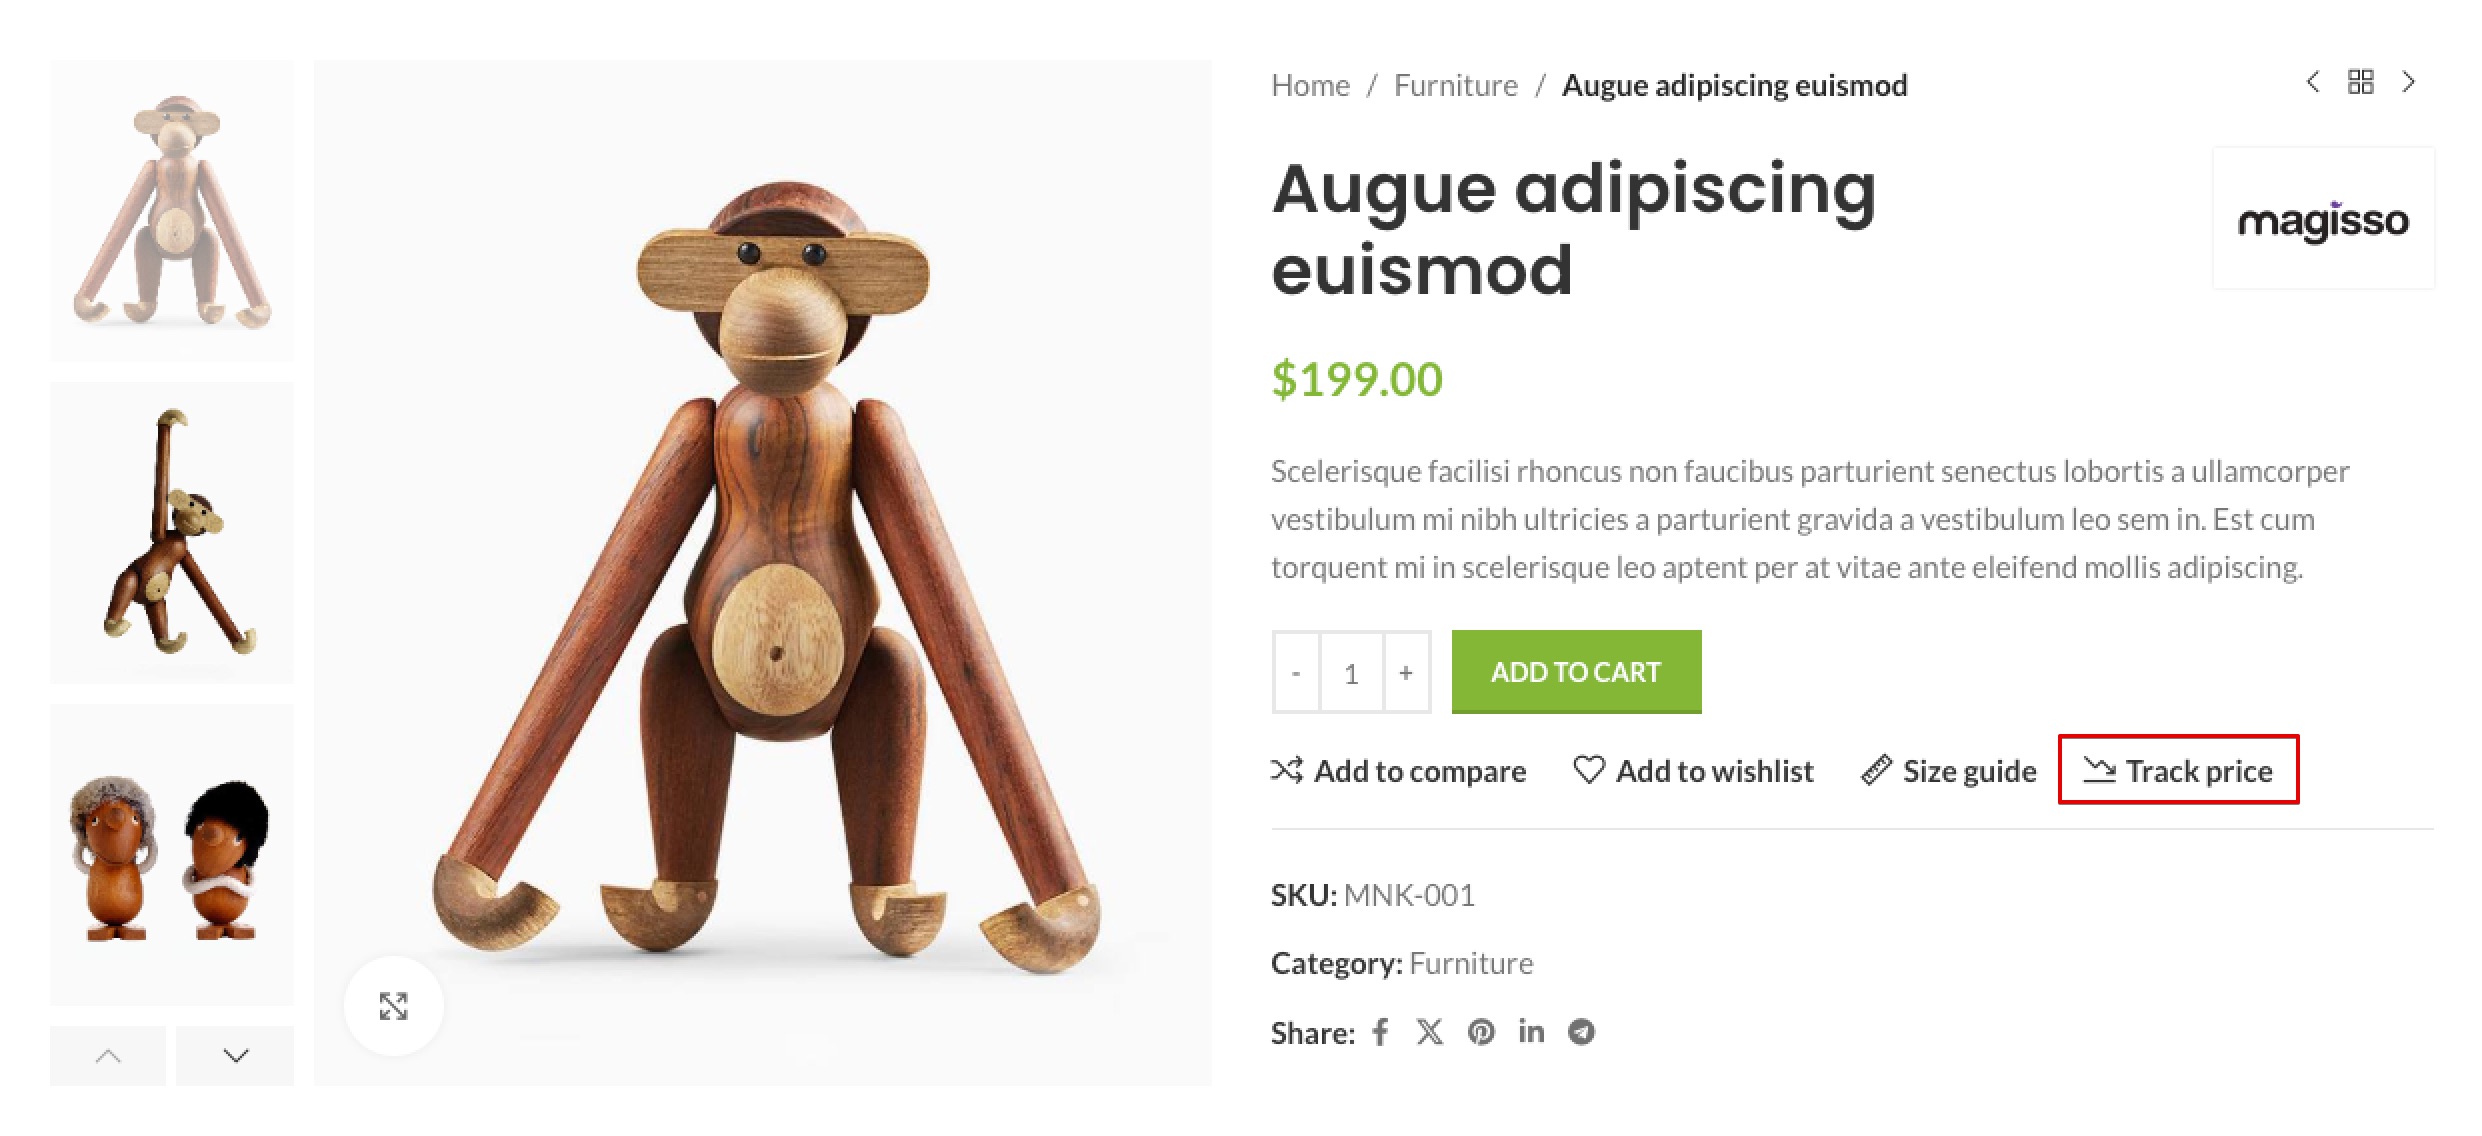
To add a product to price tracking, site visitors need to go to the product page and click the special “Track price” button, located next to other action buttons such as Add to wishlist or Add to compare. If you are using the Product Layout Builder to create the single product page, you will additionally need to add the special “Price Tracker Button” element to the page.
Depending on the enabled sub-options of the Price Tracker, when clicking the “Track price” button, a popup will appear where the user needs to enter their email, set the desired price, and agree to the site’s terms. If your Price Tracker is configured in such a way that, for example, the user’s email is automatically taken from their profile, and the desired price and terms agreement options are disabled, the popup will not appear, and the product will be automatically added to the price drop tracking list.
Every user who has added product prices to be tracked can view and manage them using a dedicated endpoint on the My Account page. Here, they can view and delete the price tracking subscription, as well as change the desired price for each individual product if the “Desired price” option is enabled. By deleting products from this list, the user also unsubscribes from email notifications, which is the equivalent of clicking “Stop tracking” on each individual product page.
Every user who has added product prices to be tracked can view and manage them using a dedicated endpoint on the My Account page. Here, they can view and delete the price tracking subscription, as well as change the desired price for each individual product if the “Desired price” option is enabled. By deleting products from this list, the user also unsubscribes from email notifications, which is the equivalent of clicking “Stop tracking” on each individual product page.
How to configure the email template
After enabling the Price tracker in the WooCommerce → Settings → Email section, two new email templates will appear that users can edit using standard WooCommerce tools.
- Price tracker alert – this email is sent to customers when the price drops on products they are watching.
- Price tracker alert confirmed – this email confirms that the customer has successfully subscribed to price drop alerts for this product.
How to view the statistics of all tracked products
For administrators, a statistics page is available where they can see the tracked products and the desired prices visitors are interested in. This valuable data, in turn, helps the store owner better plan his sales and marketing strategies. This page is located at WooCommerce → Products → Price Tracker. On this page, you can see which product prices people are tracking, who is tracking them, and what desired price they have set.
 Last updated: October 21, 2025